

-
Welcome to Tacoma World!
You are currently viewing as a guest! To get full-access, you need to register for a FREE account.
As a registered member, you’ll be able to:- Participate in all Tacoma discussion topics
- Communicate privately with other Tacoma owners from around the world
- Post your own photos in our Members Gallery
- Access all special features of the site
 C4 Fabrication Rear High Clearance Bumper
 Remove, repaint replace factory fender flare
 N-fab Epyx Steps?
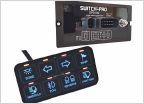 SP 9100 Needed for this build?
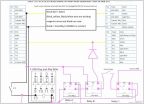 Custom Switch Wiring for Aftermarket Front & Rear Lockers
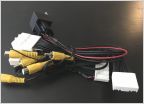 Anytimebackupcamera.com Install- Front and Rear Cameras
Yaesu FTM-400XDR Ham Radio Install
Discussion in '3rd Gen. Tacomas (2016-2023)' started by aceiswar, Oct 5, 2019.


