1. Welcome to Tacoma World!

    You are currently viewing as a guest! To get full-access, you need to register for a FREE account.

    As a registered member, you’ll be able to:
    • Participate in all Tacoma discussion topics
    • Communicate privately with other Tacoma owners from around the world
    • Post your own photos in our Members Gallery
    • Access all special features of the site
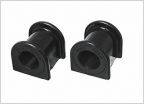
Wiring Switchpros and Power Tray - 2nd Gen Tacoma - Writeup with pictures!

Discussion in '2nd Gen. Tacomas (2005-2015)' started by ramonortiz55, May 4, 2020.

  1. May 4, 2020 at 2:25 PM
    #1
    ramonortiz55

    ramonortiz55 [OP] Not A Well-Known Member

    Joined:
    Nov 28, 2012
    Member:
    #92013
    Messages:
    35,200
    Gender:
    Male
    First Name:
    Ramon
    Texas
    Vehicle:
    2015 DCSB Offroad 4x4
    stock
    Time to install the switchpros and power tray!

    This writeup will be picture heavy, so multiple posts will probably need to be created.

    I purchased the following powertray kit and expedition essentials switch pro bracket:

    https://www.powertrays.com/collecti...-powertray-05-current-tacoma-trd-off-road-pro

    https://expeditionessentials.com/co...ts/switch-pros-mount-toyota-2nd-gen-2005-2015

    A good power station install is vital at the beginning of every build. Pretty much every mod done to a vehicle will include some sort of wiring. I decided to use a switchpro that I had in the garage for a few years and mount it to a powertray and expedition essentials bracket.

    That being said, let's start with the meat and potatoes of this install.

    First thing was to remove the overhead console.


    There is a screw in the rear sunglass holder that needs to be removed:


    Once it is removed, grab the console firmly from the front and tug firmly but carefully:


    The overhead console is held by these rear claws:


    and

    These front tabs:


    Unplug two wires:


    This "abandoned" plug is for a compass/temp mirror if you ever wondered what it's doing up there.


    Time for surgery:


    Here is our expedition essentials switch pro mount:


    The switchpro fits very snug in the mount, love it.


    Install switchpro supplied brackets and screws to secure it in place


    Once it is in place, I put it in the sunglass holder and played around with the fitment.


    Open/Close, make sure that it clears and does not rub any


    Now we need to make some templates for these screws:


    Use the supplied Expedition Essentials template paper:


    I traced each of these ears onto it and located the screw holes:


    Cut them out:


    I then fit them against the sides of the sunglass holder like this:


    You kinda notice when the template lines up with the actual bracket ears. I had to trim the template once or twice to get it right.


    Time for some pilot holes:


    Perfect!


    Thread in screws:


    Now time to notch out the back end of the console to allow the pigtail connection:


    As always, safety first:


    Notched!


    Now move on to the actual Power Tray build!


    Building the Power Tray is pretty much straighforward, plenty of pictures for reference:


    Attach the ground link between the Blue Sea Fuse Box and Bus Bar


    Connect the Switchpros wiring and start building the connections!


    For this switchpros model, I only need to build the red wiring for now. I zip tied the loom, blue wire, yellow, and black wire just to get them out of the way.


    Powertrays will provide the needed connectors!


    Pay attention to the wiring notation in the instruction booklet and the back of the plug, this will ensure that you know what goes to what accessory in the future:


    Notice 8,16 for switch 8 output? - Those will be crimped together at ONE connector.


    These will not be needed, Power Trays has provided the required cables:


    I trimmed down the red wires to about 13", this allows plenty of slack for future trims and modifications.


    Adding connectors:


    Don't tell the wife we are using her blow dryer for shrink wrap:


    I am using this soldering iron to melt the connectors and provide a waterproof seal. I am not using the tip, just the side of the ... shaft. The thicker portion of the....shaft:


    Sex:


    Time to mount the powertray:


    It BARELY Clears the hood strut:


    See these breathers? - Remove the bracket that holds them:


    The existing hole will be used to mount the Power Tray leg as shown:


    Installing that tray is a pain in the nalga, but man does it look GREAT!


    Now to run the wiring!

    Remove the bottom and side kick panels:


    The side panel is held by these


    Prepare the wiring:


    See that grommet? - Run the wiring thru there:


    I used a hangar to run it thru the grommet, it was a PAIN:


    You can barely see where it comes thru the grommet, sorry for the weird orientation:


    Ran the loom behind all the electrical boxes in the left kick panel area:


    Thru this void in the fuse panel area:


    At this point I removed the grab handle:


    Pulled the loom thru this hole:


    Traced it along an existing loom, I later zip tied both together (pictures not shown)


    Ran up the headliner:


    Fished thru the overhead console opening:


    Connected the switch pro and other harnesses, installed overhead console!


    Checked for cleareances:


    Reinstalled grab handle:


    Now to finalize wiring the switchpro:

    Black wire went to ground:


    Power Tray grounded to fender:


    I then fished the blue/yellow wires into the fuse box:


    The main issue with the blue and yellow wire is WHERE to tap them. I used @Coop68 recommendations here:

    https://www.tacomaworld.com/threads...mation-discussion.439310/page-3#post-13459606

    https://www.tacomaworld.com/threads...ation-discussion.439310/page-18#post-23205487

    Pulling this fuse for the blue wire, 10AMP EFI:


    and this fuse for the yellow wire, 10AMP "H-LP RH-LO":


    Then tapped to those locations with an add a fuse:


    Again, using @Coop68 pictures shown in the above two links to aid in what I did.

    Then I connected the buss bar to the battery terminal and connected the switchpros/blue sea fuse box:


    We have power! - @Coop68 did mention that the lighting on the powertray will brighten during high beams, I am okay with that. Since the switchpro will remain hidden most of the time anyways. Here are pictures:


    Final pictures:


    JB92109, Hawapino, 4x4cajun and 7 others like this.
  2. May 4, 2020 at 2:29 PM
    #2
    Biscuits

    Biscuits Thorny Crown of Entropy

    Joined:
    Aug 8, 2010
    Member:
    #41397
    Messages:
    15,576
    Gender:
    Male
    Swiggity swangin' biggity bangin'
    Another outstanding "how-to" post, Ramon.

    This and your Big 3 post should be stickied.

    @tcBob, what do you think?
     
    tcBob likes this.
  3. May 4, 2020 at 2:35 PM
    #3
    ramonortiz55

    ramonortiz55 [OP] Not A Well-Known Member

    Joined:
    Nov 28, 2012
    Member:
    #92013
    Messages:
    35,200
    Gender:
    Male
    First Name:
    Ramon
    Texas
    Vehicle:
    2015 DCSB Offroad 4x4
    stock
    Special thanks to @Mr.PowerTrays and @Jeff@ExE for answering all my questions in regards to the installation
     
    Biscuits likes this.
  4. May 4, 2020 at 2:48 PM
    #4
    ramonortiz55

    ramonortiz55 [OP] Not A Well-Known Member

    Joined:
    Nov 28, 2012
    Member:
    #92013
    Messages:
    35,200
    Gender:
    Male
    First Name:
    Ramon
    Texas
    Vehicle:
    2015 DCSB Offroad 4x4
    stock
    It's not a hard job to do, just very very tedious.
     
    Biscuits likes this.
  5. May 7, 2020 at 11:55 AM
    #5
    Jeff@ExE

    Jeff@ExE Well-Known Member

    Joined:
    Mar 15, 2018
    Member:
    #247358
    Messages:
    204
    Gender:
    Male
    First Name:
    Jeff
    Vehicle:
    2016 Toyota Tacoma
    A Lot
    I see you were one of the lucky ones with the ears to the inside
     
    ramonortiz55[OP] likes this.
  6. May 7, 2020 at 12:03 PM
    #6
    ramonortiz55

    ramonortiz55 [OP] Not A Well-Known Member

    Joined:
    Nov 28, 2012
    Member:
    #92013
    Messages:
    35,200
    Gender:
    Male
    First Name:
    Ramon
    Texas
    Vehicle:
    2015 DCSB Offroad 4x4
    stock
    yup!
     
  7. Dec 18, 2020 at 1:38 PM
    #7
    WillzTaco

    WillzTaco Well-Known Member

    Joined:
    Feb 24, 2011
    Member:
    #51754
    Messages:
    159
    Gender:
    Male
    North Carolina
    Vehicle:
    05 TRD Off Road Silver
    Great write up! I was wondering how you got the hood struts to clear? I have wrestled with mine and can't get them to behave.
     
  8. Dec 18, 2020 at 1:55 PM
    #8
    ramonortiz55

    ramonortiz55 [OP] Not A Well-Known Member

    Joined:
    Nov 28, 2012
    Member:
    #92013
    Messages:
    35,200
    Gender:
    Male
    First Name:
    Ramon
    Texas
    Vehicle:
    2015 DCSB Offroad 4x4
    stock
    i clears by the hair of a frog's ass
     
  9. Dec 18, 2020 at 2:01 PM
    #9
    WillzTaco

    WillzTaco Well-Known Member

    Joined:
    Feb 24, 2011
    Member:
    #51754
    Messages:
    159
    Gender:
    Male
    North Carolina
    Vehicle:
    05 TRD Off Road Silver
    I guess you just got lucky then because mine hits right when it clicks into the release latch. I'd say I need to find about 1/2 - 1 inch of clearance somehow. Time to go fabricate something
     
  10. Dec 18, 2020 at 2:19 PM
    #10
    ramonortiz55

    ramonortiz55 [OP] Not A Well-Known Member

    Joined:
    Nov 28, 2012
    Member:
    #92013
    Messages:
    35,200
    Gender:
    Male
    First Name:
    Ramon
    Texas
    Vehicle:
    2015 DCSB Offroad 4x4
    stock
    holy smokes thats a lot!
     
  11. Jan 2, 2021 at 10:19 PM
    #11
    tbird95

    tbird95 Well-Known Member

    Joined:
    Mar 7, 2013
    Member:
    #99215
    Messages:
    447
    Gender:
    Male
    British Columbia, Canada
    Vehicle:
    TRD sport SR5 V6 DC, LB, 4x4, Tow package
    4runner heated, signal, courtesy light side mirrors, rearview mirror w/compass, temp & backup cam w/ pop luck PL 5400, Interior lights/gauges, BHLM, grillcraft MX black. Third brake light LED swap, rear tail lights LED swap from 2011. 3" Toytec (Boss) Coil overs, rear TSB AAL Bilsteins, Light Racing UCA. TRD grill badge, VIPER Smart Start.
    Just wondering how watertight this would be and/or how it could possibly be improved? Splash etc going to be a problem wheeling?
     
  12. Jan 3, 2021 at 12:01 AM
    #12
    Shadowhunter

    Shadowhunter Well-Known Member

    Joined:
    Mar 24, 2017
    Member:
    #214241
    Messages:
    4,222
    Gender:
    Male
    First Name:
    Nate
    Birdsview Washington
    Vehicle:
    13’ DCSB MT Sport
    Front and Rear Locked, 35’s, Chevy 63” swap, Fox Suspension and a bunch of other shit too long to list.
    It’s not a problem as long as the Switch Pros module is mounted vertical. People had problems when they mounted it horizontally and the water got trapped.
     
  13. Feb 11, 2021 at 4:59 AM
    #13
    Greg-tacoma

    Greg-tacoma Well-Known Member

    Joined:
    Dec 19, 2020
    Member:
    #350088
    Messages:
    1,039
    Gender:
    Male
    First Name:
    Greg
    Vehicle:
    2016 Black 4cyl 4wd
    Bed cover, soon bug deflector, halo interior lights and backup
    GREAT write up with pictures!!

    question. I don’t have a compass but would like one. Will those connections be there and I just swap out the mirror?
     
  14. Feb 11, 2021 at 6:01 AM
    #14
    ramonortiz55

    ramonortiz55 [OP] Not A Well-Known Member

    Joined:
    Nov 28, 2012
    Member:
    #92013
    Messages:
    35,200
    Gender:
    Male
    First Name:
    Ramon
    Texas
    Vehicle:
    2015 DCSB Offroad 4x4
    stock
    most of them have those connections and i believe those are for the compass, but not for the temperature sensor.
     
    Greg-tacoma[QUOTED] likes this.
  15. May 13, 2021 at 1:06 PM
    #15
    Flying_Taco

    Flying_Taco "In there"

    Joined:
    Oct 11, 2015
    Member:
    #166359
    Messages:
    142
    Gender:
    Male
    First Name:
    James
    Tacoma, WA
    Vehicle:
    2014 TRD OR
    Thank you for the great write up!

    For my own clarification, are you using the Switch pro for accessories you want to control with their switch panel and the Blue Seas for additional accessories?

    Im going to tackle this soon but I’m exploring the option of using an Spod and Blue Seas setup.
     
  16. May 13, 2021 at 1:17 PM
    #16
    caribe makaira

    caribe makaira Well-Known Member

    Joined:
    Feb 13, 2011
    Member:
    #51121
    Messages:
    11,713
    Gender:
    Male
    Caribbean, Puerto Rico
    Vehicle:
    05 PreRunner TRD Offroad AutoTrans
    Hood Struts, My version Fogs always ON, Map & Overhead Light Mod,
    OP ignored, like many, to follow advise from the Manufacturer
    upload_2021-5-13_16-18-31.jpg
     
  17. May 13, 2021 at 2:03 PM
    #17
    Flying_Taco

    Flying_Taco "In there"

    Joined:
    Oct 11, 2015
    Member:
    #166359
    Messages:
    142
    Gender:
    Male
    First Name:
    James
    Tacoma, WA
    Vehicle:
    2014 TRD OR
    Did you get that from the Switch Pros instructions? Makes sense from a CYA and practical stand point. That’s part of the reason I like the Spod solution instead.
     
  18. May 13, 2021 at 2:32 PM
    #18
    ramonortiz55

    ramonortiz55 [OP] Not A Well-Known Member

    Joined:
    Nov 28, 2012
    Member:
    #92013
    Messages:
    35,200
    Gender:
    Male
    First Name:
    Ramon
    Texas
    Vehicle:
    2015 DCSB Offroad 4x4
    stock
    May I ask what I ignored? Because reading thru that screenshot, I followed all those instructions.
     
  19. May 13, 2021 at 2:36 PM
    #19
    ramonortiz55

    ramonortiz55 [OP] Not A Well-Known Member

    Joined:
    Nov 28, 2012
    Member:
    #92013
    Messages:
    35,200
    Gender:
    Male
    First Name:
    Ramon
    Texas
    Vehicle:
    2015 DCSB Offroad 4x4
    stock
    thats correct! make sure theyre are separate power and ground feeds

    @caribe makaira like many, failed to either ask for clarification or didnt pay attention to pictures and writeup.
     
    Flying_Taco[QUOTED] likes this.
  20. May 13, 2021 at 2:39 PM
    #20
    caribe makaira

    caribe makaira Well-Known Member

    Joined:
    Feb 13, 2011
    Member:
    #51121
    Messages:
    11,713
    Gender:
    Male
    Caribbean, Puerto Rico
    Vehicle:
    05 PreRunner TRD Offroad AutoTrans
    Hood Struts, My version Fogs always ON, Map & Overhead Light Mod,
    Yes, first page & paragraph of the instructions.
     

Products Discussed in

To Top