

-
Welcome to Tacoma World!
You are currently viewing as a guest! To get full-access, you need to register for a FREE account.
As a registered member, you’ll be able to:- Participate in all Tacoma discussion topics
- Communicate privately with other Tacoma owners from around the world
- Post your own photos in our Members Gallery
- Access all special features of the site
 '15 Camping Taco Advice
 TPMS assistance needed (Pic included)
 Locked keys in truck
 Need help with a front axle seal part #
 Detailed LED bed light install GUIDE. No Holes No wire cutting
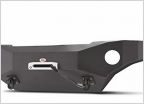 OFF ROAD FRONT BUMPER
V6 Antifreeze/Coolant Change How-To
Discussion in '2nd Gen. Tacomas (2005-2015)' started by Foghorn, Mar 15, 2020.
Page 1 of 4
Page 1 of 4

