

-
Welcome to Tacoma World!
You are currently viewing as a guest! To get full-access, you need to register for a FREE account.
As a registered member, you’ll be able to:- Participate in all Tacoma discussion topics
- Communicate privately with other Tacoma owners from around the world
- Post your own photos in our Members Gallery
- Access all special features of the site
 My most satisfying mod to date
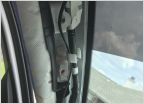 A Pillar?
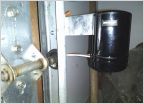 HOWTO: keep garage door from coming down on taco
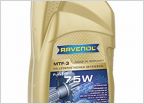 Transfer case fluid question
 TRD Skid Plate
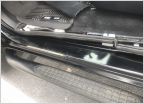
 Step bars
Unique custom aux fuse panel
Discussion in '3rd Gen. Tacomas (2016-2023)' started by i8boots, Nov 22, 2022.
Products Discussed in


