1. Welcome to Tacoma World!

    You are currently viewing as a guest! To get full-access, you need to register for a FREE account.

    As a registered member, you’ll be able to:
    • Participate in all Tacoma discussion topics
    • Communicate privately with other Tacoma owners from around the world
    • Post your own photos in our Members Gallery
    • Access all special features of the site

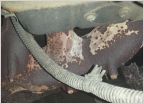
Transmission extension housing seal. Kind of a PITA.

Discussion in '1st Gen. Tacomas (1995-2004)' started by AKADriver, Mar 30, 2014.

  1. Mar 30, 2014 at 9:54 AM
    #1
    AKADriver

    AKADriver [OP] Active Member

    Joined:
    Feb 21, 2014
    Member:
    #123663
    Messages:
    29
    Gender:
    Male
    NoVA
    Vehicle:
    03 base 2WD
    I followed this guide but ran into some problems:

    http://www.tacomaworld.com/forum/2nd-gen-tacomas/270255-diy-how-replace-output-shaft-seal.html

    The write up was in the 2nd gen forum, but the pieces are basically the same.

    However, this is what I ran into.

    First, the A43D (2wd 4cyl) transmission has a dust cap and felt dust ring in front of the seal itself. This in itself is a huge pain to remove and install. Unlike the seal it's made of soft steel and bends if you look at it funny, both removing and installing it.

    Second, in my truck the handbrake lever and cable assembly was right there in the way of getting good leverage on the pick-type seal puller, or being able to drive the new seal straight in. If I do this job again - and I might need to because there's a good chance I messed up the new seal getting it in - I'm getting a jaw-type puller.

    My old seal was definitely damaged, the part that contacts the driveshaft itself to form the ATF seal had broken off and was just sitting in there like an O-ring.
     
  2. Nov 2, 2021 at 7:42 PM
    #2
    Oldmantaco2

    Oldmantaco2 Active Member

    Joined:
    Sep 15, 2021
    Member:
    #377162
    Messages:
    31
    Gender:
    Male
    Vehicle:
    2013 Taco 4 banger no tow pkg
    2nd battery added(yellow top), big 3 upgrade completed w/ofhc 0awg, 1000 watt pure sine wave inverter added, medical oxygen system added, led marker lights. 60% rear seat deleted. Upgraded both battery terminals. Yellow top primary battery. 200Amp Alternator upgrade.
    Did you remove entire extension housing or just the driveshaft seals?
     
  3. Nov 2, 2021 at 11:06 PM
    #3
    Sicyota04

    Sicyota04 Slowly but surely.

    Joined:
    Jan 9, 2015
    Member:
    #145940
    Messages:
    3,551
    Gender:
    Male
    First Name:
    Morgan
    California
    Vehicle:
    04 DC 4x4
    I don’t think you’re going to get an answer from him. It says the last time he was on here was Oct. 23rd 2014
     
    Bivouac likes this.
  4. Nov 3, 2021 at 5:32 AM
    #4
    Oldmantaco2

    Oldmantaco2 Active Member

    Joined:
    Sep 15, 2021
    Member:
    #377162
    Messages:
    31
    Gender:
    Male
    Vehicle:
    2013 Taco 4 banger no tow pkg
    2nd battery added(yellow top), big 3 upgrade completed w/ofhc 0awg, 1000 watt pure sine wave inverter added, medical oxygen system added, led marker lights. 60% rear seat deleted. Upgraded both battery terminals. Yellow top primary battery. 200Amp Alternator upgrade.
    I’m hoping that someone can help me out with an answer. I have a leak, and am trying to figure out what I gotta do to resolve it.
     
  5. Nov 3, 2021 at 5:43 AM
    #5
    gearcruncher

    gearcruncher Well-Known Member

    Joined:
    Nov 1, 2012
    Member:
    #90305
    Messages:
    7,173
    Gender:
    Male
    First Name:
    Canadain bumper technician
    Great white North 51.0333° N, 93.8333° W
    Vehicle:
    2010.TRD.SportDCLB4x4Limited leather package
    TRD Sport Rally -5 speed automatic Limited ,Factory heated leather seats ,chrome package,Super white with front windows tinted to 35 % Dick Cepek DC-2 wheels Summer tires - Good year silent armor P265/65R17 Winter tires - Good year P265/65R17 Ultra Ice studded Illuminated 4x4 switch TRD 3rd brake light cover ($20) TRD seat belt shoulder protectors (5). ($50) TRD ...B pillar emblems ($20) TRD rear slider sticker with devil horns ( $6) TRD summer floor matts ($60) TRD steering wheel emblem ($20) TRD floor pedals .($95) TRD shorty antenna ($14) TRD front Windshield emblems ($17) TRD head pillows .($60) TRD head rest protectors TRD door scuff protection $20 TRD floor matt emblems ($40) TRD tow plug emblem . ($40) TRD cigarette lighter with LED.($35) TRD tissue dispenser ($12) TRD front bezel emblems ($9) TRD door emblems ($6) TRD lanyards($9) TRD lisence plates with TRD bolts($50) TRD fender emblems TRD center caps Part Number:PT904-35070-CC ($80) TRD cd
  6. Apr 30, 2022 at 3:34 PM
    #6
    Myk-07XR

    Myk-07XR Member

    Joined:
    Mar 14, 2021
    Member:
    #359347
    Messages:
    14
    Gender:
    Male
    First Name:
    Michael
    Vehicle:
    O7 X-Runner
    It is actually one of the most simplest prepared jobs that you can do Under your vehicle. This is all you have to do and there's only about 4 or 5 steps remove the 214 mm bolts holding the support carriage for the drive shaft make sure to hold the drive shaft up so it doesn't fall on you when you take the bolts out. Then fold the U joint on the drive shaft down and slide the drive shaft out of the transmission. And there you have it the seal is right there behind the drive shaft around the entrance to the extended extended housing on the transmission. Use a seal puller to pull the old seal out if it's stuck in there and take your new seal and place it on the opening and use APVC pipe fitting that's the same size as the lip on the inside of the new seal and gently tap it in with a rubber mallet and risk and reassemble the drive shaft And you're done!
     

Products Discussed in

To Top