

-
Welcome to Tacoma World!
You are currently viewing as a guest! To get full-access, you need to register for a FREE account.
As a registered member, you’ll be able to:- Participate in all Tacoma discussion topics
- Communicate privately with other Tacoma owners from around the world
- Post your own photos in our Members Gallery
- Access all special features of the site
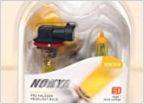 Fog lite bulb replacement
 Installed Extang Trifecta + Bed Mat + AMP Rectangular Bed Extender
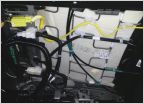 Disable 2019 (3rd Gen) Tacoma Seat Belt Chime
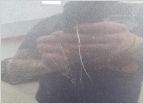 Paint scratch repair advice
 LED Light Bar Opinions
 Entune 3.0 map updates
Timbren Industries Bump Stop Install **PIC HEAVY**
Discussion in '3rd Gen. Tacomas (2016-2023)' started by Danactive, Aug 27, 2016.
Page 1 of 2
Page 1 of 2


