1. Welcome to Tacoma World!

    You are currently viewing as a guest! To get full-access, you need to register for a FREE account.

    As a registered member, you’ll be able to:
    • Participate in all Tacoma discussion topics
    • Communicate privately with other Tacoma owners from around the world
    • Post your own photos in our Members Gallery
    • Access all special features of the site

The Chronicles

Discussion in '3rd Gen. Builds (2016-2023)' started by nuSchule, Jun 1, 2020.

  1. Jun 1, 2020 at 6:14 PM
    #1
    nuSchule

    nuSchule [OP] Well-Known Member

    Joined:
    May 18, 2020
    Member:
    #328432
    Messages:
    50
    Gender:
    Male
    NC
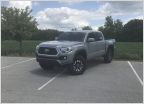
    Not so much a "build" as much as it is a thread to chronicle one enthusiast's first truck, side projects, his dogs, good whiskey and life in general...

    Since this is Tacoma World let's start with the catalyst:

    2019 TRD OR
    Cement
    Tech Package
    RB520: Predator Step Bar
    XF210: Paint Protection
    MC100: Carpet Mats
    TL100: Tailgate Power Lock
    JB300: Black Overlays and Tailgate Insert Package
    CS200: Phone Cable & Charger Package

    I'd been hunting for either a Pro or TRD OR in Cement for almost six months. Every few weeks, one would pop up on the usual outlets, then disappear just as quickly. I even drove to several dealerships only to get there to find *gasps* the truck sold earlier that day. This one popped up in Charlotte, NC late on 5.22.2020. On 5.23.2020 I locked in an appointment for the following day and on 5.24.2020, I was driving her home.

    After having just signed the dotted line:

    IMG_5913.jpg

    Given the previous owner took delivery in late 2018, I was pretty surprised to only see 3,900 miles on the ODO. Even with such low mileage, there was some evidence of neglect... pretty sure it hadn't seen a basic detail in...well, ever. Not necessarily neglect, but the previous own had also installed what appears to be a track system or a USB accessory power strip above the radio bezel, as well as some sort of mounting system on the center console, passenger side.

    Holes above radio bezel:
    GOPR0782.jpg

    And center console:
    GOPR0783.jpg


    I also dropped the Predator Step Bars because the original owner nerfed the hell outta the passenger rear step:
    GOPR0805.jpg

    Money shot:
    GOPR0806.jpg

    ...and how she currently sits:
    GOPR0773.jpg

    Engine bay is a cluster, so going to get some before/after shots of a quick engine bay detail. I also have some OEM parts on order that should be here tomorrow and which will be installed over the coming week or so.

    My current goal is to just enjoy the truck as it sits and make some OEM+ upgrades to make the best of what is already proving to be an extremely fun, capable truck.

    ...we'll see how long that lasts.
     
  2. Jun 1, 2020 at 6:38 PM
    #2
    doublethebass

    doublethebass aspiring well-known member

    Joined:
    Jan 1, 2017
    Member:
    #206252
    Messages:
    3,429
    Gender:
    Male
    First Name:
    Antoin
    Minneapolis MN
    Vehicle:
    ’17 6MT Pro
    nuSchule[OP] likes this.
  3. Jun 2, 2020 at 3:36 AM
    #3
    nuSchule

    nuSchule [OP] Well-Known Member

    Joined:
    May 18, 2020
    Member:
    #328432
    Messages:
    50
    Gender:
    Male
    NC
    doublethebass[QUOTED] likes this.
  4. Jun 2, 2020 at 10:52 AM
    #4
    nuSchule

    nuSchule [OP] Well-Known Member

    Joined:
    May 18, 2020
    Member:
    #328432
    Messages:
    50
    Gender:
    Male
    NC
    Finally got a chance to get intimate with the Tacoma's engine bits. Given the low mileage I wasn't expecting too much effort but there was quite a bit of dust, pollen and the remains of what appeared to be a nest of some sort under the MC. Also took a few mins to remove the engine cover, bracket and associated bolts.


    Some before pics:

    GOPR0787 (1).jpg

    GOPR0788 (1).jpg

    GOPR0789.jpg


    Hard to make out, but the leaves, moss, and sticks went all the way down to the backside of the fender well.

    GOPR0790.jpg


    Blurry foreground, but these are two of the bolts I removed and will likely replace with standard versions similar to those that hold the bracket... just to fill the gaps.

    GOPR0809.jpg

    GOPR0791.jpg

    GOPR0792.jpg

    GOPR0801.jpg


    Some diluted Simple Green, foam cannon loaded with CGs and assorted brushes took care of the base clean. Some Meguiars Natty Shine pulled everything back to showroom fresh:

    GOPR0815.jpg

    GOPR0816.jpg

    GOPR0817.jpg

    GOPR0818.jpg


    NO MORE NEST

    GOPR0819.jpg

    GOPR0820.jpg

    GOPR0821.jpg

    GOPR0823 (1).jpg


    Engine cover bolts removed... again, will be reinstalling standard bolts to fill the gaps these left.

    GOPR0825.jpg


    Engine cover bracket removed. Same as above, will be looking to pick up another one of these bolts to fill the gap.

    GOPR0826.jpg


    ...and...

    Teaser of today's UPS delivery:

    IMG_5950.jpg
     

    Attached Files:

    doublethebass likes this.
  5. Jun 2, 2020 at 10:57 AM
    #5
    Bama_Taco4x4

    Bama_Taco4x4 Well-Known Member

    Joined:
    Jan 6, 2020
    Member:
    #315349
    Messages:
    117
    Gender:
    Male
    Vehicle:
    White Sporty Turd
    Anything to reduce fuel economy
    Looking good... i wish my engine bay was half as clean as the before pictures :rofl:
     
    nuSchule[OP] likes this.
  6. Jun 6, 2020 at 1:12 PM
    #6
    nuSchule

    nuSchule [OP] Well-Known Member

    Joined:
    May 18, 2020
    Member:
    #328432
    Messages:
    50
    Gender:
    Male
    NC
    Ha! Yeah, when it comes to engine bays, I'm a bit OCD...
     
  7. Jun 6, 2020 at 1:45 PM
    #7
    nuSchule

    nuSchule [OP] Well-Known Member

    Joined:
    May 18, 2020
    Member:
    #328432
    Messages:
    50
    Gender:
    Male
    NC
    Tackled a few more small projects this weekend.

    First, the obligatory TRD shiny parts under the hood:

    IMG_5952.jpg

    IMG_5954 (1).jpg

    IMG_5955.jpg

    IMG_5956.jpg

    IMG_5963.jpg

    IMG_5964.jpg

    IMG_5965.jpg

    IMG_5966.jpg


    Second, a little intake work. I like the OEM fit/finish of the TRD intake, but not the red flex hose, coupler and airbox accents. Figured I could get 80% of the performance at 20% of the cost and keep it stock-looking under the hood. Enter the TRD panel filter and air accelerator:

    IMG_5973.jpg

    IMG_5967.jpg


    Before installing, I wanted a close look at the stock components to see if there are any other areas to improve upon the original design. Other than being a bit dusty, the bottom section of the stock airbox isn't bad:

    IMG_5968 (1).jpg


    Definitely not expecting a difference with removing the carbon filter, but... synergy:

    IMG_5969.jpg

    IMG_5970.jpg


    Once again, decent overall design. Before starting I wondered if there was a way to apply the same air accelerator concept in the lid itself but... Toyota engineers are all over it. Air guide is a bit clunky, but going to leave as-is for now:

    IMG_5971.jpg


    After comparing the TRD panel to the outgoing paper element, I started putting everything back together (after cleaning all the components, of course):

    IMG_5974.jpg

    IMG_5975.jpg

    IMG_5976.jpg

    IMG_5978.jpg

    IMG_5979.jpg

    IMG_5981.jpg

    IMG_5982.jpg


    Sláinte!

    IMG_5983.jpg
     
  8. Jun 7, 2020 at 12:19 PM
    #8
    nuSchule

    nuSchule [OP] Well-Known Member

    Joined:
    May 18, 2020
    Member:
    #328432
    Messages:
    50
    Gender:
    Male
    NC
    Wheels are on!


    Before:
    IMG_6001.jpg


    After:

    IMG_6004.jpg


    I was curious to understand the weight difference between the stock TRD OR wheel an the Pro. Stock wheels came in at 25.4lbs, Pro at 27.2lbs so up about +1.8lbs per corner. Not ideal, but this swap was solely for aesthetics.

    IMG_6005.jpg

    IMG_5999.jpg


    :cheers:
     
    StaticOnTheRadio likes this.
  9. Jun 14, 2020 at 6:20 AM
    #9
    nuSchule

    nuSchule [OP] Well-Known Member

    Joined:
    May 18, 2020
    Member:
    #328432
    Messages:
    50
    Gender:
    Male
    NC
    It's the little things...


    Picked up some GP filters for the Tacoma and my 250K miles Yaris DD.

    IMG_6018.jpg


    I always try to keep a decent inventory of OE filters... except for the lowly Subaru. She's an ongoing project and gets the twice-a-year treatment as I have put a grand total of 2K miles on her in two years of ownership.

    IMG_6019.jpg


    Also took 5 mins and swapped out the broken side-view mirror (BSM equipped) with an OE piece.

    IMG_6020.jpg


    Next "project" is to get the mileage to 5K so I can swap out some fluids. Also bouncing around some exhaust ideas... would like to get the y-pipe rerouted but dropping almost $600 for aftermarket tubing that deletes the rear cats is not a great option for me. If anyone knows of a good exhaust shop in close to Winston Salem, NC, toss me some names!

    Otherwise it might be time for me to learn to weld.
     
  10. Jun 14, 2020 at 7:00 PM
    #10
    nuSchule

    nuSchule [OP] Well-Known Member

    Joined:
    May 18, 2020
    Member:
    #328432
    Messages:
    50
    Gender:
    Male
    NC
    ***WARNING: NON-TOYOTA CONTENT AHEAD***

    For a while a few years back, I was looking for either 1.) a cheap-o truck or 2.) a wagon that I could haul kayaks, dogs and be an overall practical hauler of... stuff. The only requirements... it had to be cheap and it had to have a manual transmission. Back in 2018, after a few months of searching, I found a listing for a one-owner 1997 Subaru Legacy Brighton 5spd wagon. For those new to Subaru nomenclature, "Brighton" means no frills, no options, no creature comforts... just an engine, 4WD and some sheet metal to keep you out of the elements. Only "option" it has is A/C, which barely works. Otherwise, it has manual windows, manual door locks, cassette deck and a generic block-off where a tach would typically be.

    Intrigued, I had a day off so I spent it driving to Raleigh, NC (about 2 hours away) to a small, local used car dealership that had her tucked away in the back lot. I drove her a few miles, fell in love instantly and essentially threw some spare change at the salesman to seal the deal. Seriously, picked her up for a song. One owner, low mileage (for the year) and in astonishingly good shape where it counted.


    First fill-up after purchase.

    IMG_3758.jpg

    IMG_3757.jpg


    For 132K miles, she was relatively clean... although you could tell she'd not been very well cared for. Engine bay was a mess, glass was scratched all to hell, multiple dings and dents and the paint was essentially shot. It was going to be a labor of love anyways, so I wasn't too concerned with the overall condition. Tires didn't match F/R (which is the coup de grace on Subaru transmissions) so new tires was the first order of business.


    Not wanting to go too overboard, I went with Discount Tire for their least expensive option. I present... the Barum Brillantis. Given the price point I thought they'd be made of saw dust and Elmer's glue, but figured they would at LEAST keep the wagon's transmission from exploding. They've held up great and have been a decent tire the past few years, no more miles than they've seen. (In the pic below, you can see the full extent of the marring in the paint, dents, etc... driver-side rear door is a cluster).

    IMG_3770.jpg


    A few weeks later, baptized by snow-nuts:

    IMG_3793.jpg


    First official cleaning after the snow melted away.

    IMG_3803.jpg


    One thing I absolutely LOVE doing is general maintenance. For peace of mind, I snagged a laundry list of OEM parts to make sure she was running as close to 100% as possible. I started with an OEM timing belt, water pump, tensioner, pulleys, cam seals, fuel filter and plugs and coupled them with some NGK wires, AEM dry filter and Grimmspeed lightweight crank pulley to get the engine back to peak.

    Pre:

    IMG_3774.jpg


    New front seals, pulleys, tensioner, plugs, wires and timing belt installed:

    IMG_4047.jpg


    Timing cover and lightweight crank pulley installed.

    IMG_4051.jpg


    All buttoned-up after a little TLC, some donor parts and snorkus removal:

    IMG_6045.jpg


    Also have some exhaust and suspension mods already completed that will be posted this week...

    :cheers:
     

    Attached Files:

    doublethebass likes this.
  11. Jun 14, 2020 at 7:44 PM
    #11
    doublethebass

    doublethebass aspiring well-known member

    Joined:
    Jan 1, 2017
    Member:
    #206252
    Messages:
    3,429
    Gender:
    Male
    First Name:
    Antoin
    Minneapolis MN
    Vehicle:
    ’17 6MT Pro
    Nice! I learned to drive in a 97 Subaru wagon just like that. Had Outbacks (AT) and Imprezas (5MT) until I got into the Tacoma. Hard to compare, but great cars.
     
  12. Jun 15, 2020 at 4:34 AM
    #12
    nuSchule

    nuSchule [OP] Well-Known Member

    Joined:
    May 18, 2020
    Member:
    #328432
    Messages:
    50
    Gender:
    Male
    NC
    Agree 100%!
     
    doublethebass[QUOTED] likes this.
  13. Jun 25, 2020 at 4:26 PM
    #13
    nuSchule

    nuSchule [OP] Well-Known Member

    Joined:
    May 18, 2020
    Member:
    #328432
    Messages:
    50
    Gender:
    Male
    NC
    Spent a LOT of time under the Taco and the Subaru recently... we'll let the old girl go first.


    Although there was nothing particularly wrong with the Legacy's exhaust, I want to improve upon, as best I can, the workhorse EJ22. Anderson Design Fab hooked me up with one of the final runs of his single-port UEL manifold and high-flow catted J-pipe. The rust on the flanges of the OE system had eaten away any hope of salvaging the mid-pipe and muffler, so I also ordered a new OE-fit mid-pipe and bespoke muffler from Northern Exhaust.

    IMG_5688.jpg


    Old v/s New:

    IMG_5692 (1).jpg
    IMG_5689.jpg
    IMG_5690.jpg
    IMG_5691.jpg


    Buttoned up:

    IMG_6129.jpg


    There's now a very nice, deep... subtle boxer rumble. Besides the total system being over 20lbs lighter, there is a noticeable bump in power. She's not wrinkling pavement by any stretch, but for a hilariously lightweight wagon with AWD and a 5spd manual, she is a riot.


    The Taco got some more TRD love.

    Don't mind the masking tape on the bubble wrap around the tip. I initially removed it then realized it probably made more sense to leave it on so it didn't get ruined during install.

    IMG_6104.jpg
    IMG_6103.jpg


    The muffler itself was several inches longer but a flatter oval versus factory.

    IMG_6102 (1).jpg


    Factory piping is a shade over 60mm just before the muffler:

    IMG_6099 (1).jpg


    Where the piping snakes up and over the axle, it goes oval. Width of 61mm, height of 58mm.

    IMG_6100 (1).jpg

    IMG_6113.jpg


    TRD piping before muffler jumps up to 63mm:

    IMG_6106.jpg


    It then stays pretty consistent over the axle at 62mm x 63mm.

    IMG_6109.jpg
    IMG_6110.jpg


    The TRD exhaust just feels way more substantial and the scale supported this. Factory unit was 26.2lbs, TRD came in at just under 34lbs, almost +8lbs... well worth it for the larger piping and beefy tip.

    IMG_6094.jpg
    IMG_6095.jpg


    Before:

    IMG_6092.jpg
    IMG_6090.jpg


    After:

    IMG_6130.jpg
    IMG_6131.jpg


    Initial impression, it is 100% everything I wanted it to be. Great tone, aggressive note at full throttle and not overkill for a V6. I dig...
     

    Attached Files:

    Last edited: Jun 25, 2020
    4x4_Taco and doublethebass like this.
  14. Jul 1, 2020 at 3:33 PM
    #14
    4x4_Taco

    4x4_Taco Well-Known Member

    Joined:
    Aug 4, 2017
    Member:
    #225929
    Messages:
    400
    Gender:
    Male
    FL
    Vehicle:
    Silver SR5 4x4
    :thumbsup: Nice job so far man, love the oem+ style and the progress on the Subaru.
     
    nuSchule[OP] likes this.

Products Discussed in

To Top