1. Welcome to Tacoma World!

    You are currently viewing as a guest! To get full-access, you need to register for a FREE account.

    As a registered member, you’ll be able to:
    • Participate in all Tacoma discussion topics
    • Communicate privately with other Tacoma owners from around the world
    • Post your own photos in our Members Gallery
    • Access all special features of the site

Speaker and sound system upgrade - 2014 ext cab Taco

Discussion in 'Audio & Video' started by Rebele93, Jul 8, 2014.

  1. Dec 7, 2014 at 5:54 PM
    #41
    Rebele93

    Rebele93 [OP] Newbie 4 Wheeler

    Joined:
    Dec 2, 2013
    Member:
    #117718
    Messages:
    24
    Gender:
    Male
    First Name:
    Mike
    Louisville, Colorado
    Vehicle:
    Black Tacoma - Off Road
    TRD Exhaust, K&N Air Intake and High Flow Air Filter, Front windows tinted to match back, Heated Seats, Weathertech Floor Mats
    My audio build is now complete.

    Today I ran a new power wire to replace the one I pinched. While I was doing this, I went ahead and cleaned up and wrapped all of my wires to protect them and keep them from getting tangled on stuff.

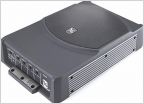
    I re-installed the 4-channel amp. I initially planned on running the 4-channel amp in a bridged configuration, but as it turns out, I had plenty of power without bridging it. If I ever decide to replace the rear speakers, I'll have available amp channels. I currently left the rear speakers disconnected (and I think this was a good decision).

    The Line-out converter to RCA to Sub Amp to RCA to 4-Ch AMP configuration did not work as I expected it to and I ended up getting lots of hum/feedback. To fix this, I ditched the RCA between the two amps and then I ran some additional wires to the head-unit and spliced and soldered them to the same left and right speaker wires coming out of the HU that the line-out converter was already wired to. I also severed the connection between the HU and the speakers which was needed until I got my amp issues resolved. The speakers were connected to the amp out wires.

    I got everything put back together and then crossed my fingers as I re-connected the battery. Turned the key and everything powered up as expected.

    I did some tuning on the amp and set it to HC to filter out all of the sub frequencies. I got my gains adjusted like I wanted them and then reinstalled the seat and finished cleaning up.

    The front component speakers are now getting the power they need and the sub adds in the perfect amount of bass which can be tuned on the fly. I did crank the system pretty loud to test it.and was delighted with the sound. The front speakers sound so much better with the right amount of juice. I'm now able to crank the bass up a bit more not without drowning out the mids and treble.

    I can hear no hiss or buzzing, even at low volumes. It IS possible to have a great sounding system without replacing the head unit. However, be aware that while it is possible to do what I did, I would not recommend that you try. Wait a few more months and save up for an aftermarket head unit. I was tired of living with a crappy sounding 1/2 complete system, and out of money. If I'd have been more patient, I probably would not have had to suffer through the cold Colorado evenings. More importantly, I would not have had to do all of the custom re-wiring that I did. An aftermarket unit with built in RCA outs to the amplifiers is the way to go.

    I would also probably just use a 5 channel amp with a dedicated sub channel. I was worried about space, but there is plenty of room for a larger amp, especially under the passenger seat.

    I absolutely love how the sub box fits in the truck when flipped upside down behind the drivers seat. (pics coming soon...I promise.) It gives you a nice back massage as well.

    I have noticed an issue with my mic no working when trying to use the truck's bluetooth for a call. I have no doubt that this is the result of my stupid wire snipping incident. A problem for another day. I guess I need to dig up an actual wiring diagram for the 2014 Tacoma to fix that.
     
    Last edited: Dec 7, 2014
To Top