

-
Welcome to Tacoma World!
You are currently viewing as a guest! To get full-access, you need to register for a FREE account.
As a registered member, you’ll be able to:- Participate in all Tacoma discussion topics
- Communicate privately with other Tacoma owners from around the world
- Post your own photos in our Members Gallery
- Access all special features of the site
 Expedition Essentials 3TPAM Wiring Questions
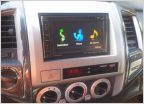 Pioneer AVIC-X920BT (and Adapters) Install Drawing
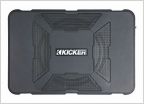 Crutchfield Quote
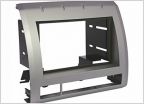 New Headunit...gotta Dash Kit question.
 ISimple Sirius integration for 2013
 Need amp advice!
Sony XAV-AX200 Install with OEM Rear Camera and Steering Wheel Ctrl Retention
Discussion in 'Audio & Video' started by dome, Aug 5, 2018.

