1. Welcome to Tacoma World!

    You are currently viewing as a guest! To get full-access, you need to register for a FREE account.

    As a registered member, you’ll be able to:
    • Participate in all Tacoma discussion topics
    • Communicate privately with other Tacoma owners from around the world
    • Post your own photos in our Members Gallery
    • Access all special features of the site

Replace Valve Cover Gaskets in my 3.4 - How?

Discussion in '1st Gen. Tacomas (1995-2004)' started by TACO in SC, Dec 9, 2019.

  1. Dec 9, 2019 at 5:09 PM
    #1
    TACO in SC

    TACO in SC [OP] TuRD

    Joined:
    Sep 18, 2012
    Member:
    #87221
    Messages:
    271
    Gender:
    Male
    First Name:
    Andrew
    Greenwood, SC
    Vehicle:
    '03 Tacoma Ex Cab 4x4 V6 5-Speed
    Pretty well stock
    As the title says I need to replace the valve cover gaskets in my 3.4 engine. I now have 163,000 miles and it's overdue. I get the burned oil smell and a few drops on the driveway wherever I park. I replaced the timing belt at about 100k miles, based on that I think I am game for the cover gaskets.

    I see various write ups of this job but am inquiring from you guys, where are the best instructions? I already have new gaskets from Felpro but I understand more seals are needed. I bet within Tacomaworld there is a nice writeup.

    Thank you in advance for your assistance.
     
    BuelltonTacoma and GQ7227 like this.
  2. Dec 9, 2019 at 5:11 PM
    #2
    Damyota

    Damyota Well-Known Member

    Joined:
    Sep 20, 2018
    Member:
    #266890
    Messages:
    146
    Gender:
    Male
    First Name:
    Dakota
    Virginia
    Vehicle:
    97 V6 Single Cab
    Toytec coil spring spacer lift, green wire mod, soon to be supercharged ;)
    Not sure on a write up but if you did the timing belt, valve covers will be a cake walk.
     
  3. Dec 9, 2019 at 5:33 PM
    #3
    TACO in SC

    TACO in SC [OP] TuRD

    Joined:
    Sep 18, 2012
    Member:
    #87221
    Messages:
    271
    Gender:
    Male
    First Name:
    Andrew
    Greenwood, SC
    Vehicle:
    '03 Tacoma Ex Cab 4x4 V6 5-Speed
    Pretty well stock
  4. Dec 9, 2019 at 5:36 PM
    #4
    cruiserguy

    cruiserguy Well-Known Member

    Joined:
    Jul 31, 2016
    Member:
    #193416
    Messages:
    19,000
    Gender:
    Male
    First Name:
    Elijah
    SEKS
    Vehicle:
    2000 ext cab, 2.7L, auto, 4x4
  5. Dec 9, 2019 at 5:50 PM
    #5
    TACO in SC

    TACO in SC [OP] TuRD

    Joined:
    Sep 18, 2012
    Member:
    #87221
    Messages:
    271
    Gender:
    Male
    First Name:
    Andrew
    Greenwood, SC
    Vehicle:
    '03 Tacoma Ex Cab 4x4 V6 5-Speed
    Pretty well stock
  6. Dec 9, 2019 at 5:57 PM
    #6
    cruiserguy

    cruiserguy Well-Known Member

    Joined:
    Jul 31, 2016
    Member:
    #193416
    Messages:
    19,000
    Gender:
    Male
    First Name:
    Elijah
    SEKS
    Vehicle:
    2000 ext cab, 2.7L, auto, 4x4
    Yes Tim's videos are a must see as well. Very very thorough. Like having the FSM in video form:cool:
     
    Timmah! likes this.
  7. Dec 9, 2019 at 6:15 PM
    #7
    GQ7227

    GQ7227 mw survivor

    Joined:
    Dec 6, 2018
    Member:
    #275019
    Messages:
    29,298
    Gender:
    Male
    First Name:
    J A Y
    309km east of Hazard ...the good life
    Vehicle:
    '97 black SR5 0g ~ MT @ 176k ...
    black woolWax, green IFC, borlaCB, custom Line-X PC drums, skid, nuts, hooks, 1/4 silver frame...
    i need a FSM in video form of proper bed removal and install, i don't think @Timmah! has done one of those?
    the only info I have found is from this file on page 21
     

    Attached Files:

  8. Dec 9, 2019 at 6:23 PM
    #8
    cruiserguy

    cruiserguy Well-Known Member

    Joined:
    Jul 31, 2016
    Member:
    #193416
    Messages:
    19,000
    Gender:
    Male
    First Name:
    Elijah
    SEKS
    Vehicle:
    2000 ext cab, 2.7L, auto, 4x4
    There's really not a video on the internets or youtubes for taking the taco bed off?
     
    CS_AR likes this.
  9. Dec 9, 2019 at 6:36 PM
    #9
    GQ7227

    GQ7227 mw survivor

    Joined:
    Dec 6, 2018
    Member:
    #275019
    Messages:
    29,298
    Gender:
    Male
    First Name:
    J A Y
    309km east of Hazard ...the good life
    Vehicle:
    '97 black SR5 0g ~ MT @ 176k ...
    black woolWax, green IFC, borlaCB, custom Line-X PC drums, skid, nuts, hooks, 1/4 silver frame...
    i have not finished looking, just inspecting what i have to do
    everything covered so far except for the wire harness clips
    the attachment sheet said be careful not to damage them is all
     
    cruiserguy[QUOTED] likes this.
  10. Dec 9, 2019 at 6:51 PM
    #10
    TacoTaco02

    TacoTaco02 Well-Known Member

    Joined:
    Feb 26, 2019
    Member:
    #284615
    Messages:
    230
    Gender:
    Male
    Illinois
    Vehicle:
    02 Ext Cab SR5 TRD 4x4 V6
    I did mine a few months ago using Timmy's videos on YouTube. Knowledgeable guy and great vid!

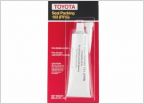
    My only suggestion is to use the RTV properly if you're doing the half moons. Let it cure per the instructions before torquing everything down.
     
    Timmah! likes this.
  11. Dec 10, 2019 at 7:51 AM
    #11
    TACO in SC

    TACO in SC [OP] TuRD

    Joined:
    Sep 18, 2012
    Member:
    #87221
    Messages:
    271
    Gender:
    Male
    First Name:
    Andrew
    Greenwood, SC
    Vehicle:
    '03 Tacoma Ex Cab 4x4 V6 5-Speed
    Pretty well stock
    Ok, I've ordered the needed parts from McGeorge Toyota Online Parts in VA & should have them by late this week. Then I'll pick a not-too-cold day to do the job. In the meantime I can watch the above linked video and give the engine a good cleaning.
     
  12. Dec 10, 2019 at 1:01 PM
    #12
    TACO in SC

    TACO in SC [OP] TuRD

    Joined:
    Sep 18, 2012
    Member:
    #87221
    Messages:
    271
    Gender:
    Male
    First Name:
    Andrew
    Greenwood, SC
    Vehicle:
    '03 Tacoma Ex Cab 4x4 V6 5-Speed
    Pretty well stock
    I've watched half of that video and reviewed the link in the sticky section. That video does have a lot of information but I find it had to watch with the camera constantly waving around. It must be mounted to his forehead.
    One question: The instructions say to remove the half moons, clean them and reapply with RTV sealant. If they are that difficult to pull out why not just leave them there? It seems they are already in place and sealed up pretty good.
     
  13. Dec 10, 2019 at 1:05 PM
    #13
    NCJeyota

    NCJeyota Well-Known Member

    Joined:
    May 2, 2010
    Member:
    #36373
    Messages:
    259
    Gender:
    Male
    First Name:
    Mike
    Raleigh,NC
    Vehicle:
    2013 acces cab TRD offroad M/T 4wd
    If the half moons are not leaking you don't have to replace them. I just find it to be a good idea since the sealant gets hard and brittle over the years causing the leaks.
     
    Timmah! likes this.
  14. Jan 7, 2020 at 3:14 PM
    #14
    TACO in SC

    TACO in SC [OP] TuRD

    Joined:
    Sep 18, 2012
    Member:
    #87221
    Messages:
    271
    Gender:
    Male
    First Name:
    Andrew
    Greenwood, SC
    Vehicle:
    '03 Tacoma Ex Cab 4x4 V6 5-Speed
    Pretty well stock
    Between yesterday evening and today I completed this job. I followed the instructions detailed by Ramon on his thread that is a "sticky", and linked below. His instructions with photos were very helpful and for that I am thankful.

    https://www.tacomaworld.com/threads...ping-out-valve-cover-gaskets-pictures.469596/

    About 5:00 I took it for a 10 mile ride to test things out. The truck started easily but it cannot find a correct idle RPM. It keeps surging from about 1,200 to 1,800 RPM but drives nicely nonetheless. While I did this job I did not disconnect the battery but as you know there were many intake manifold things unplugged. I did clean the gunk out of the air handler butterfly valve area.

    Might the engine computer "learn" the correct idle speed if I continue driving? Or should I disconnect the battery to allow a full reset? Or might there be another solution?
     
  15. Jan 7, 2020 at 6:39 PM
    #15
    Timmah!

    Timmah! Well-Known Member

    Joined:
    Feb 25, 2016
    Member:
    #179385
    Messages:
    1,224
    Gender:
    Male
    First Name:
    TIM
    Well, there's some things a write-up won't show you and my shakey camera work video wouldn't have helped either from preventing you from the mistake I'm surmising you made.

    I bet you made the mistake that a ton of guys make when doing a job like this. You cleaned the throttle body bore out and you let the dirty run-off drain right down into the IAC Valve (Idle Air Control Valve). You will need to pull off the throttle body, take off the IAC and clean it out. Sounds like the valve door is hanging up because it's overwhelmed with all the crap you let drain down into it. I actually have a video coming out soon that shows all the steps to test and clean an IAC valve (No crazy camera work in this one). I recommend you get yourself a new IAC gasket from your local dealer for this job. The 4 screws that hold the IAC onto the throttle body are on their TIGHT. Don't strip them out. Use a screwdriver that gets a good bite on the head of the screws and use firm downward pressure as you're turning the screwdriver counterclockwise. If you own JIS screwdrivers (Japanese Industrial Standard), that would be your best bet to avoid stripping out the heads. Good Luck!
     
    Last edited: Jan 7, 2020
    cruiserguy and TWJLee like this.
  16. Jan 7, 2020 at 8:20 PM
    #16
    Timmah!

    Timmah! Well-Known Member

    Joined:
    Feb 25, 2016
    Member:
    #179385
    Messages:
    1,224
    Gender:
    Male
    First Name:
    TIM
    You pull out the half moons, clean them up and reseal them, because just like any gasket sealant, it gets old and might start leaking. If every gasket sealer made was "permanent", I guess nobody would ever have a leaking oil pan or leaking trans pan or leaking whatever else on a drivetrain component. You do it to lessen your chances of having to redo a bunch of labor if a leak does start from one of those half moons. People cut corners all the time. I bet a lot of shops don't bother with removing, cleaning and resealing them but it's not their motor, it's yours. Do the job once and do it right.
     
    cruiserguy and TWJLee like this.
  17. Jan 7, 2020 at 9:35 PM
    #17
    Area51Runner

    Area51Runner Well-Known Member

    Joined:
    Jun 26, 2014
    Member:
    #132748
    Messages:
    11,937
    Gender:
    Male
    First Name:
    Mike
    Northern California, Bay Area
    Vehicle:
    02 3.4 DC TRD PreRunner 4WD SWAP
    https://youtu.be/TBubnYKS8y4
     
    cruiserguy[QUOTED] likes this.
  18. Jan 7, 2020 at 10:27 PM
    #18
    TWJLee

    TWJLee Well-Known Member

    Joined:
    Dec 7, 2018
    Member:
    #275158
    Messages:
    542
    Gender:
    Male
    First Name:
    Jay
    Midwest
    Vehicle:
    2001 Tacoma 4X4 2.7 5spd access cab 2020 Tundra DC LmTD 2020 F150 5.0
    2020 Tundra GFC 33’s Borla Pro XS FOX 2.0 2020 F150 33’s Magnaflow FOX 2.0 2001 Tacoma 4x4 2.7 5spd access cab new frame 217k 2” lifted Always for sale.
    I experienced the same
    this was the fix- a good throttle body cleaning and q tip /cleaner/ low air pressure clean out and was Golden from on:

     
  19. Jan 8, 2020 at 9:41 AM
    #19
    TACO in SC

    TACO in SC [OP] TuRD

    Joined:
    Sep 18, 2012
    Member:
    #87221
    Messages:
    271
    Gender:
    Male
    First Name:
    Andrew
    Greenwood, SC
    Vehicle:
    '03 Tacoma Ex Cab 4x4 V6 5-Speed
    Pretty well stock
    Where is the Idle Air Control Valve that you speak of? I've removed the throttle valve, removed the top plate and cleaned that area and the 6 holes that extend into the valve area. But I don't see anything on the intake area that resembles what might be the ICV

    Okay, based on this thread my throttle valve doesn't have the bolt on ICV but it may be within the black plastic motorized assist on the firewall side of the throttle valve.
    https://www.tacomaworld.com/threads/3-4l-w-etcs-tb-cleaning.324673/
    So I cleaned the 6 holes again, pushing through with a #44 .086 drill bit, and will reassemble and try again.

    Another update: I drove again with no improvement, it continued to pulsate idle between 1,200 and 1,800 RMP. Returned home, disconnected the battery (now I have to reset the radio again *_*) reconnected the battery and drove again. The idle is now closer to a constant 1,200 RPM so it did help some. I'm going to drive it some to see if it settles down, unless someone has another solution. At least it now is drivable.
     
    Last edited: Jan 8, 2020
  20. Jan 8, 2020 at 11:14 AM
    #20
    TWJLee

    TWJLee Well-Known Member

    Joined:
    Dec 7, 2018
    Member:
    #275158
    Messages:
    542
    Gender:
    Male
    First Name:
    Jay
    Midwest
    Vehicle:
    2001 Tacoma 4X4 2.7 5spd access cab 2020 Tundra DC LmTD 2020 F150 5.0
    2020 Tundra GFC 33’s Borla Pro XS FOX 2.0 2020 F150 33’s Magnaflow FOX 2.0 2001 Tacoma 4x4 2.7 5spd access cab new frame 217k 2” lifted Always for sale.
    Mine was a 2000 that had those symptoms and you are right, throttle body is different on the 03-04.
    I have read some others have had it settle down after a few drives. Thanks for keeping us posted
     

Products Discussed in

To Top