

-
Welcome to Tacoma World!
You are currently viewing as a guest! To get full-access, you need to register for a FREE account.
As a registered member, you’ll be able to:- Participate in all Tacoma discussion topics
- Communicate privately with other Tacoma owners from around the world
- Post your own photos in our Members Gallery
- Access all special features of the site
 Best Base Roof Rack for Kayak Carriers
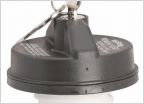 Locking fuel cap for my new baby
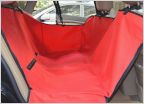 Looking for a seat cover for dogs
 Best Accessories You’ve Bought off Amazon for 3rd Gen
 Snorkel alternatives?
 What's the best mehthod to clean the dash and leather interior
RCI slider installation
Discussion in '3rd Gen. Tacomas (2016-2023)' started by k3ith99, Aug 18, 2023.
Page 1 of 2
Page 1 of 2


