

-
Welcome to Tacoma World!
You are currently viewing as a guest! To get full-access, you need to register for a FREE account.
As a registered member, you’ll be able to:- Participate in all Tacoma discussion topics
- Communicate privately with other Tacoma owners from around the world
- Post your own photos in our Members Gallery
- Access all special features of the site
 Wiring question
 Sound deadening Question...
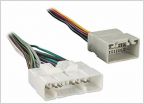 The elusive jbl amp wiring diagram
 Want to upgrade all speakers
 $2k and no new head unit. Damn it gets expensive FAST.
 2nd Gen. Non-Subaru Tweeter up-grade
Raspberry Pi Car-puter with touch screen, Apple Carplay, sensors, cameras, etc
Discussion in 'Audio & Video' started by Robpm, Mar 16, 2021.
Page 1 of 2
Page 1 of 2


