1. Welcome to Tacoma World!

    You are currently viewing as a guest! To get full-access, you need to register for a FREE account.

    As a registered member, you’ll be able to:
    • Participate in all Tacoma discussion topics
    • Communicate privately with other Tacoma owners from around the world
    • Post your own photos in our Members Gallery
    • Access all special features of the site

RAS (Roadmaster Active Suspension) install... Before and After

Discussion in '2nd Gen. Tacomas (2005-2015)' started by PyroTaco, Aug 3, 2019.

  1. Aug 3, 2019 at 7:27 PM
    #1
    PyroTaco

    PyroTaco [OP] Well-Known Member

    Joined:
    Jul 11, 2016
    Member:
    #191756
    Messages:
    289
    Gender:
    Male
    Vehicle:
    2013 Reg Cab Tacoma
    Fat Bob's lift kit, 30's on stock steelies, lunchbox locker in the rear, and a ton of other general mods and additions to help the utility of the truck for my particular uses.
    A while back I lifted my 5 Lug with a FatBob's kit and did the AAL along with it. The AAL's did a pretty good job, but as the weight got added into the mix, its rear started sagging more and more. To put it into perspective I have a fricken heavy as crap Snugtop with a roof basket and full drawer slides in the rear. Between those things and everything in the slides, it put a ton of weight over the rear end pulling it down. Then came the inevitability of moving cross country and I needed to get the truck ready to support more weight safely (yes, yes, I know that I'm only rated to a certain amount and am still well under). With that in mind, I added SumoSprings which would act like an overload spring of sorts given I would be loaded to the hilt in the bed and pulling a trailer. Still, this wasn't enough... I wanted to take it a step further. Enter Roadmaster Active Suspension.

    For those who aren't aware of what it is, it converts basic “passive” leaf spring suspension to mechanical “active” suspension. Read tons of reviews from multiple sources and figured it was time to pull the trigger once a deal popped up. Go figure there was a 4th of July sale so I jumped on it and got it. It showed up fairly quickly, but due to some scheduling issues, the install had to be pushed back till today. HERE WE GO!!! Install time!!!

    First things first, take measurements. Starting off going up the centerline of the wheel to the top of the arch, 33 3/16in. There's very slight variation side to side. Also, took a picture for a before reference.

    [​IMG]

    Now, jacked up the rear end, placed some stands, and took off the wheels. Time to see what we're working with.

    [​IMG]

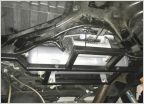
    Everything looks good. The SumoSprings are doing well. Time to quickly install. I will say make sure to read the instruction thoroughly. Perhaps reference a youtube video or two as well. It makes things much easier. One major tip which isn't noted in the instructions, the kit is side specific. Be aware of where the bolts are on it or it'll hit the shocks. Also, the "C" hanger that goes over the rear shackle goes into place much easier if you lift the rear just a hair otherwise it won't go into the pocket. (yes I know the pic is from the other side of the truck lol). DO NOT remove anything additional beyond what the instructions say. I've seen others do that and jack things up.

    [​IMG]

    Installation was straight forward. Then came time to adjust the pre-load on the spring. It came with 2 measurement discs... one black one white. The white is 1 mil thickness and the black was 2. This translates into a 25% load increase with the white and 40% with the black. You take the disc and try to slide it between the coils as you pre-load. Very simple. Went with 40% as I know what I will be faced with in the future. With that, I was done. Time to step back and see the handiwork.

    [​IMG]

    Time to lift the rear up, put the wheels back on, and see the difference/take measurements. First, the before then the after.

    Before:
    [​IMG]
    After:
    [​IMG]

    Measurements came back at 34 1/2in (remember 33 3/16in originally) again with slight variation side to side. The real question is how does it ride? Fantastically!!!! It's very smooth, that extra inch and change makes a difference (that's what she said), and the headlights are significantly better in their position. I imagine once I change to an aluminium shell, it'll lift a bit more due to the huge weight loss. Hope someone found this semi-entertaining and useful.

    -PyroTaco
     
  2. Aug 3, 2019 at 7:35 PM
    #2
    FishingPups

    FishingPups Well-Known Member

    Joined:
    Jun 17, 2019
    Member:
    #296632
    Messages:
    480
    Gender:
    Male
    First Name:
    Barry
    Vehicle:
    2014 Tacoma TRD Sport Access Cab
    Prerunner, Towing Package, Convenience Package, Tonneau Cover
    Nice job!! And yeah, the aluminum shell will take alot of weight off.
     
  3. Aug 3, 2019 at 8:21 PM
    #3
    PyroTaco

    PyroTaco [OP] Well-Known Member

    Joined:
    Jul 11, 2016
    Member:
    #191756
    Messages:
    289
    Gender:
    Male
    Vehicle:
    2013 Reg Cab Tacoma
    Fat Bob's lift kit, 30's on stock steelies, lunchbox locker in the rear, and a ton of other general mods and additions to help the utility of the truck for my particular uses.
    Thanks. I'd love to get an aluminium shell soon.
     

Products Discussed in

To Top