1. Welcome to Tacoma World!

    You are currently viewing as a guest! To get full-access, you need to register for a FREE account.

    As a registered member, you’ll be able to:
    • Participate in all Tacoma discussion topics
    • Communicate privately with other Tacoma owners from around the world
    • Post your own photos in our Members Gallery
    • Access all special features of the site

Problems? No.Just a reason to upgrade

Discussion in '1st Gen. Builds (1995-2004)' started by Pj40, Feb 9, 2020.

  1. Feb 9, 2020 at 5:25 AM
    #1
    Pj40

    Pj40 [OP] Well-Known Member

    Joined:
    Jan 17, 2020
    Member:
    #316424
    Messages:
    108
    Gender:
    Male
    Washington
    Front suspension
    New beginnings for a oldtimer
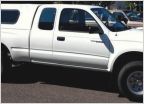
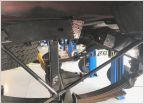
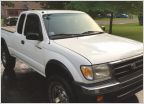
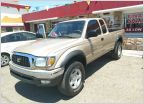
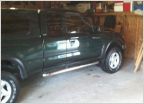
    I'm not new to tacomas but my current 2003 Tacoma might be the last one I get, or at least that's all I can hope. I purchased this 100% stock beauty at 97k miles for a steal of a deal and ever since then could not stop thinking of how to improve it for my adventures. Paired with a 2.7l 4 cylinder efficient monster and a 5 speed manual transmission it was the perfect combination for me and my needs, and lets not forget the unbeatable 4wd it had to get me through the toughest off all situations.
    20200209_052837.jpg 20200209_052745.jpg


    Current build

    Specs
    2003 sr5
    3rz-2.7l 4 banger
    5 speed manual
    Mileage when purchased 97,203


    Engine Bay
    NGK Copper
    New OEM belts and bearings
    Oil Mobile One 5w-30
    ARB Compressor
    Custom Fuse box
    arb safari snorkel


    Drivetrain
    Front diff Redline 75w-90
    Rear diff Redline 75w-90
    Tranny Redline MT90-gl4
    Trail gear front diff drop
    Trail gear rear carrier bearing drop
    Reman Low range steering rack
    east coast gear 4.88
    front harrop e-locker
    rear harrop e-locker


    Brakes
    Front EBC Drilled/Slotted rotors
    EBC Green brake pads
    New Oem Calipers
    Rear brakes(need tlc)
    Rear extended brake line

    Electronics
    Custom made fuse box
    BIG 3 upgrade
    Norco battery

    Front Suspension
    king 2.5 extended travel coilovers
    Spc Control arms
    oem lbj
    oem Inner tie rod
    oemtie rod end
    Energy Suspension Lower control arm bushings
    New Oem lcas
    Lower control arms greasable camber hardware
    Energy suspension Rack and pinion bushings
    Steering column tack weld mod

    Rear Suspension
    Alcan custom 700lb leaf pack
    Front greasable sping eye hardware
    OME greasable stock height shackle
    Arb poly bushings on all rear parts
    KING 2.5x10 Reservoir shocks
    trail gear U-Bolt flip kit
    Wheelers Super bumps
    RUFFSTUFF Shock relocation brackets

    Tire and Wheels
    Method mr702 beadgrip 17 inch rims
    285-75-17 Cooper discover at3 xlt
    Full size matching 5th wheel

    Exterior
    Led turn signals
    Led brake lights
    Front relocated led signals
    Diode Dynamics Hyper flashing resistors
    9 inch led baja lights on bumper


    Armor
    All pro baja bumper
    all pro font ifs skid
    all pro tranny skid
    4x innovations Sliders
    4x innovations rear tube bumper with custom swingout


    Random
    12k smittybuilt winch
    Custom Wedge camper
    300w solar
    40amp dc to dc charger
    170 amp lithium second house battery
    5kw b4l m2 espar gasoline heater plumbed into tank
    rear custom fuse box and power system for offgrid camping
     
    Last edited: Jan 3, 2022
    07TacoLA likes this.
  2. Feb 9, 2020 at 5:41 AM
    #2
    Pj40

    Pj40 [OP] Well-Known Member

    Joined:
    Jan 17, 2020
    Member:
    #316424
    Messages:
    108
    Gender:
    Male
    Washington
    The rubber meets the road
    Let's fast forward now to the part where I get the modifications bug and never seem to shake it.
    My first and in my eyes most important modification was tires.
    After thousands of tire vs tire posts and reading millions of size charts I made my best educated decision. Being that I'm not a extreme offroad enthusiast and am only a weekend warrior I went with a A/T tire.
    My final choice was the COOPER Discover at3 LT in a modest but perfect size of 265/75/16.
    For me the load rating being c and having a slightly stiffer side wall made all the difference instead of opting for the standard load rating.
    I've had them for just over 10k miles and they are performing flawlessly and are truely top notch tires.

    20190719_164153.jpg
     
    Last edited: Feb 9, 2020
  3. Feb 9, 2020 at 3:35 PM
    #3
    Pj40

    Pj40 [OP] Well-Known Member

    Joined:
    Jan 17, 2020
    Member:
    #316424
    Messages:
    108
    Gender:
    Male
    Washington
    Let the problems begin
    After I purchased the tacoma I ran into high idle issue. Mind you I feel very capable in tracking down such a minor problem.......turns out that this little issue wasn't so little after all. I was always told start with the easy things and it usually pans out. I cleaned the maf, replaced the air filter, did a full tune up. I even traced every vacuum line and replaced any lines that looked even a month old. My idle was still high. It sits at 1100-1300 but every once in awhile will go down to the 750 range. To this day I have no idea what it is.
    Here are the items I've replaced.(all oem Toyota parts)
    MAF
    Air filter
    Iac valve
    iac gasket
    throttle body gasket
    cleaned throttle body thoroughly
    Ngk spark plugs
    Throttle position sensor
    Power steering idle sensor
    Engine coolant temp sensor
    every vacuum line
     
  4. Feb 9, 2020 at 3:57 PM
    #4
    Pj40

    Pj40 [OP] Well-Known Member

    Joined:
    Jan 17, 2020
    Member:
    #316424
    Messages:
    108
    Gender:
    Male
    Washington
    Its not broken but could be better
    After driving the tacoma for about a month with no changes I realized that the front end was not up to par and not to my liking. I came from a very fast 2.5rs swapped wrx with too many modifications to go over.
    Anyways back to the tacoma. Every forum post about bushings and replacing them seemed like they just want to scare people. So after all the reading and research I decided to swap out everything.

    I started with the lower bushings and all the hardware attached. I Switched out every bolt and nut to a grease-able version for ease of service and so that I never have to cut off another bolt and sleeve with a grinder again. After the lcas were replaced and bushings I replaced upper and lower ball joints with the Moog problem solvers. Wow, they did make a huge difference, I also just got rid of the front sway bar as I felt for my needs It would just get in my way.
    Only thing not replaced was the Upper control arms due to a future upgrade to total chaos arms and bushings.

    Parts replaced in this endeavor
    LCa for oem oems
    Energy suspension lca bushings
    Energy suspension Upper control arm bushings
    lower ball joint
    upper ball joint
    Caster and camber grease-able bolts
    Rancho quick lift 1.75 inch lift struts
    Inner tie rod ends
    outer tie rod ends


    20190803_113910.jpg
    20190802_202148.jpg
     
  5. Feb 9, 2020 at 4:21 PM
    #5
    Pj40

    Pj40 [OP] Well-Known Member

    Joined:
    Jan 17, 2020
    Member:
    #316424
    Messages:
    108
    Gender:
    Male
    Washington
    Time for some rear suspension tlc
    Again it wasn't necessarily broken but the second I put anything over 40lbs in the bed it squatted like there was 5000lbs of bricks in there.
    I didn't want to lift the rear end sky high but at the same time I wanted a capable suspension to hold the future add ons and extra weight that would be back there.
    I decided to take the leap and went with arb ome 2.5 inch leaf springs and paired the springs with bilstein 5100 shocks. As usual every bolt and nut had to get cut off from the miserable rust preventive treatment Toyota did so well....
    After everything was cut off I again turned to wheelers off-road for all new grease-able hardware including the new ome shackles. What an awesome spring setup but of course things were not right. ill get to that later as it turned into a larger problem than I could even imagine.


    20190828_192133.jpg
     
  6. Feb 9, 2020 at 4:42 PM
    #6
    Pj40

    Pj40 [OP] Well-Known Member

    Joined:
    Jan 17, 2020
    Member:
    #316424
    Messages:
    108
    Gender:
    Male
    Washington
    RUST INTRUDERS
    Here we go, just like every tacoma frame ever built I had some rust problems and they weren't bad enough to not fix so I dove in head first and took it upon myself to fix it all! As you can see from the very telling picture they're was a build up of dirt and 20 years worth of road grim stuck inside the frame right above the front leaf spring hanger. As I poked around the frame more and put a inspection camera inside I found only the one troubled spot that needed to be addresses asap. My solution was a auto rust cap from safe t caps. I ordered their mid section and tore my truck down to the frame.


    20200203_160050.jpg
    20200131_185604.jpg
    20200131_213507.jpg
    20200201_171308.jpg
     
  7. Feb 9, 2020 at 4:52 PM
    #7
    Pj40

    Pj40 [OP] Well-Known Member

    Joined:
    Jan 17, 2020
    Member:
    #316424
    Messages:
    108
    Gender:
    Male
    Washington
    Relocation and more upgrades to be had
    While I was fixing the rust problem and reinforcing the frame I decided I would take the time to box the rest of the frame in and trail gear had my solution....almost.
    They're kit starts from the rear gas tank support crossmember and goes all the way back to the rear bumper mounting holes. So you almost box the entire thing in except the first part where the gas tank and exhaust hangers are. At this point I went to the local steel yard and picked myself up some 3/16 plate to finish the rear box frame. Was it unnecessary, probably but I'm glad I did it.
    Of course once I cut ogg the exciting crossmember u had to find another way to support the gas tank and the end of the exhaust as well as the charcoal canister.
    Turns out it wasn't too bad and I just made some of my own brackets and called it a day.
    As I was welding and putting heat into my frame I supported the frame in multiple spots with some angle iron to ensure that the frame wouldn't twist and bend from the heat.
    All the while I was finding new problems left and right.


    20200205_180826.jpg
    20200202_191816.jpg
     
  8. Feb 9, 2020 at 5:04 PM
    #8
    Pj40

    Pj40 [OP] Well-Known Member

    Joined:
    Jan 17, 2020
    Member:
    #316424
    Messages:
    108
    Gender:
    Male
    Washington
    Rear suspension rebuild,AGAIN
    Okay so turns out my truck had 3 inch shorter leaf springs for whatever reason and the arb ones were making the shackles hit the mounting hangers and never move. So I ordered new rear leaf spring hanger mounts,ubolt flip kit, shock relocation kit and some amazing shocks!
    it was time to get the rear end to do the things I wanted it to do. After hours of measurements and relocation of the rear hangers I finally have the shackle angles where they need to be. I also was able to pick up some king 2.5x10 reservoir rear shocks with welded rod ends and smaller top caps so I can squeeze a 10 inch travel shock in a vertical as close to 1-1 ratio as possible.
    Arb was also amazing in working with me to figure out the shackle hanger relocation and sent me new parts to ensure the old"new" springs I had been running for a few months were not compromised and even sent me a add a leaf only because they thought with the current build and future parts that would really help. Cant say enough how great arb was in this whole process!


    20200126_135017.jpg
    20200131_192846.jpg
     
  9. Feb 9, 2020 at 5:12 PM
    #9
    Pj40

    Pj40 [OP] Well-Known Member

    Joined:
    Jan 17, 2020
    Member:
    #316424
    Messages:
    108
    Gender:
    Male
    Washington
    The fun times never end!!!
    Well remember how I talked about that high idle issue... I think I may have found it but not sure. This insane process of rebuilding everything and building this truck the right way for me I dropped the gas tank to clean the frame and coat it in por-15. Well when I did this I started to clean the gas tank so I could coat it as well in the awesome por-15 coating. while I was cleaning I noticed a funky stream of gas coming from the top but not from gaskets or seals or bad pipes or broken hoses. The worst case scenario was discovered. The top edge by the vent valve had rusted so badly that their was pinholes everywhere like Swiss cheese sadly...... so I was not only losing fuel but also a vacuum leak at the gas tank could be my reason for high idle. I of course ordered a new tank the same day and am very hopeful that this fixes the high idle and bad gas mileage.

    20200204_181056.jpg
     
  10. Feb 9, 2020 at 5:22 PM
    #10
    Pj40

    Pj40 [OP] Well-Known Member

    Joined:
    Jan 17, 2020
    Member:
    #316424
    Messages:
    108
    Gender:
    Male
    Washington
    I like to think I'm decent at 12v electrical circuits
    As I waited for all these parts and pieces to come in and reorder more parts while sending some back I took on another mini project.
    I know that down the road ill have a large need for electrical relays and fuses so I built my own fuse box. Down the road I plan to add multiple lights and a arb compressor and small accessories. I drew this sketch up and went online to get the parts I needed to build my future proof box. I couldn't find anything with a reasonable price and also anything that was easy to maintain and keep running. I just wanted a way to keep all my accessories safe and not run power into the cab of the truck except for low voltage signal wires.


    20191222_163722.jpg
    20191222_165839.jpg
    20191231_180850.jpg
    20191231_201454.jpg
    20191231_201422.jpg
    20191231_201519.jpg
     
  11. Feb 9, 2020 at 5:28 PM
    #11
    Pj40

    Pj40 [OP] Well-Known Member

    Joined:
    Jan 17, 2020
    Member:
    #316424
    Messages:
    108
    Gender:
    Male
    Washington
    Random pieces!
    I finally decided to get a more power puller with synthetic winch cable and the capability to pull 12000lbs. Yes yes I know its a manual winch but I really enjoy the ability to use it anywhere and in any direction. it also can't fail unless overloaded or not wound up correctly.
    I also stumbled upon an awesome deal on a arb compressor so that's in the works to be mounted as soon as I kinda get an idea to where I want to rearrange everything.


    20191228_125054.jpg
    20190919_174845.jpg
     
  12. Feb 9, 2020 at 5:41 PM
    #12
    Pj40

    Pj40 [OP] Well-Known Member

    Joined:
    Jan 17, 2020
    Member:
    #316424
    Messages:
    108
    Gender:
    Male
    Washington
    Custom front armor and trail gear goodies!!!
    Well with all these parts and the truck slows turning into more and more of a weekend warrior I opted to get some protection....
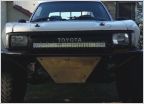
    I went with a custom front bumper that is super tight to the truck and still capable of a light winch. There is a new front brace to support the bumper and its welded and bolted through the factory mounts to ensure a 100% safe pulling/pick point. For the sliders I went with a 4x innovations rock sliders that I chose to keep a little wider off the vehicle so I can use it also as a nice step to grab things off a soon to be roof rack. For the rear bumper it was again a 4x innovations rear bumper that is soon to be modified to hold a swing out tire carrier. Overall the pieces I went with are all the lightest I could find and hopefully will keep th truck safe on the upcoming adventures ahead.
    At this time I replaced every turn signal and bulb except headlights with led variants and wired in the led relay to make sure I didn't have hyper flashing going on.


    20200104_204803.jpg
    20200114_131054.jpg
    20200112_125903.jpg
    20200114_184901.jpg
     
  13. Feb 12, 2020 at 5:38 PM
    #13
    Pj40

    Pj40 [OP] Well-Known Member

    Joined:
    Jan 17, 2020
    Member:
    #316424
    Messages:
    108
    Gender:
    Male
    Washington
    Unnecessary but so worth it
    Well I got my king rear springs in, a new gas tank and the ruff stuff shock mounts. Hopefully this weekend I can get my rear end back together!


    20200212_144921.jpg
     
    Eisenhower likes this.
  14. Feb 13, 2020 at 7:22 PM
    #14
    Eisenhower

    Eisenhower Well-Known Member

    Joined:
    Apr 17, 2016
    Member:
    #184562
    Messages:
    60
    Southern Oregon
    Vehicle:
    2000 Toyota Tacoma XtraCab 4x4
    Nice build. It's looking good!
     
  15. Feb 13, 2020 at 11:13 PM
    #15
    Pj40

    Pj40 [OP] Well-Known Member

    Joined:
    Jan 17, 2020
    Member:
    #316424
    Messages:
    108
    Gender:
    Male
    Washington
    Thanks, it's a slow process but it's coming along.
     
  16. Feb 15, 2020 at 3:17 PM
    #16
    Pj40

    Pj40 [OP] Well-Known Member

    Joined:
    Jan 17, 2020
    Member:
    #316424
    Messages:
    108
    Gender:
    Male
    Washington
    The Big list
    1.Reinstall bed for final fitment check
    2.Find best spot for 1.75 tubing under bed for upper shock mount
    3.Remove bed
    4.Bolt together the new arb leaf springs with aal and axle shim
    5.Instal new leaf pack and adjust shackle hanger mount location
    6. Finalize mounting location and full weld
    7.Find best location on axle for shocks
    8.Weld on upper bar
    9.Weld upper bar brackets and lower axle brackets on
    10. instal shocks and find best place to weld up the reservoir mounts
    11.Por 15 the new shackle hanger mounts/gas tank/upper shock mount bar/axle mounting locations
    12.Eastwood rust converter on inside of frame
    13.Wait for dry time and start fixing bed
    14. Make patch panels for bed holes and weld
    15.Remove and strip the small rust spots
    16. Clean bottom of bed
    17.Por 15 bad spots with two coats and let dry for final coat of regular por15 top coat
    18. Glue on the rubber mats to gas tank
    19.Remove fuel pump and small pieces from old tank
    20.Install all new gaskets, vapor seal, for new gas tank
    21.install gas tank and plumb everything back up(find red plastic connection for the tube at parts store?)
    22.reinstall the charcoal canister in new mounting location(big stainless zip ties)
    23.Reroute all the wiring close as possible to the mounting locations of tailights
    24.Run all wiring through new loom and new cable tie down points on frame
    25.Por15 topcoat everything(bottom side of bed, entire rear half of frame)
    26.Reinstall bed onto truck (new hardware)
    27.Reinstall gas tank fill neck, and taillights
    28.Reinstall battery cables and test all lights and functions
    29.Install rear carrier bearing dropp kit and hopefully new carrier bearing
    30.Install front diff drop kit
    31.Install Rear bumper, new hardware (m12x1.25), finalize placement ad two small welds on bottom and back
    32.Cut off right side tube and plate for swing out install later on
     
  17. Feb 20, 2020 at 6:28 PM
    #17
    Pj40

    Pj40 [OP] Well-Known Member

    Joined:
    Jan 17, 2020
    Member:
    #316424
    Messages:
    108
    Gender:
    Male
    Washington
    Chopping down the list
    Well I got down to business after recovering from a small surgery. I was able to get the new gas tank mounted and the charcoal canister bracket made and that all remounted and sitting pretty. I also threw on some eastwood rust encapsulater paint on the inside of the frame and that was not as fun as i imagined. I also was able to get the new carrier bearing in as well as the drop kit that goes with it to correct some drive train geometry.Speaking of drive train geometry while i was at it i installed a front diff drop kit from trail gear to help those front cv axles as much as possible. As far as the gas tank was concerend i got all new gaskets and replaced all the tube clamps and fixed any old and brittle hoses since i had the opportunity too. My custom little gas tank mount also worked a charm and the new cross member (1.5x1.5 square tube) gained me a inch or two of clearance with the rear of the gas tank. The gas tank was able to be moved up just a bit and also secured with two 5/8th grade 10.9 bolts and nuts. the last thing i got around to doing was the wheelers superbump install.

    20200217_185237.jpg
    20200217_185215.jpg
    20200217_185228.jpg
     
  18. Feb 20, 2020 at 6:35 PM
    #18
    Pj40

    Pj40 [OP] Well-Known Member

    Joined:
    Jan 17, 2020
    Member:
    #316424
    Messages:
    108
    Gender:
    Male
    Washington
    Airing down is fun.....when you can air back up
    Well as a little fun side project as i waited for auto-rust to re manufacture the rear spring hangers i found a good spot for my arb compressor. The arb compressor used to be mounted in the bed of the truck but throwing lumber in and loading tools in and out slowly but surely was causing damage to the little guy. So i found a great and empty spot on my firewall and proceeded to make a strong enough mount so it didnt wiggle and rattle. I used 3/16 mild steel plate and about 6 inches of angle iron to complete the task with some well thought out drilled holes and lots of heavy duty steel nutserts. But of course the only nutserts i had were 1/4-20 and i have miles and miles of metric grade 8 hardware but i literally have scraps of sae measure hardware. I managed to scrounge up a random assortment of bolts soon to be replaced by proper hardware but for now it is solid and the mount is perfect for me.

    20200218_204029.jpg
    20200218_204037.jpg
    20200218_204047.jpg
     
  19. Mar 1, 2020 at 7:37 PM
    #19
    Pj40

    Pj40 [OP] Well-Known Member

    Joined:
    Jan 17, 2020
    Member:
    #316424
    Messages:
    108
    Gender:
    Male
    Washington
    Getting Closer
    Well guys i got the list complete finally after lots of hours and what seemed like a never ending supply of coke a cola and sour skittles. Safe t cap sent me out the correctly made rear spring hangers and from there it felt like smooth sailing. I did lots of measurming to ensure the rear spring hangers were in the correct positon and welded those back on. After the leafs were installed i started with the rear shock relocation. I was fortunate that i had got my hands on some king 2.5x10 external res shocks that had welded loop end and a shortened top hat. Therefor i was able to install the upper mount from ruffstuff almost inside the frame rails and the bottom brackets at a slight incline so they were out of harms way.


    20200222_233021.jpg
     
  20. Mar 1, 2020 at 7:45 PM
    #20
    Pj40

    Pj40 [OP] Well-Known Member

    Joined:
    Jan 17, 2020
    Member:
    #316424
    Messages:
    108
    Gender:
    Male
    Washington
    The battle continues
    Once i got the upper mounts on i had to wait for the ruffstuff lower mounts because they were behind schedule shipping wise. While i was waiting i decided to give the bottom of my bed a make over and ensure rust never took this truck. I took out the trusty grinder with a wire wheel and went to town for a few hours and then pressure washed the bottom clean. After the pressure washing i de-greased it and acid etched it with por 15 products. once that was all dry i hit any rust spots or what looked like forming rust with por 15 rust converter. after two coats of the converter on the rusty spots i then used eastwood rust converter spray that had a 24 inch nozzle to spray inside the supporting frame rails to ensure there was no rust anywise and if there was it was treated. The fun didn't stop there though, i had some holes i drilled through the bed for a bedslide and i decided to weld those holes shut and and waterproof the bed again. After all the holes were filled i used the por 15 top coat dtm paint and applied two very heavy coats on the entire bed even inside the fenders as far as i could reach. The pictures speak for themselves.

    20200222_194020.jpg
    20200222_194028.jpg
    20200222_225717.jpg
    20200223_104855.jpg
     

Products Discussed in

To Top