1. Welcome to Tacoma World!

    You are currently viewing as a guest! To get full-access, you need to register for a FREE account.

    As a registered member, you’ll be able to:
    • Participate in all Tacoma discussion topics
    • Communicate privately with other Tacoma owners from around the world
    • Post your own photos in our Members Gallery
    • Access all special features of the site

Out of sight... XM/Ipod Install

Discussion in '2nd Gen. Tacomas (2005-2015)' started by mick6, Aug 21, 2009.

  1. Aug 21, 2009 at 1:12 PM
    #1
    mick6

    mick6 [OP] Well-Known Member

    Joined:
    May 1, 2009
    Member:
    #16634
    Messages:
    60
    Gender:
    Male
    New Jersey
    Vehicle:
    08 Tacoma TRD DC Sport
    None....Yet
    This is my first real post since getting the truck a few months ago. So finally got around to the first real mod and since I work in a high crime area it took a while to come up with an idea so here it is.....

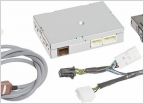
    1st I got the USA-Spec I pod adapter (i wont go into removing the HU and covers that has all been covered here on other posts). I installed the adapter under the cover next to the cup holder (bottom left) fits nice and snug


    IMG_1262.jpg

    Next drill a 7/8" hole in the bottom of the center console and run IPod cable to adapter. I Pod is done!

    IMG_1263.jpg

    Now for the XM, remove rear stop light (2 screws and pull gentlly it is chaulked in place too) then inside spin 2 clothing hooks 90 degrees and the liner will fall down a few inches. Feed XM antenna wire from outside down and run it under liner to pillar cover.

    IMG_1264.jpg

    Pull back weather stripping and tuck wire under pillar cover. At the bottom remove front and rear (on D/C) threashold covers by gently pulling them up. Then run wire to front up under dash using the existing wire guides, this is easy and neat, re install covers.

    IMG_1267.jpg
    IMG_1268.jpg

    Run wire up under drivers footwell (use wire tie to keep neat) and under center consol cover and into hole you drilled in center consol. Then attatch an RCA adapter for line input to I Pod adapter and into center consol (easy).

    IMG_1270.jpg

    Re-install light cover and use a little clear silicone to seal. I may go back with a small dremel and remove a little of the body under the cover to make a beter fit!

    IMG_1266.jpg


    Now last is the power for the XM! Pick up an aux cig adapter at Radio Shack and a mini add-a-fuse. I put the aux cig adt to the right of the shifter and zip tie it to the existing cable cover, plug in the xm power and run lead into center console. Use the ground screw and ground your aux cig lighter

    IMG_1278.jpg

    For power run red lead back under drivers footwell to fusebox. I used the mini add-a-fuse in the top row 4th slot (empty) and now you have power. Again secure with zip ties as needed. Pull all excess wires from console and zip tie as you go to make need install.

    IMG_1273.jpg
    IMG_1272.jpg


    Last step....I got a hinge at local hardware store and painted it black. I atattched the adapter, included in the XM Car Kit to one side of the hinge and atattched the other on the inside of the console (need a small right angle drill). Atatch 3 wires (antenna, power and line output) to XM cradle, zip tie wires....and you are good to go......

    IMG_1274.jpg
    IMG_1279.jpg

    When I get out of the truck it all goes out of sight into the center console. The lid still closes with the unit and wires out.
    The unit comes with me but I dont even want the cradle out in the open...and I hate wires all over the truck! Hope this helps anyone looking to do an install, it is easy, just takes time!


    IMG_1281.jpg
    IMG_1282.jpg

    IMG_1271.jpg
    IMG_1280.jpg
     
  2. Aug 21, 2009 at 1:15 PM
    #2
    97Blk_one

    97Blk_one Well-Known Member

    Joined:
    Apr 14, 2008
    Member:
    #5970
    Messages:
    730
    Gender:
    Male
    Memfrica
    Vehicle:
    not so low
    A whole lot,But not satify
    Wow..Thanks for sharing. Nice writen up
     

Products Discussed in

To Top