

-
Welcome to Tacoma World!
You are currently viewing as a guest! To get full-access, you need to register for a FREE account.
As a registered member, you’ll be able to:- Participate in all Tacoma discussion topics
- Communicate privately with other Tacoma owners from around the world
- Post your own photos in our Members Gallery
- Access all special features of the site
 How to mount EDC tools inside of console?
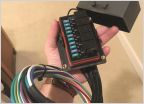 H.O. alternator question.
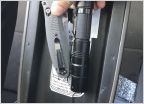
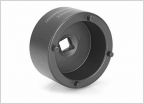 Tool Recommendations for Wheel bearing Replacement
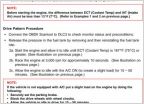 Evap system repair from manual
 Looking for Bilstein 4600 series shocks....
 Yet another catback question.
Oem seat cover removal
Discussion in '1st Gen. Tacomas (1995-2004)' started by fouillard13, Dec 18, 2014.


