1. Welcome to Tacoma World!

    You are currently viewing as a guest! To get full-access, you need to register for a FREE account.

    As a registered member, you’ll be able to:
    • Participate in all Tacoma discussion topics
    • Communicate privately with other Tacoma owners from around the world
    • Post your own photos in our Members Gallery
    • Access all special features of the site

New Lighting and Bed-Lined Rocker Panels Write Up

Discussion in '1st Gen. Tacomas (1995-2004)' started by Garth223, Jul 23, 2012.

  1. Jul 23, 2012 at 11:41 AM
    #1
    Garth223

    Garth223 [OP] Well-Known Member

    Joined:
    Oct 17, 2010
    Member:
    #44805
    Messages:
    112
    Gender:
    Male
    First Name:
    Garth
    Vehicle:
    04 PreRunner
    All Pro Bumpers, K&N CAI Kit, Rough Country 1.5" Fender Flares, Lund Bug Deflector, Icon Coilovers, Total Chaos UCAs, Billy 5125's rear, Deavers leaf springs, GrillCraft Black Mesh Grill, Blacked-out Taillights, All Pro 1.5" Wheel Spacers on back axle, FJ Cruiser Rims.
    Greetings TW. Its been a while since I have done some posting here, but I just put some new lights on, and painted my rocker panels a while ago, so I figured I would let you all see my work.

    DSCN0534_3672e65dc9f9d727b43cd1fdf574864ced9fe42f.jpg

    I have been getting some pitting on my rocker panels from driving on a lot of dirt roads, and have been wanting to put some bed liner on it for a few years. I finally made the decision to buy the supplies at walmart, and went for it.

    I got a gallon of the Rustoleum Roll-On Bed Liner, paint tray, brush, sanding sponge, roller, and some masking tape at Walmart for about 70$. The bed liner was 40$, and I think its the best place to get it, since AutoZone sells it for 60$.

    DSCN0545_4cce0e88ca9b39091772dec6c5a0587f95edbb41.jpg

    I went and washed my truck first, to get all the dirt residue off the body and have a good surface for the paint to adhere to, and then pulled my fender flares and rear bumper off, and masked the truck level with the top of the horizontal indent about a foot up on the body. I used 2 layers of masking tape, so I could build the liner up thicker. Once it was masked, I sanded the whole area with a sanding sponge, and wiped off the dust it left. I did the area inside my door where my paint has gotten worn off on both sides from shoes rubbing it.

    I poured the bed liner into a roller tray, and applied two coats via the roller. As a side note, I believe the Rustoleum product has some sort of solvent in it, to eat the clear coat and help it stick better, because the cheap rollers I was using started to melt and leave little strings everywhere. So be sure to get a good quality roller. After the paint cured for a few hours, I went back over it with a brush, and put two excessively thick coats. The brush allows you to apply it super thick, and just keep working it around as it starts to cure, and you will get much more coverage than the roller.

    I painted inside the cab right where the door seal is, the bottoms of the doors, and the whole rocker panels. I brought the paint all the way under the panels to where they are pinch welded. They all came out looking great, and it has not started chipping or flaking in the two or three weeks since I did it.

    DSCN0537_1165c25b632ea899fbc215332cdd593a9dd753ce.jpg

    I have the older style All-Pro tube bumper, and had previously painted it a year and a half ago with the spray-on Rustoleum Bed Liner, but sand and rocks kicked up by the back tires had sandblasted the bottom surfaces, and it was starting to rust. I am not too pleased with the spray paint type, because it doesn't apply very thick, and runs very easily. The roll on liner is a much better product overall.

    I put the bumper in my shower, cleaned it off, and let it dry.

    DSCN0526_aefccb4d7165a32c8b2cf147e3d99215495bcbd0.jpg

    Then i scrubbed all the rust off, painted it with Rustoleum Rust Reformer, and then brush painted 4 coats of bed liner. It goes without saying, but make sure you let it cure for a day before you flip it over, or else it will stick to the cardboard. I put extra thick inside the D-Ring mounts, because they rattled around over a few years and stripped the old liner off and caused some rust to occur.

    DSCN0527_c6919df48f21290c7a1d1ede4682c2b5f3f1d572.jpg

    Once I finished up everything, I put the truck back together, and didn't drive it for a few days, so no dirt would get embedded in the paint before it fully cured. So far it has held up quite well. I drive through a lot of thick brush, and the sides of my truck are all scratched up, but the liner hasn't been affected.

    ~~~~
    Last week I decided to finally do something about my poor lighting situation. At night, I have only had my low and high beams to aid me in seeing my path, and as we all know, they are adequate at best. I did some research, and decided on the KC HiLites 100w 6" Slim Driving Lights. MSRP is over 200 bucks, and everywhere I looked wanted around that, but Amazon had them for 155$, with free shipping. The part number is KC 124. I dont like the look of the rock covers, so I ordered some clear lens covers for 17$, which amazon also sells. Here is the link. I got these to completely cover my lens, so they are protected from rocks on the highway, bugs, and things on the trail. It is way cheaper to buy new covers than new lenses.

    DSCN0546_dac0f270e21ff62230a151902efcf56fbb8d028e.jpg

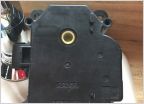
    I found a write up about using the OEM 4Runner fog light switch to turn on and off lighting, so I ordered one through my local stealership. I dont like the look of the switches that come with most lights, and wanted something that looks like it belongs in the dash. The part number for the illuminated style I chose is 00550-35976 "Switch, Dash Fog" which cost $12.41. It has a small orange circular light on the top, I assume to help you find it in the dark. I thought the light would only come on when the switch was turned on, but it is always illuminated. I pulled my lower dash piece off from under the steering wheel, and installed it where the E-Locker button is on the TRDs, just pulled out the knock off plate and popped it in.

    DSCN0547_e641efc1ffaf83a0042e4e713ae7d7ecac38801d.jpg

    DSCN0536_1118c230bdf57a7643edb0755cb1f1968e01a02f.jpg

    The side with the light is the top, and there are three prongs. If anyone is interested in following the same route as me, thee wiring for the switch is as follows:

    Top Prong - Ground
    Middle Prong - Power
    Bottom Prong - Relay

    I installed the lights on the tabs on my All-Pro tube front bumper, hanging down into the hoop. I ran the wires from the right side of the engine bay, behind the grill, and down to each light. I zip tied them to the grill supports, and put about a foot of plastic black conduit around each set of wires to protect and hide them better.

    DSCN0543_d708ef21599df52d0dbc41d1a9f6f17b7611ee63.jpg

    DSCN0540_872ff8f43b7d996522136a8cc49e84c24fc0d66a.jpg

    DSCN0542_f6650f8bc78e4426390c63c9b2f9b0fafcb70100.jpg

    On the right side of the fire wall, inside the open area that is perfect to keep a rag for checking oil, there is a plug with wires running through to the cab for your interior fuse box. I pulled some black putty that is supposed to water proof it, and pushed the two wires for the switch through. This comes out right behind your fuse box, so it was easy to make everything reach.

    DSCN0544_1983872f143c5f8dfd2abd686a5bdf98fa0fb9db.jpg

    I pulled the kick panel off on the drivers side, and screwed the ground into the body back there, same spot as where you ground the gray wire mod. For my switch power, i just pulled my un-used 4WD fuse out, stripped the wire, and jammed it where the left prong sticks into. I broke that prong off and stuck the fuse back in to hold it in place. I wanted the lights to shut off if I turned the truck off, so I wouldn't accidentally leave them on and drain the battery during the day, and this fuse is only powered when the key is in the on position, so it worked out perfectly.

    I tested everything out while the truck was taken apart, and discovered my original ground wasn't good, and so while the switch turned the lights on, the light on it wouldn't illuminate. I remedied this by grounding directly into the body behind the kick panel.

    I finished this up while it was just getting dark last night, so I waited a few hours, and helped my buddy do his plugs on his V6 Taco. We took my truck out on the trails on Camp Lejeune, and I am very impressed with them. Some minor adjustments, and they light up the trails much better than my headlights. The lights didn't move or drop down, despite driving on some washboard roads and hitting big pot holes. The light they put out is super bright, 180,000 candlepower, and is whiter than my headlights, so you can see the colors of the foliage much better. For a total cost of just under 200$, it was an excellent investment. I now feel much better about night driving, and it makes the front end look even better. I would recommend the KC lights and OEM switch to everyone.

    DSCN0541_146e2b7091fb22274ce22bfd84dd3e2cac8c1f7f.jpg

    DSCN0539_d3a0f8e90121fb810a6dd4f845b8f4c52b675ada.jpg
     
  2. Jul 23, 2012 at 2:24 PM
    #2
    pippen

    pippen that was'nt a vitamin!!

    Joined:
    May 6, 2011
    Member:
    #56205
    Messages:
    661
    Gender:
    Male
    First Name:
    Pippen
    Eastern NC
    Vehicle:
    04 PreRunner Ext.
    Cool, I just did my skid plate in Rustoleum spray today, I can tell you live in a barracks from pics :D
     
  3. Jul 23, 2012 at 4:45 PM
    #3
    Garth223

    Garth223 [OP] Well-Known Member

    Joined:
    Oct 17, 2010
    Member:
    #44805
    Messages:
    112
    Gender:
    Male
    First Name:
    Garth
    Vehicle:
    04 PreRunner
    All Pro Bumpers, K&N CAI Kit, Rough Country 1.5" Fender Flares, Lund Bug Deflector, Icon Coilovers, Total Chaos UCAs, Billy 5125's rear, Deavers leaf springs, GrillCraft Black Mesh Grill, Blacked-out Taillights, All Pro 1.5" Wheel Spacers on back axle, FJ Cruiser Rims.
    Yes I do, and I use this room as a paint booth all the time. Just gotta be careful not to spill too much on the floors.

    I just did the diff breather mod as well. 4 feet of 5/16ths vacuum hose, pipe clamps, and a breather from Toyota. Attached it to my gas fill tube.
     
  4. Jul 23, 2012 at 6:58 PM
    #4
    tacoma04

    tacoma04 Retired to the lake

    Joined:
    Mar 9, 2011
    Member:
    #52717
    Messages:
    879
    Gender:
    Male
    First Name:
    Bruce
    Tennessee
    Vehicle:
    2017 TRD OR DCSB BBP
    Great write-up! I always liked the look of a reg cab, but with a family and dog I got the dc.

    Nice truck!
     
  5. Jul 24, 2012 at 7:58 AM
    #5
    Fati Tacoma

    Fati Tacoma Well-Known Member

    Joined:
    Apr 25, 2010
    Member:
    #35969
    Messages:
    70
    Gender:
    Male
    Looks sweet man! I love that you did the door wells, has me thinkin. Also, I used that same bedliner on my rock sliders, been about 3 months and it's held up great.
     

Products Discussed in

To Top