

-
Welcome to Tacoma World!
You are currently viewing as a guest! To get full-access, you need to register for a FREE account.
As a registered member, you’ll be able to:- Participate in all Tacoma discussion topics
- Communicate privately with other Tacoma owners from around the world
- Post your own photos in our Members Gallery
- Access all special features of the site
 Camper shell clamp
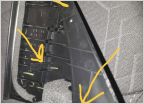 Where can I find these clips???
 SR Front Bumper
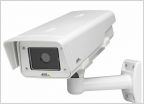 Front camera mounting ?
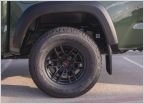 Black Lug Nuts or Covers for My TRD PRO 2020 Wheels
My take on a drawer system build. 3rd Gen Drawers
Discussion in '3rd Gen. Tacomas (2016-2023)' started by aturk, Jun 26, 2023.


