1. Welcome to Tacoma World!

    You are currently viewing as a guest! To get full-access, you need to register for a FREE account.

    As a registered member, you’ll be able to:
    • Participate in all Tacoma discussion topics
    • Communicate privately with other Tacoma owners from around the world
    • Post your own photos in our Members Gallery
    • Access all special features of the site

Midwest FISHWHIP build - Now w/ Fishporn

Discussion in '3rd Gen. Builds (2016-2023)' started by HeyB, Jul 30, 2023.

  1. Jul 30, 2023 at 1:04 PM
    #1
    HeyB

    HeyB [OP] Well-Known Member

    Joined:
    Jun 11, 2022
    Member:
    #399237
    Messages:
    71
    Gender:
    Male
    Vehicle:
    2022 TRD OR DCLB
    Howdy TW!
    This thread attempts to document my second Tacoma’s “build” and hopefully share a few of its fishing adventures. Along the way I hope to call out all the folks and small vendors (mostly on TW) that have provided products, guidance, or inspiration - because Taco’s are awesome and so is the TW community. Throw your feet up and enjoy. Here we go…

    32AAAA78-3F87-42BE-B2B3-938A9D90D334.jpg

    Midwest - ‘Cause that’s where I’ve lived my entire life and spend most of my time.

    FISHWHIP - Because fly fishing in awesome places has been my “happy place” for the last 25 years or so. Long gone are the days where I managed to put 100+ days/year on the water while holding down a career. I’d love to take another year off to fish every day, but that’s not going to happen any time soon. Honestly, the past few have been work to much and fish very little, so this has been a big step towards fixing that.

    Objective - incorporate everything good about the past 4 “unintentional fishwhips”, and customize the current Taco to make getting out on 2-7 day fishing trips as fast, easy, and comfortable as possible. Sadly, also need to keep in mind that the daily commute is a 90 mile round trip, predominantly highway, so on-road ride and MPGs are also a consideration.

    Enough of that. Here’s some pics:

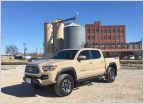
    Picking up the new whip (April ‘22 - Sorry for the lame photo)
    0E1458E4-4C0F-45C6-903A-18697C42B588.jpg
    (Traded in my silver 2011 DCSB Sport that gave me 270k problem free miles. Why would you buy anything else?)

    Fishwhip doing fishwhip stuff
    283B09EC-3A7F-47EB-A4E0-1B3C8D681690.jpg
    The start of some savagery…
    3140F3E5-82C7-4544-BACA-7F4BE11292C0.jpg
    (Probably more rustic than the plush back down boat launch/dam may suggest. See next.)

    Recovery gear? Mine’s focused on getting a drift boat in/out of basically anywhere, all by my scrawny @ss self when need be
    0322FB05-9FFB-4628-AF8B-DC103E1C4F5A.jpg
    (Manually converting a canoe put-in to a drift boat take out. Several beers and a flip flop were harmed for this awesome 2 day brook trout mission.)

    Here’s the list of stuff I intend to document over time:
    • Putting a cap on it
    • 3’s company, 5 is 2 more useless seats than a drift boat. 60% rear seat delete = more room for activities!
    • The perfect crash pad (bed sleeping platform)
    • River quiver - adding rod storage.
    • Back the f-up - stuff that makes pulling a drift boat off the river @ 4AM a little easier
    • Base camp creature comforts, for folks who are as lazy as me and don’t care to waste any time on comfort.
    Non exhaustive list of small vendors and forum folk who’ve been super helpful along the way (off the top of my head, very incomplete and I’ll correct that over time)
    • Matt Gecko LED’s
    • Dave @ FBC Harness Solutions
    • @switch - bed light pockets and aux fuse block
    • Green Chili Adventure Gear - the perfect cam straps
    • All the folks I forgot…. (To be corrected soon.)
    And the small amount of remaining stuff I’m planning to do in the future, just so I’ve got a to-do list to keep me honest.
    • non-cr@ppy fog lights
    • Front camera/anytime backup - mostly so I can check on the boat while towing…
    • AAL or similar. Daily drive is great, but she’s saggy when loaded and towing the boat.
    That’s all for now, so here’s a view of where I’m writing this from to wrap this up….
    B6D040C1-3FB1-428D-938E-F92E4765F91B.jpg
    (Killing time before tonight’s mousing mission.)
     
    Last edited: Jun 16, 2024
    FLAK-TAC likes this.
  2. Jun 16, 2024 at 9:16 AM
    #2
    HeyB

    HeyB [OP] Well-Known Member

    Joined:
    Jun 11, 2022
    Member:
    #399237
    Messages:
    71
    Gender:
    Male
    Vehicle:
    2022 TRD OR DCLB
    I started this thread with the intention of sharing the FISHWHIP “build”. Obviously that hasn’t happened.

    Just spent 14 days on a fun fish/camp adventure and do believe the WHIP is finally dialed, so maybe I’ll get around to something meaty soon.
    IMG_4213.jpg
    The FISHWHIP makin’ a cameo @ camp.

    In the mean time I’m on a single night in the woods and surprisingly have limited reception, so here’s a few cheap/easy hacks making life more comfortable at the moment….

    IMG_4266.jpg
    This little battery/USB fan was about $15 on Amazon. It’s quiet, runs 8+ hours on low and puts out good air movement. I can also power/charge it from an aux USB port I added to the bed. Add Velcro to the base and you can stick it to the toppers carpet and position it anywhere.

    Some cheap mosquito netting I picked up at an Army Surplus about 20 years and 2 trucks ago, plus a little Velcro, and you’ve got significantly improved airflow opening the front slider and rear glass.

    For no logical reason, Leer decided to put the pull for the front slider on the cab side of the glass. I’m sure that’s convenient as hell if you’re sitting in the back of the cab, unless you forgot to open the cab glass from the front seat. It’s positively useless when you’re in the bed and would like some ventilation. Amazon to the rescue again, where $4-5 will get you a 2 pack of “self adhesive mirror pulls” and you can add one where it should have been all along. Don’t forget to give the second one to a fishing buddy.

    Nothing ground breaking. Just easy and cheap and definitely making my first hot and humid night of the year more comfortable.

    And a little complementary fishporn to end the post…
    IMG_4249.jpg
    Not the biggest of the trip, but DAMN, look at those shoulders. Fiberglass and frog flies for the win.
     
    Slatroni likes this.
  3. Jul 3, 2024 at 6:46 PM
    #3
    HeyB

    HeyB [OP] Well-Known Member

    Joined:
    Jun 11, 2022
    Member:
    #399237
    Messages:
    71
    Gender:
    Male
    Vehicle:
    2022 TRD OR DCLB
    60% Seat Delete and a major rear seat improvement over my first double cab.

    Finally getting around to something more substantial…. My old DCSB would get all types of stuff stored on the back seats, particularly on extended fishing trips. The problem, because everything was hap-hazard, it inevitably just ended up taking up the entirety of the back seat, things regularly went “temporarily MIA”, and I had to quickly rearrange (read just pile stuff higher) any time I needed to actually seat somebody in the back. Time to make that so much better!

    IMG_4296.jpg
    Definitely better! More room for activities…

    Since the only time I need people in the back seat is a +1 when I’m pulling the boat off the river (driftboat seats 3), the starting point was a 60% seat delete. I won’t cover the basic design and construction-type details here since you can find them in TW’s awesome Rear Seat Delete Decks thread #556. Instead, this covers how I use it to keep everything organized, easy to access, and keep an open 3rd seat on demand.

    The deck folds forward like the factory seat. Just enough to still access the cubby. Since there’s a small gap, it’s a convenient place to store a saw. I carpeted the bottom for sound deadening, and the unexpected bonus was I can Velcro stuff to it, like a tube that holds a handful of trash bags. Both are accessible without lifting the deck.

    IMG_4294.jpg
    Silky…..

    The back folds forward like factory too. I kept the seat-back bin as it’s useful. I keep seldom used and oh-sh!t items here like a jump box and a spare hub for my boat trailer. I re-used some Velcro storage pouches from my last taco. It’s a really great way to make the upper area behind your rear seats useful. The big one has bungees, paracord, etc. The small one used to be a first aid kit, but I’ve relocated that somewhere better so basically empty for now.

    IMG_4291.jpg
    Empty storage space. Time to fill it with something.

    If I was doing this part over again I’d carpet the back side vs covering it with Seadek. Carpet sound deadens a bit better and Velcro compatibility is a bonus.

    And while it actually works quite well, using the childseat restraint point as a latch strikes me as ghetto. Honestly I just didn’t want to grind it off, and didn’t want to give up a few inches cab side moving the seat back forward to accommodate it. Upside, it creates a secure tie down point for taller items when needed.

    IMG_4292.jpg
    Low on looks but high on function.

    On deck, I played around w/ various plastic bins, duffels, etc. They were decent but never perfect, until I stumbled upon these North Face totes. They are soft sided (so no rattling), but have a collapsible wire frame that always keeps them wide open. They’ll also fold flat. Two side by side fit perfectly while still being easy to get in and out.

    IMG_4295.jpg
    Totes better.

    Passenger side holds waders, boots, and rain gear. They obviously aren’t “waterproof”, but the tub bottom hasn’t leaked and the materials don’t mind being damp for days on end. Waders in the cab vs bed is way better if you fish in the winter. Just crank the heat and your wading boots generally thaw by the time you make it to the river.

    Drivers side holds clothes. I was surprised how much more convenient it is to find a clean pair of underwear out of an open topped tote than the Patagonia duffel I’ve used for years, but the difference is actually real.

    With the totes strapped down there’s still just enough room to tilt the seat back forward to access storage if needed.

    On long trips I add a larger industrial grade plastic bin as dry-goods storage. It gets strapped down where clothes normally are, and the clothes tote just sits on top. Convenient enough since I only need to access dry goods 2x/day.

    Around town, I usually just leave one empty bin strapped down for whatever I might randomly need to throw in the truck, and the other folded flat underneath it. Easy peasy.

    Behind the rear drivers side seat, it’s amazing what you can pack back there with a little organization. Another Velcro pouch packed w/ repair consumables (zip ties, JB weld, fuses, etc), a full tool pouch, and even enough room to just fit my ball hitch.

    IMG_4290.jpg
    Tool time.

    Shout out for the Blue Ridge tool pouch! I’ve got just about every hand tool you’d ever need (save a hammer…) and it keeps it all organized and accessible. I use it constantly and it’s holding up great.

    Rounding out the system are two headrest items. One’s a relocated first-aid kit. Mostly because it dawned on me that if it was ever ME that needed first aid, no one would ever find it behind the seat delete. I don’t want that in my obituary.

    On the drivers side is basically a big dump pouch I’ve had for years that holds seasonal stuff mostly. Bug spray, sunscreen, etc in the summer. Spare hat, gloves, ice scraper, etc. in the winter. One plastic buckle to remove it and make some leg room for a rear passenger.

    One more shout out for a little thing… the cam straps I use to hold stuff down are from a small independent company called Green Chille Adventure Gear. The straps have a 10-ish” bungee section (encased in a climb-spec tubular webbing) that allows you to get stuff and keep stuff snugged down great without over tightening the heck out of them. They are made very well, holding up great, and moderately priced. In my particular set-up, because of the way I positioned the tie down points, the elastic actually keeps some opposing force on the bottom and rear portion of the deck. Essentially, when the straps are snugged neither portion can flip up/down since the straps constantly pull them towards their proper rest position. I can pull the rear forward enough to fish stuff out without loosening anything, but it won’t lay flat and the straps elastic snaps it back into place as soon as I let go.

    (No affiliation w BROG or GCAG. Just a very happy customer)

    Alright, nothing groundbreaking about any of this, but hopefully some useful ideas. My experience has always been that it’s super easy to leave for a trip and have everything organized, but I’m used to coming home with the back seat looking like a college dorm room. On a recent 14 day fish/camp, I never had to hunt for anything, never wasted any vacation time “re-organizing”, and arrived home in the same state that I left (except the dry goods bin was nearly empty and the clothes a lot dirtier). Think I finally got it.

    Enough rambling. If you made it this far, enjoy some gratuitous fishporn…

    IMG_4228.jpg
    Old grizzled dude with a big paddle. The fish, not the dangler.
     
  4. Jul 11, 2024 at 12:49 PM
    #4
    bolinas_2

    bolinas_2 Member

    Joined:
    May 13, 2024
    Member:
    #449680
    Messages:
    14
    Gender:
    Male
    First Name:
    Moses
    Los Angeles
    Vehicle:
    2023 Tacoma TRD OR DCLB
    As a fellow angler, and new owner of my (barely) used Tacoma, I'm very excited to follow this build- thank you for posting! If anything, keep the fish porn coming!
     
  5. Jul 11, 2024 at 1:38 PM
    #5
    HeyB

    HeyB [OP] Well-Known Member

    Joined:
    Jun 11, 2022
    Member:
    #399237
    Messages:
    71
    Gender:
    Male
    Vehicle:
    2022 TRD OR DCLB
    Congrats on your first taco and thank you Bolinas! You’ll love it as your “FISHWHIP”.

    No updates or classic fishporn today (but soon). Here’s a pic from last weekend doing one of the most important things we can… teaching the next generation to appreciate and respect the great outdoors (whatever your outdoor passions are….).

    Unnamed: A privilege to row 7 YO “Team Zebco” down a blue water trout stream. 50% of the time, bead head wolly buggers work every time….

    IMG_4298.jpg
     
  6. Jul 11, 2024 at 1:55 PM
    #6
    bolinas_2

    bolinas_2 Member

    Joined:
    May 13, 2024
    Member:
    #449680
    Messages:
    14
    Gender:
    Male
    First Name:
    Moses
    Los Angeles
    Vehicle:
    2023 Tacoma TRD OR DCLB
    Amen! Looking forward to lots of time on the water with my own boy! We may need to start a TW fly fishing (and tying..) thread…if there isn’t one already ha!
     
  7. Jul 11, 2024 at 2:02 PM
    #7
    HeyB

    HeyB [OP] Well-Known Member

    Joined:
    Jun 11, 2022
    Member:
    #399237
    Messages:
    71
    Gender:
    Male
    Vehicle:
    2022 TRD OR DCLB
    bolinas_2 likes this.
  8. Jul 18, 2024 at 6:20 PM
    #8
    HeyB

    HeyB [OP] Well-Known Member

    Joined:
    Jun 11, 2022
    Member:
    #399237
    Messages:
    71
    Gender:
    Male
    Vehicle:
    2022 TRD OR DCLB
    The not-at-all-sexy (but supremely practical) post on how I spent a year+ figuring out how to make my truck bed (virtually) waterproof…

    I had planned on a “sexy” post on a reasonably novel rod storage solution. Since the remnants of Hurricane Beryl dropped 5-7” of rain on the WHIP last week and we ended up dry as a bone, I’m preempting that to describe how I achieved victory over wet/dusty places to sleep and store stuff. Quick - somebody knock on wood….

    First, this thread from @OmniBot is an extremely helpful starting place. Sealing the Truck Bed…. With Pics

    Also, while the gent in this YouTube video might be a little extreme, the bed teardown really makes it clear how the pieces are put together and where the gaps are.


    Both of those are 2nd Gen, but 3rd is essentially identical. Suspect 4th Gen is too.

    OK, from the bottom of the tub up…

    Drain Holes - I see people plug these. I do not. I’ve never seen signs of water or dust making their way up thru the 3 drain holes (over 13yrs). Try leaving them open to function as intended. They’re about the only area that’s super easy to seal up after you’ve installed a cap.

    Bed Cubbies - These suckers leak in 3 different ways!
    • That nearly useless 120v outlet actually has tons of gaps. Examine it from the backside and seal those up w/ silicone. (See video)
    • Where the cubby and bed mates also leaks water. See referenced TW post above and butyl tape is a good way to seal this up. Silicone caulk should also do it.
    • Finally, into the cubbies themselves via the door “hinges” and drain holes. You can DIY this with fiberglass/epoxy/etc. but fortunately there’s a former forum member @micwillia who came up with an easy 3D printed solution that works like a charm. See this post and as I understand it he’s still reliably taking and shipping orders via the Google order link.
    If you have a 2nd Gen with the small forward cubbies, simple duct tape over the drain holes and sealing where they mate to the bed w/ butyl tape is super easy.

    Bed Lights/Covers - The FISHWHIP came with LED bed lights installed and I definitely had water coming thru to a degree, even though they have a rubber gasket seal. I suspect the factory covers don’t have seals and would tend to leak worse? Since I removed those LEDs and did something custom in this spot I’ve got no useful advice to offer other than silicone and butyl are your friends…

    OK, for the next steps you’re probably best off to just remove a small pile of parts all at once.

    IMG_4328.jpg
    Part-out obviously

    Remove the plastic bed rail caps
    (Blue). Start at the rear above your taillight. Work your fingers under the plastic and slowly lift straight up until you feel the first clip pop. Now just slowly work forward. You can probably use a plastic trim tool to get started but I didn’t find it necessary.

    Remove the front bulkhead rail (green). I believe these are T30 Torx. These bolts are very soft and for some reason super prone to corroding quickly (dissimilar metal on the inserts?). If your truck isn’t really new, I’d suggest a soak with penetrating oil first. Definitely get them started/snugged by hand so you don’t strip them. Consider anti-seize before reinstalling.

    Remove the side utility rails (yellow). Same bolt issues as the front bulkhead, believe it’s the same size Torx.

    Now back to the waterproofing…

    I’d suggest applying foil tape to the top of the bed rails next per @Omnibot’s helpful post. Make sure the surface is clean, but this step is beyond easy and you can’t possibly screw it up. Some folks apply a silicone bead either down the inside edge or around each of the holes. I did neither of those and get zero water and dust intrusion.

    Don’t forget to tape the large rectangular hole on the inside (near the tailgate). I sealed the passenger side only, as the drivers side is the most convenient place to run a wire harness to your cap without bending sheet metal or drilling a hole.

    The next bit is one I think most people skip, but it’s definitely a source of dust intrusion and a little bit of water.

    IMG_4329.jpg

    This picture sucks, but there is an 1/8” or so gap running down both sides where the bed tub and sheet metal overlap. Most of this is hidden behind the utility rails. Run a bead of silicone down the entire length, and maybe do a nicer job than I did on the visible portion.

    Now on to the front bulkhead and this is definitely the area that gives everyone the most problems (Including me).

    First, scrape off the little piece of foam gasket Toyota put underneath the bulkhead rail. It is useless.

    I popped out the plastic end caps and reinstalled them with silicone. That was probably completely unnecessary.

    I’ve seen some people report that their bulkhead had a small drain hole in the bottom of it. Mine did not so ???

    I see most people apply silicone between the bed and rail. I did this too. It did not work great and there is a better way…

    Unfortunately I did not get pictures of this and it might be a little hard to explain, but here goes…

    Using one continuous piece of butyl, start on your metal bed rail (because you’ve still got those plastic bed side trim pieces off, right?). Run across the front edge, turn 90deg down to the composite bed, across the entire length following the forward edge, and repeat up and over the other side.

    That’s probably confusing as hell, and this crudely drawn sketch may not help much…

    IMG_4330.jpg
    I sucked in art class…
    I found a video from ARE on sealing a 2nd Gen, and if you watch the first 1/2 you’ll get a good sense of why you’re starting on the metal bedside and what you’re hoping to achieve when you finally reinstall the plastic bedside trim. I’m just doing that + the most problematic part of the side/front bulkhead gap + underneath the bulkhead, all in one continuous (and waterproof) step.


    If you followed all that, now reinstall the front bulkhead. The 3rd Gen bulkhead already sits slightly proud of the sides and the butyl tape on its own wants to slightly increase that. Before bolting in, tap the bulkhead down a little with a rubber mallet. This simultaneously helps align the bolt holes while super sealing the bed/bulkhead gap. Don’t forget anti-seize on the bolts.

    Now reinstall the plastic trim pieces. I worked from the rear forward. When you get to the front edge, make sure it goes over/around the vertical bits of butyl, and there’s a little bit protruding forward of the trim (on the horizontal portion) that you can smooth out and seal the leading trim edge as shown in the ARE video. God I hope that all made sense! Should have taken pictures…

    You will still have a gap between the bulkhead ends and the bedsides. Go ahead and really force butyl in and around that gap, particularly the leading edge. On a 3rd Gen, it’s a good idea to make sure any height difference between the front bulkhead and side trim is smooth, not abrupt, so your cap’s bulb seal doesn’t have a sharp edge to deal with (ask me how I know…). Butyl works for this too.
    IMG_4331.jpg

    Once your cap is on, nobody (including you) can really see any of this, so be thorough and err on the side of to much sealing here vs cosmetics. This is the spot where everyone has the biggest issues, and it’s mighty hard to effectively address later without removing your cap.

    Now reinstall the side utility rails and you’re done. That probably reads like a whole pile of work, but everything is super easy and if you have all of the tools/materials on hand when you start it’s less than a 2-beer project.

    This post is long enough, so I’ll save tailgate area sealing and chasing various cap leaks from the factory for a later date.

    Obligatory fishporn…
    IMG_4269.jpg
    Keep your fish wet and your truck bed dry.
     
    T4R_hereforbearings likes this.
  9. Jul 18, 2024 at 10:00 PM
    #9
    bolinas_2

    bolinas_2 Member

    Joined:
    May 13, 2024
    Member:
    #449680
    Messages:
    14
    Gender:
    Male
    First Name:
    Moses
    Los Angeles
    Vehicle:
    2023 Tacoma TRD OR DCLB
    GREAT info. Thank you @HeyB for all the detail. Seems like when it comes to this stuff, no such thing as too long of a post. And beaut of Brownie!
     
  10. Jul 21, 2024 at 8:13 AM
    #10
    HeyB

    HeyB [OP] Well-Known Member

    Joined:
    Jun 11, 2022
    Member:
    #399237
    Messages:
    71
    Gender:
    Male
    Vehicle:
    2022 TRD OR DCLB
    It wouldn’t be a FISHWHIP without a serious river quiver.

    Ideally something that is fast & convenient to access, keeps rods safe & out of the way, and always rigged & ready. Mine needs to accommodate lengths from 7-14’, and ideally handle up to 8 rods at a time.

    My previous taco had a cab rack - I used a rod vault and a ski/snowboard rack for rod transport. They worked excellent and did all of the above.

    Since the FISHWHIP doesn’t have a roof rack (which I don’t have any other use for currently), and I’m still stuck driving way to many commuter miles daily, I decided to skip the roof mounted option and try something else…

    About 20 years ago I cobbled together a 4 rod holder out of oak that mounted inside a cap to the window framing. With that as a starting point, and my newly acquired (terrible) stick welding “skills” from building a bed platform, I set out to fabricate something taco specific and much more functional than v1.

    IMG_4207.jpg
    4 rigged & ready. I believe 5 in socks. All super safe & out of the way.
    The end product keeps rods as far away from cargo as possible by following the caps side profile and bolts to the bed utility rails. It holds:
    • 4 rigged rods (up to 12’) conveniently accessible/loadable from the tailgate
    • 4 more rigged, but they must be loaded from inside the cap. Seldom used or needed since I can trailer 4 in the drift boat, but hey, always nice to have options.
    • An additional 6-8 unrigged rods in rod socks.
    A key piece is purchased, vertical mount Rod Savers. A pair of 4 Rod Savers are definitely more convenient than v1’s single 8 Rod Saver FYI. Fewer rods to deal with at a single time.

    IMG_4336.png
    Test fit to finalize dimensions.

    The work in progress pic hopefully shows the basic premise.

    IMG_4337.jpg

    I added Seadek for padding on the horizontal, and an elastic loop to strap down unrigged rods.

    A little D-ring and ‘biner on the bottom clips the elastic loop.

    IMG_4340.jpg

    You can take a rigged rod in half in seconds. The best way to secure the rod tips are Rod Butlers, which also conveniently slip into the cab side Rod Savers without having to open them up (so load/unload from the tailgate). I keep a pile of them hanging near the rear holder. Works like a charm.

    Oh, window is still functional and I can still hang a blackout curtain easily.

    If I was doing it over:
    I wouldn’t change much, except probably extend the height by about a 1/2 inch to make the unrigged storage area a bit more flexible.

    Slick Variant?
    For caps with a windoor, you could definitely make all 8 rigged rods easily accessible from outside the vehicle. You might sacrifice some max rod length and have to screw around w/key locks, but definitely easier to load to the max.

    For the long rods:
    For 13-14’ rods I’ve got a double bungee system strung across the cap top. Works super good enough for my occasional Spey outings, but I’d definitely be looking for an alternate if I lived in the PNW.

    One area I’m super not happy with and haven’t been able to solve - I’d love some suggestions…

    IMG_4208.jpg

    One piece rods are inconvenient. Ideally a removable gasket between the cab and cap would do the trick and be easy to make. The thing that’s stumped me is the taco’s rear window and Leer’s slider open in opposite directions (which seems like a dumb design flaw on Leers end). Reversing the slider direction on the cap seems like a possible first step, but I haven’t been able to figure that out yet.

    Tried the bicycle tire method on my last extended trip. Really worked pretty well for about 10 days, but finally worked its way loose on the long drive home (probably temp change related). Definitely would have snapped a much-loved and irreplaceable streamer rod in the process if I hadn’t considered that possibility and used a heavy cardboard tube to protect it.

    Ideas appreciated! I’ll even throw in some vintage fishporn…
    IMG_4344.jpg
    Swinger Baby!
     
  11. Aug 10, 2024 at 4:27 PM
    #11
    HeyB

    HeyB [OP] Well-Known Member

    Joined:
    Jun 11, 2022
    Member:
    #399237
    Messages:
    71
    Gender:
    Male
    Vehicle:
    2022 TRD OR DCLB
    I should definitely be napping now to rest up for tonight’s fish mission. Since I can’t fall asleep, here’s a little hack I’ll be super grateful for come sunrise…
    IMG_4367.jpg

    This blackout material (from Amazon) works like a champ to keep the truck bed absolutely pitch black, even in a mid-day sun. They were easy to measure and cut, came with the Velcro dots, and 4 go up or down in 60 seconds flat. They seem to provide some insulation value too, just not lots.

    TIP: cut them generously oversized so light doesn’t spill around any edges.

    IMG_4338.jpg

    I tried reflectix originally, but personally wasn’t a fan. I found it bulky and awkward to put up/down/store, plus I felt like I was sleeping in a 70’s spaceship. This stuff just quickly folds flat, and I store it in a flat mesh zipper pouch to keep it out of the way and give it some air circulation for the times I stow the curtains with a bit of condensation.

    Alright, fresh fishporn from last night. Not a bad opening trout…
    IMG_4379.jpg
    Kype, meet rodent. That dorsal should win prizes…
     
  12. Aug 15, 2024 at 6:01 PM
    #12
    HeyB

    HeyB [OP] Well-Known Member

    Joined:
    Jun 11, 2022
    Member:
    #399237
    Messages:
    71
    Gender:
    Male
    Vehicle:
    2022 TRD OR DCLB
    Credit where credit’s due, and a pro tip for aspiring after-dark trout anglers…

    The only thing that comes close to railing a giant in the pitch black (my fav is Scamania, which I can’t yet manage to do reliably all summer-long), is watching comets shooting thru a clear nights sky while playing with a friggin’ light-Sabre! Doesn’t matter if the fishing is just decent or awesome - I always feel like a kid again!

    IMG_4381.jpg
    Big thanks to T for turning me on to the dark side and the obvious benefits of the “Triangle”. Huge props to Danno @ 1884 (Baldwin,MI fly shop. Look ‘em up) for getting Rio to do a custom run of O.G. 8Wt Lumilux triangle tapers. Betting the few of us had already scrounged every “old-stock” taper from dusty fly shop corners around the globe. No more…

    Accept no substitutes. Feel like a kid again. Own the night…
     
    koditten and bolinas_2 like this.
  13. Aug 25, 2024 at 5:36 PM
    #13
    HeyB

    HeyB [OP] Well-Known Member

    Joined:
    Jun 11, 2022
    Member:
    #399237
    Messages:
    71
    Gender:
    Male
    Vehicle:
    2022 TRD OR DCLB
    I’ve not touched on my 1/2 bed platform yet. I covered the general construction in TW’s awesome Show Us Your Truck Bed Sleeping Platform/Drawer/Storage System thread and some small updates here

    One of these days I’ll do a write up documenting how I use it, since it’s been game changing for me.

    Today, I’ll just note that a super-light platform and no-tool removal is awesome when:
    1. You need to do actual truck stuff vs fun stuff, and can pull the platform easily (without help) in about 120 seconds.
    2. You can simply hose out the fun stuff+truck stuff grime before you put it back in.
    IMG_4454.jpg

    Sorry for the lack of fresh fishporn. Hustling to catch up after the last north woods adventure. Here’s a moment of zen around the campfire contemplating a day well fished…

    IMG_4444.jpg

    B
     
  14. Aug 25, 2024 at 5:41 PM
    #14
    koditten

    koditten Well-Known Member

    Joined:
    Sep 8, 2013
    Member:
    #112077
    Messages:
    19,600
    Gender:
    Male
    First Name:
    Kirk
    Central Michigan
    Vehicle:
    04 trd x-cab 4 x 4 3.4l
    Reserected from the dead.
    Only subscribing for more pics of the drift boat.

    Building drift boats is a hobby of mine.
     
  15. Aug 25, 2024 at 6:05 PM
    #15
    HeyB

    HeyB [OP] Well-Known Member

    Joined:
    Jun 11, 2022
    Member:
    #399237
    Messages:
    71
    Gender:
    Male
    Vehicle:
    2022 TRD OR DCLB
    Nice! Wood, glass, or aluminum?

    I wish I had the time, patience, and skills required for any of those, but the craftsmanship on a well built woody (drifter or AuSable boat) will always have a soft spot in my heart.

    I’ve rowed most Y2K+ boats, but pulling on my 4th Hyde…. XL low side currently. Heavier hull, but an amazingly versatile all-species, all-seasons greater Midwest fishing platform.

    Best,

    B
     
    koditten[QUOTED] likes this.
  16. Aug 25, 2024 at 6:29 PM
    #16
    koditten

    koditten Well-Known Member

    Joined:
    Sep 8, 2013
    Member:
    #112077
    Messages:
    19,600
    Gender:
    Male
    First Name:
    Kirk
    Central Michigan
    Vehicle:
    04 trd x-cab 4 x 4 3.4l
    Reserected from the dead.
    I'm a fabricator by hobby.

    I like to build welded aluminum boats.

    I do have a link in my signature on the build. You may have to turn your phone sideways for the link to show at the bottom of my posts.

    I was on the sticks for a few other boats after I sold mine. I much prefer my aluminum drifter.

    Keep the updates coming!
     
  17. Aug 25, 2024 at 8:40 PM
    #17
    HeyB

    HeyB [OP] Well-Known Member

    Joined:
    Jun 11, 2022
    Member:
    #399237
    Messages:
    71
    Gender:
    Male
    Vehicle:
    2022 TRD OR DCLB
    Kirk, thanks for pointing me to your sig. That’s a brilliant build! Wish I had those fabrication skills!

    I’ve rowed more rotomolded hulls (Boulder, Hog Island) than AL, and would have said that’s because I’m in the Midwest, but I see you’re a MI guy too… If you no longer own the boat and want to get out for a fish just hit me up. I’m in metro-D.

    I leave my phone in the car when I’m fishing and am awaiting a spectacular pic of rowing out under the “super moon” last week, but here are a few drift boat hacks I inadvertently photographed while doing some boat maintenance @ camp this past week. I’m a serial tinkerer, and they definitely don’t all work, but these have stood the test of time…

    IMG_4436.jpg
    • The front “cooler seat” concept generally sucks (particularly if you row 1-man trips) as the weight distribution goes decidedly front-heavy. Pulling it into the rowers compartment provides better balance (read: handling) and allows you to up/downshift extra weight as the seasons/mission changes.
    • That front “seat” is the first piece of metal I ever “fabricated”. The Stratocaster casting platform is an aluminum deck that mates to the standard Tempress QD and fits my front storage box. It’s amazing for about 3 months out of the year when you’re sight fishing. I can switch between it and a standard seat instantly.
    IMG_4435.jpg
    • On the rear casting brace (either side) I’ve installed a clevis+ bungee loop that normally holds a hand towel on one side and a fish glove on the other. This is an improvement on a system I picked up from a long-time MI trout guide. For this particular trip it’s holding a gong, because it’s definitely one of those serious-minded mid summer smallmouth trips….
    • In the very center, there’s a magnet holding a pair of nippers. There’s one on the front brace too. Your anglers always misplace em, and while I keep a full “toolbox” on the rowers seat, it’s easier to say “right in front of you” when they inevitably ask. These are cheap Amazon phone holder magnets, but still going strong after 5-6 years.
    • To the way left, that’s a “plug puller” idea I got from CJ down on the White River and ran with. 3-piece extending painting pole, roller handle, and a “pig tail” I came across at a Bass Pro sold as a sand spike. Whole thing cost $20 to put together, and I don’t think I’ve lost a streamer in years unless it’s on a chunky fish, the way it should be. Good thing when your streamer ties are 30-60min. Quick Fists to mount it to the under-gunnel costs more than the puller or the 2nd streamer you save…
    • To the way right, if you rock a side-anchor (and I personally hate floor anchors), a Ronstan halyard bag keeps your rope out of the way. Extra nice when you’re rowing a full walk-around layout, fishing the long rods, and have to net a good fish.
    Best,

    B
     
    koditten likes this.
  18. Aug 26, 2024 at 7:15 AM
    #18
    koditten

    koditten Well-Known Member

    Joined:
    Sep 8, 2013
    Member:
    #112077
    Messages:
    19,600
    Gender:
    Male
    First Name:
    Kirk
    Central Michigan
    Vehicle:
    04 trd x-cab 4 x 4 3.4l
    Reserected from the dead.
    What do you have on the bottom of the sled?

    I used a water based epoxy called Wetlander. This stuff is super slippery!

    I'll be using it on my next build.
     
  19. Aug 26, 2024 at 10:16 AM
    #19
    HeyB

    HeyB [OP] Well-Known Member

    Joined:
    Jun 11, 2022
    Member:
    #399237
    Messages:
    71
    Gender:
    Male
    Vehicle:
    2022 TRD OR DCLB
    Wetlander is supposed to be Da Bomb on AL hulls. I've never rowed one personally, just bare aluminum or a mechanically fastened UHMW bottom. I definitely dislike bare AL.

    My bottom is somewhat unique and no longer available from Hyde. It's a glue-on UHMW bottom that wraps slightly around the chines that Hyde called the "G4 Shoe". I love it since I pretty regularly rope the boat in and out of rivers without launches and fish some insanely boney water on summer lows and never worry about a thing. The downside is you need to maintenance it every 2-3 seasons, and if you don't keep up with it the adhesive eventually fails (which is why it's discontinued). Mine's pushing 14 years, so pretty durable if you simply re-caulk it semi-regularly.

    I've been toying with getting a new boat, and lack of the shoe option has kept me from pulling the trigger. Suppose I'll need to look into how wetlander does on fiberglass one of these days.

    Best,

    B
     
    koditten likes this.
  20. Aug 27, 2024 at 2:38 PM
    #20
    HeyB

    HeyB [OP] Well-Known Member

    Joined:
    Jun 11, 2022
    Member:
    #399237
    Messages:
    71
    Gender:
    Male
    Vehicle:
    2022 TRD OR DCLB
    21.5” of predators stomping hair-frogs this past week…
    IMG_4029.jpg
    (Ole’ boy is bloody but unbowed. Tail is grizzled but he ate and fought like a champion)

    Not terribly vintage swinger-porn on the North Shore…
    IMG_4458.jpg
    (Go ahead and waterboard me… not disclosing where this is. Nirvana…)

    And not the “champion” super moon row out shot I was expecting. There’s a better one in there somewhere…
    IMG_4030.jpg
    (And that’s a shitty mid-river barge, not the super moon freakishly low on the horizon. If ya know the “lollipop white pine” then ya know…)
    B

    P.S. WTF is the “first of 4 super moons”? Semi-super moon?
     
    koditten likes this.

Products Discussed in

To Top