

-
Welcome to Tacoma World!
You are currently viewing as a guest! To get full-access, you need to register for a FREE account.
As a registered member, you’ll be able to:- Participate in all Tacoma discussion topics
- Communicate privately with other Tacoma owners from around the world
- Post your own photos in our Members Gallery
- Access all special features of the site
 Voiding warranty.
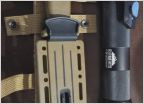 Flashlight/knife mounting options
 3rd Gen Halogen Lights
 No Drill Gas Hood Struts
 Tray for eating in driver seat?
 Fab Fours Bumper Owners?
Lug Stud Replacement / Rear Drum Brake Cover Removal
Discussion in '3rd Gen. Tacomas (2016-2023)' started by MGM_Grand, May 12, 2019.


