1. Welcome to Tacoma World!

    You are currently viewing as a guest! To get full-access, you need to register for a FREE account.

    As a registered member, you’ll be able to:
    • Participate in all Tacoma discussion topics
    • Communicate privately with other Tacoma owners from around the world
    • Post your own photos in our Members Gallery
    • Access all special features of the site

Installation of Lower Ball Joints/Front Shocks. Tips or Tricks?

Discussion in '1st Gen. Tacomas (1995-2004)' started by Tjsingle26, Aug 29, 2019.

  1. Aug 29, 2019 at 9:54 AM
    #1
    Tjsingle26

    Tjsingle26 [OP] Well-Known Member

    Joined:
    Jul 18, 2013
    Member:
    #108524
    Messages:
    471
    Gender:
    Male
    First Name:
    Tom
    PA
    Vehicle:
    03 Tacoma xtra cab 4x4
    Hey Guys,

    I am looking into installing my new OEM LBJs and Blistein 4600s into my truck over the weekend. The shop I typically go to isn't able to fit me in until next week and with a long weekend coming up I figure it might be a good time to give it a shot myself. It'll be nice to save some money as well.

    Replacing the front end components kind of scares me, but I think I am capable.

    I've watched a couple of videos online of the installation of the LBJs. It doesn't seem all that hard to do, but I was wondering if there was any tips or lessons learned about replacing them. I believe the ones on my truck are original, I am the second owner.

    A couple of questions about LBJs/Shock Installation:
    1. Torque Specs for the bolts and castle nut? I have read that the mounting nuts are 43 ft-lb and the stud on the balljoint is 105 ft-lb.
    2. What tools? Pitman Puller and some sort of press?
    3. Is using a spring compressor the best method for assembling the shocks? I've seen people use the weight of their truck to compress the coil, but to me that seems more dangerous than using a spring compressor...

    Does anyone have any additional advice or tips for the install of these parts?

    Thank you!
     
  2. Aug 29, 2019 at 10:00 AM
    #2
    eon_blue

    eon_blue Okayest Member

    Joined:
    Mar 4, 2016
    Member:
    #180213
    Messages:
    69,210
    Gender:
    Male
    First Name:
    Ryan
    Azusa, CA
    Vehicle:
    '04 TRD 3.4l 4x4 5sp manual Xtraca & '96 4runner 4x4 5spd manual
    Print these out and keep them handy (I laminated them to keep in my truck)

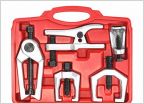
    LBJs are pretty darn easy, I highly recommend using a Pitman puller to separate the outer tie rod as well as the old ball joint. Smacking it loose with a hammer isn't as easy as the videos make it look (at least it wasn't for me). Pitman pullers are cheap and work great.

    I would take your shock and coil assembly out and have a shop separate them to be honest...spring compressors are no joke and can do serious bodily damage if you make a mistake with them. A shop will separate them for you and put the new ones together quickly and cheaply, then all you have to do is bolt them in.

    TORQUE SPECS PG1.jpg
    TORQUE SPECS PG2.jpg
     
    dweikum, 1997tacomav6, jammer and 6 others like this.
  3. Aug 29, 2019 at 10:05 AM
    #3
    Tjsingle26

    Tjsingle26 [OP] Well-Known Member

    Joined:
    Jul 18, 2013
    Member:
    #108524
    Messages:
    471
    Gender:
    Male
    First Name:
    Tom
    PA
    Vehicle:
    03 Tacoma xtra cab 4x4

    Thanks man. That is incredibly helpful!

    I wouldn't need a press or anything for the LBJs? I was thinking about using Advanced Auto Parts loaner tool program. A puller at Harbor Freight its like $14 though.

    The spring compressor scares me, but I think its doable. Not too sure of shops in my area who would assemble the shocks for me...
     
  4. Aug 29, 2019 at 10:08 AM
    #4
    eon_blue

    eon_blue Okayest Member

    Joined:
    Mar 4, 2016
    Member:
    #180213
    Messages:
    69,210
    Gender:
    Male
    First Name:
    Ryan
    Azusa, CA
    Vehicle:
    '04 TRD 3.4l 4x4 5sp manual Xtraca & '96 4runner 4x4 5spd manual
    No press needed for the LBJs, after you separate them with the pitman puller the new one goes right in place when you torque it down.
     
    Area51Runner likes this.
  5. Aug 29, 2019 at 10:09 AM
    #5
    Tjsingle26

    Tjsingle26 [OP] Well-Known Member

    Joined:
    Jul 18, 2013
    Member:
    #108524
    Messages:
    471
    Gender:
    Male
    First Name:
    Tom
    PA
    Vehicle:
    03 Tacoma xtra cab 4x4
    Good deal. Thank you!
     
  6. Aug 29, 2019 at 10:32 AM
    #6
    jbrandt

    jbrandt Made you look

    Joined:
    Feb 12, 2011
    Member:
    #51038
    Messages:
    17,612
    Gender:
    Male
    First Name:
    Justin
    El Dorado, CA (NOT El Dorado Hills)
    Vehicle:
    '04 TRD Tacoma 4x4 DC
    Kings, J59's Total Chaos UCAs Custom skids Sticker mod
    Make sure you support the frame on jackstands because you need the suspension to be free and drooped all the way down to remove the shocks.

    The spring compressor is definitely intimidating, but just take your time, and like firearms, don't point the springs at anything you don't want destroyed, lol.

    I recommend using a hand wrench or a socket rather than a drill or an impact gun with tightening the compressor arms. Like I said, go slow.

    A little trick is to NOT completely remove the castle nuts (for the tie rod ends and the lower control arm) before you pop them free with the pitman arm puller. That way, when you pop the arm free, things don't go shooting across the garage.

    For re-installing the castle nuts, use the torque specs, and if the cotter pin doesn't quite line up, tighten (don't loosen) the castle nut until you can get a cotter pin in.

    Also, for the 4 bolts on the bottom of the BJ: be cognizant of the length of the bolts. Some people say the bolts are all the same size, mine were not. I guess it depends on which BJs you get... I wasn't paying attention and I tried to install a shorter bolt where the longer size was needed, and I stripped the first couple threads of my spindle. :censored: Luckily, I was able to use a tap to clean out the threads and use a loner bolt and I dodged a bullet of having to buy a new spindle.
     
    jammer and JJ04TACO like this.
  7. Aug 29, 2019 at 11:18 AM
    #7
    Tjsingle26

    Tjsingle26 [OP] Well-Known Member

    Joined:
    Jul 18, 2013
    Member:
    #108524
    Messages:
    471
    Gender:
    Male
    First Name:
    Tom
    PA
    Vehicle:
    03 Tacoma xtra cab 4x4

    Excellent tips. Thank you guys for the help. I'll post some pictures of the install/completed product!
     
  8. Aug 29, 2019 at 11:42 AM
    #8
    Area51Runner

    Area51Runner Well-Known Member

    Joined:
    Jun 26, 2014
    Member:
    #132748
    Messages:
    11,939
    Gender:
    Male
    First Name:
    Mike
    Northern California, Bay Area
    Vehicle:
    02 3.4 DC TRD PreRunner 4WD SWAP
    Here's the relevant pages from the FSM (you'll find that in the stickies section of the 1st gen forum)

    Pair this with the info @eon_blue posted and reference the lower ball joint vid below - you'll do fine. Be safe, take your time.

    Personally, I'd pay a shop to the do coilover assembly. All it takes is one f-up using those cheapo spring compressors from harbor freight or autozone and you're hurting. A lot of energy stored in the coil spring. Enough to seriously injure/kill. Not trying to be a d*ck, just calling it for what it is. Follow the FSM to remove the coilover assembly and take it to your local shop to assemble it with your new parts. Charge should be minimal.


    Lower Ball Joint

    https://youtu.be/bfLvtEnX9qk
     

    Attached Files:

    dweikum likes this.
  9. Aug 29, 2019 at 11:48 AM
    #9
    Area51Runner

    Area51Runner Well-Known Member

    Joined:
    Jun 26, 2014
    Member:
    #132748
    Messages:
    11,939
    Gender:
    Male
    First Name:
    Mike
    Northern California, Bay Area
    Vehicle:
    02 3.4 DC TRD PreRunner 4WD SWAP
    One more tip, when disconnecting the outer tie rod and then the lower ball joint, flip the castle nut over and thread it back onto the stud. Just a few turns to get it flush. Then use the puller. Once you torque it with the ratchet, when it snaps free it will not go flying. Once broken free, remove the castle nut and proceed.

    Don't forget to replace the bolts for the lower ball joint - don't reuse them.

    Once done with your replacements, get an alignment. :thumbsup:
     
    Last edited: Oct 20, 2019
    Skada and eon_blue like this.
  10. Aug 29, 2019 at 11:54 AM
    #10
    Area51Runner

    Area51Runner Well-Known Member

    Joined:
    Jun 26, 2014
    Member:
    #132748
    Messages:
    11,939
    Gender:
    Male
    First Name:
    Mike
    Northern California, Bay Area
    Vehicle:
    02 3.4 DC TRD PreRunner 4WD SWAP
    Here is one more vid, his yoga approach to free the lower shock mount bolt :rofl:

    he does mention pepboys doing his coilover for 40 dollars. again, well worth it imo.

    https://youtu.be/35V_l2Y8w_U?t=105
     
  11. Aug 29, 2019 at 11:57 AM
    #11
    Tjsingle26

    Tjsingle26 [OP] Well-Known Member

    Joined:
    Jul 18, 2013
    Member:
    #108524
    Messages:
    471
    Gender:
    Male
    First Name:
    Tom
    PA
    Vehicle:
    03 Tacoma xtra cab 4x4

    Thank you!

    In terms of the bolts, are there really a difference in LH and RH bolts....?

    EDIT, I'm dumb, its the same part number :facepalm:

    upload_2019-8-29_14-56-42.jpg


    Lol. A local shop wanted $170 to assemble my shocks.
     
    Last edited: Aug 29, 2019
    dweikum likes this.
  12. Aug 29, 2019 at 12:05 PM
    #12
    Area51Runner

    Area51Runner Well-Known Member

    Joined:
    Jun 26, 2014
    Member:
    #132748
    Messages:
    11,939
    Gender:
    Male
    First Name:
    Mike
    Northern California, Bay Area
    Vehicle:
    02 3.4 DC TRD PreRunner 4WD SWAP
    The bolt should be (no difference in sides):

    90119-10933
    https://partsfactory.camelbacktoyota.com/oem-parts/toyota-bolt-w-washer-9011910933

    Your local dealer might have them in stock


    EDIT: lol, just saw YOUR edit... :rofl:
     
  13. Aug 29, 2019 at 2:25 PM
    #13
    ElTaquitoJr

    ElTaquitoJr Well-Known Member

    Joined:
    Aug 12, 2019
    Member:
    #302037
    Messages:
    105
    Gender:
    Male
    Vehicle:
    01 Tacoma PreRunner 4 cyl
    How can I like this a million more times?
     
    eon_blue[QUOTED] likes this.
  14. Aug 29, 2019 at 2:42 PM
    #14
    eon_blue

    eon_blue Okayest Member

    Joined:
    Mar 4, 2016
    Member:
    #180213
    Messages:
    69,210
    Gender:
    Male
    First Name:
    Ryan
    Azusa, CA
    Vehicle:
    '04 TRD 3.4l 4x4 5sp manual Xtraca & '96 4runner 4x4 5spd manual
    Just a couple torque spec sheets I got from another member on here that shared them in a different post, pay it forward :cheers:

    Very handy to keep in the truck...for the longest time I would always have to search online for torque specs when I was in the middle of working on something and it was a pain trying to dig them up and find a good source for them.
     
    Area51Runner and Tjsingle26[OP] like this.
  15. Aug 31, 2019 at 2:03 PM
    #15
    Tjsingle26

    Tjsingle26 [OP] Well-Known Member

    Joined:
    Jul 18, 2013
    Member:
    #108524
    Messages:
    471
    Gender:
    Male
    First Name:
    Tom
    PA
    Vehicle:
    03 Tacoma xtra cab 4x4
    Anyone who’s installed 4600s. Is this plastic retainer needed on the shock assembly? I can’t tell if it’s packaging to hold the dust boot on or if its actually supposed to be there. It has to be removed to place the spring perch. I didn’t see anything in the instructions saying what it was.

    50FC210C-F576-4D68-B46F-7F3B13CEACD1.jpg
     
  16. Aug 31, 2019 at 3:24 PM
    #16
    eon_blue

    eon_blue Okayest Member

    Joined:
    Mar 4, 2016
    Member:
    #180213
    Messages:
    69,210
    Gender:
    Male
    First Name:
    Ryan
    Azusa, CA
    Vehicle:
    '04 TRD 3.4l 4x4 5sp manual Xtraca & '96 4runner 4x4 5spd manual
    I'm not sure but I can't imagine that little plastic piece serves any kind of installation purpose...maybe someone else can confirm though.
     
  17. Aug 31, 2019 at 3:36 PM
    #17
    Tjsingle26

    Tjsingle26 [OP] Well-Known Member

    Joined:
    Jul 18, 2013
    Member:
    #108524
    Messages:
    471
    Gender:
    Male
    First Name:
    Tom
    PA
    Vehicle:
    03 Tacoma xtra cab 4x4
  18. Sep 2, 2019 at 2:27 PM
    #18
    Trapperpete52

    Trapperpete52 Well-Known Member

    Joined:
    Jul 1, 2015
    Member:
    #158584
    Messages:
    141
    Gender:
    Male
    First Name:
    Pete
    Vehicle:
    98 Tacoma 4 X 4 5 speed 93 Tacoma 4 X 4 5 speed 95 Tacoma 4 X 4 5 speed
    roll bar and lights
    One more tip learned the HARD way. Locktite is your friend on the LBJ bolts. My 98 came loose and cost me a bolt broke off inside the steering knuckle. You don't want to buy one of those $480 for a new one.
     
    Tjsingle26[OP] likes this.
  19. Sep 2, 2019 at 2:38 PM
    #19
    JPinFL

    JPinFL Well-Known Member

    Joined:
    Nov 16, 2015
    Member:
    #169817
    Messages:
    918
    Vehicle:
    '01 Tacoma Xtra Cab 4x4
    Liberally spray the 4 bolts for the lower ball joints with PB Blaster. If possible, the night before. They can be a bitch to remove.
     
    Tjsingle26[OP] likes this.
  20. Sep 2, 2019 at 6:55 PM
    #20
    Tjsingle26

    Tjsingle26 [OP] Well-Known Member

    Joined:
    Jul 18, 2013
    Member:
    #108524
    Messages:
    471
    Gender:
    Male
    First Name:
    Tom
    PA
    Vehicle:
    03 Tacoma xtra cab 4x4
    Thanks for the tips guys! I ended up using a spring compressor today without any issues. Front shocks are ready to be installed. New LBJ bolts come in tomorrow as well. Plan on installing everything on Sunday.

    7C75CBAF-9208-48F8-858A-F69FAF2F9548.jpg
     
    cruiserguy and JPinFL like this.

Products Discussed in

To Top