1. Welcome to Tacoma World!

    You are currently viewing as a guest! To get full-access, you need to register for a FREE account.

    As a registered member, you’ll be able to:
    • Participate in all Tacoma discussion topics
    • Communicate privately with other Tacoma owners from around the world
    • Post your own photos in our Members Gallery
    • Access all special features of the site

Icon Lift Review and Info

Discussion in 'Suspension' started by whiskersfox, Dec 17, 2014.

  1. Dec 17, 2014 at 11:27 PM
    #1
    whiskersfox

    whiskersfox [OP] Active Member

    Joined:
    Oct 14, 2014
    Member:
    #140329
    Messages:
    41
    Gender:
    Male
    First Name:
    Aaron
    La Habra, CA
    Vehicle:
    '07 PreRunner TRD OffRoad 4Door Short Bed
    Icon coilover, total chaos UCA, OME rear spring, Icon shocks, custom rear lights for bed, all pro rear bumper, all pro IFS skid
    Hello TW. After 2 months of tireless research, I finally ordered my lift kit.

    First off, I am installing this myself, so if anyone has some expertise at installing these lifts or good references for installation guide, etc please let me know!!! Also, specifics such as settings and what-not for alignment would be VERY MUCH appreciated!!!!!

    2007 Tacoma Prerunner TRD OffRoad

    Here is the damage:
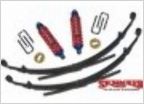
    • 1 Pair - Icon Extended Travel Coilovers
    • 1 Pair - Total Chaos Upper Control Arms
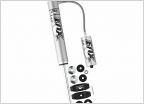
    • 1 Pair - Standard 0-2" Icon Rear Shocks
    • 1 Pair - OME Dakar Leaf Springs
    • 1 Pair - Extended Rear Brake Lines
    • 1 Pair - Upgraded Front Brake Lines
    • 1 - Carrier Bearing Drop Kit
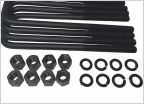
    • 1 - All Pro U Bolt Flip Kit
    • 1 - Icon Spanner Wrench
    • 1 - Wheelers Bushing Set For OME Leafs
    Total: Approx = $2780

    Also getting ready to order my rear bumper, sliders, and skid plates through All Pro.

    I purchased all of my lift through Wheelers Off-Road. I was attracted to them after speaking with Dan through email, and I was sold on them by their prices. Part of my research was wanting to talk to someone who deals with the lifts everyday. Dan was EXTREMELY helpful and very kind. He answered all my questions and explained all the little details in a way I could understand. I would highly recommend him and the company. His service was excellent, the prices were great, I got free shipping on over half my order, and got a 5% TW discount.

    As for the lift, I just ordered it today so I will be installing it myself when it arrives. I will update with pics and info as it is available. Got my Tacoma 2 months ago and this is the beginning of the long process of making it a wheeler. So Tacoma Build, here we go!


    UPDATE........................................................

    Just Finished the install this morning. Did my front end on Sunday, it took the whole day with two people. Did the rear on Monday (yesterday). And I finished this morning with bleeding the brakes and the last few touches.

    So here is how it went..............

    THE FRONT

    I used a video online to help with the front. Here is the video "https://www.youtube.com/watch?v=bbsTJgb6S_c" The video was EXTREMELY helpful, especially considering I have never messed with IFS before. Started by removing all the parts (sway bar mount, spindle, coilover, UCAs, etc.) All of that was pretty easy. Removing the UCA through-bolt requires you to bend the wheel well a bit. Even after bending it didnt fit so we used a punch to hit it out instead. This method seems to go well with a little bending. Getting the new coilovers in was a bit of a challenge. One of us had to pin our back against the wheel well and push (VERY HARD) on the lower control arm to allow enough drop to get the coilover in. Proceeded to install all pieces. Getting the first side sway bar pin put back in the spindle was kinda tough but the second side was easy, guessing because the first side had the sway bar spacer and the second didnt yet. This could probably be avoided by loosening both sides prior to reinstall. The brake lines looked like they were going to be too short but they appear ok now that it is all installed. Other than that, it all went back together nicely. Also, I noticed that the spindle seemed to be close to the inner sidewall of the tire. If you are running anything but stock tires, you will need wheel spacers or rims with different backspacing.

    THE REAR

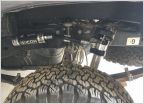
    I thought the rear was going to be easier even though we did not have a video. It ended up taking longer. We had a bit of trouble removing the original shocks as the shock turns when you try to loosen the lock nut. We ended up having to take a pair of vice grips, attach them to the shock rod as tight as possible and then remove the nut. The leaf springs came out with no problem. The brake lines were a pain. I would recommend removing the spare tire and using that space to do the work, much better view. The nuts connecting the brake line were very tight, and being of soft material, we took our time to get those off. We ended up using a clamp to squeeze the 10mm wrench a bit tighter so as to not strip the nut. The new Drivers side brake line went on no problem. The passenger side one did not. We quickly realized we had to file out the holes larger to fit the new brake line and get the clip on. We used a file but I heard a dremmel works well (keep in mind though you are right next to the gas tank). After that pain in the arse, it was all pretty easy. We removed the shackles from the old springs, put them on the new ones and mounted those easy squeezy. The new shocks required a bit of cutting to the rubber bushings for the top mount. The new ones were much larger and did not fit well so I simply took a razor and cut about half of it to a smaller diameter. After this we bled the brake lines, put the wheels back on and washed off all the leaked brake fluid. Also installed the carrier bearing drop kit which is a no brainer.

    RESULTS

    I am pretty happy with the stance of the vehicle. I did raise the coilovers a bit prior to install but it is still a little to high in the back for my taste. I got about 2.5 in lift in front and 2.75 in the rear. I am probably going to raise the front a little more and I hope that the ALL PRO rear bumper will drop the back just a wee bit as well.
    The front end rides wonderfully. I havent taken it off road yet but it handles well in the street and takes bumps well. The back is a different story. The rear feels to stiff to me. I am hoping that adding the rear bumper will help. They seem like they would be great under load, but for offroading with little to no load in the back they seem like they will be too stiff. Personally for offroading application I would recommend looking for a larger leaf pack with smaller leafs, maybe an 8 or 10 leaf pack with no overload would probably be best.
    I can definitely tell that my alignment is off but I am waiting to be done adjusting my front to do the alignment. As of now my truck wanders all over the road. I do most work myself but alignment is something I will trust to my local mechanic.

    Well that is it for now. If anyone has any questions or comments feel free to post or PM me. Hope you enjoyed this and it can help some people in their DIY Lift projects.

    I will be posting pictures soon!!!
     
    Last edited: Jan 1, 2015
  2. Dec 18, 2014 at 10:58 AM
    #2
    TacoDeLaPlaya

    TacoDeLaPlaya Total Automotive Performance Sleeper Cell

    Joined:
    Apr 15, 2013
    Member:
    #102133
    Messages:
    925
    Gender:
    Male
    First Name:
    Bobby
    Del Mar, CA
    Vehicle:
    06 Silver Access cab
    Custom sotoshi deep dish grill 6112 front 5100 rear Leer 100xl
    Awesome sounds like a nice setup. Post some pics when you start working on it.
     
  3. Jan 1, 2015 at 2:20 PM
    #3
    whiskersfox

    whiskersfox [OP] Active Member

    Joined:
    Oct 14, 2014
    Member:
    #140329
    Messages:
    41
    Gender:
    Male
    First Name:
    Aaron
    La Habra, CA
    Vehicle:
    '07 PreRunner TRD OffRoad 4Door Short Bed
    Icon coilover, total chaos UCA, OME rear spring, Icon shocks, custom rear lights for bed, all pro rear bumper, all pro IFS skid
    Here are some pics of before and after.

    IMAG0435.jpg
    IMAG0442.jpg
    IMAG0446.jpg
    IMAG0448.jpg
    IMAG0452.jpg
     
  4. Jan 2, 2015 at 8:07 AM
    #4
    2012SilverSport

    2012SilverSport Well-Known Member

    Joined:
    Apr 16, 2012
    Member:
    #77067
    Messages:
    594
    Gender:
    Male
    Guam
    Vehicle:
    2012 Silver TRD Sport Double Cab
    CS Jumpers LED's throughout the cab and marker/DTRL's weather techs/seat covers. Head unit Pioneer AVHX5500BHS, Speakers, Front, Polk Audio DXi 6500 component, rear Polk Audio DXi 650s Subwoofer Sound Ordinance B-8PS, Amplifier Alpine KTP 445U. Front ICON extended travel 2.5 remote resi, Camburg UCA's. Rear ICON 2.0 remote res rear. Wheelers 3 leaf HD progressive AAL,
    looks good! congrats on the new lift installed.
     
  5. Jan 5, 2015 at 6:46 PM
    #5
    TXTaco13

    TXTaco13 Taco/T4R Enthusiast

    Joined:
    Aug 25, 2013
    Member:
    #111175
    Messages:
    6,936
    Gender:
    Male
    Dallas, Texas
    Vehicle:
    4TH GEN V8 4X4 T4R
    '83 CJ7 '19 MT 07
    Looks good! How high do you have the coilovers cranked up?
     
  6. Jan 5, 2015 at 6:54 PM
    #6
    cgs2k2

    cgs2k2 old man

    Joined:
    Apr 24, 2010
    Member:
    #35923
    Messages:
    3,248
    Gender:
    Male
    woah that looks so high for 2.5 inches up front
     
  7. Jan 5, 2015 at 6:55 PM
    #7
    TXTaco13

    TXTaco13 Taco/T4R Enthusiast

    Joined:
    Aug 25, 2013
    Member:
    #111175
    Messages:
    6,936
    Gender:
    Male
    Dallas, Texas
    Vehicle:
    4TH GEN V8 4X4 T4R
    '83 CJ7 '19 MT 07
    I think its the tiny tires
     
  8. Jan 6, 2015 at 10:41 AM
    #8
    Westside

    Westside Southbound

    Joined:
    Jan 24, 2012
    Member:
    #71292
    Messages:
    5,328
    Gender:
    Male
    First Name:
    JT
    Nor Cal, East Bay
    Vehicle:
    TRD Sport 4X4
    I'm curious what you did for bump stops with the u bolt flip?
     
  9. Jan 6, 2015 at 10:45 AM
    #9
    Mademan925

    Mademan925 Senor Taco

    Joined:
    Nov 7, 2012
    Member:
    #90668
    Messages:
    7,636
    Gender:
    Male
    First Name:
    Nick
    Discovery Bay, CA
    Vehicle:
    2014 4x4 TRD OFFROAD DCSB
    enough to go over stuff
    Looks awesome. I have a similar setup and couldnt be happier.
     
  10. Jan 7, 2015 at 1:11 PM
    #10
    whiskersfox

    whiskersfox [OP] Active Member

    Joined:
    Oct 14, 2014
    Member:
    #140329
    Messages:
    41
    Gender:
    Male
    First Name:
    Aaron
    La Habra, CA
    Vehicle:
    '07 PreRunner TRD OffRoad 4Door Short Bed
    Icon coilover, total chaos UCA, OME rear spring, Icon shocks, custom rear lights for bed, all pro rear bumper, all pro IFS skid
    I have about 1.75in of thread showing on the coilovers.
    -------------------------------------

    I also think it looks like more but I do believe it is the tires. It settled at about 2.75 in. I am getting some 285/ 75/ 16s this weekend. Will update with pics then.

    -------------------------------------

    For the bump stops I just drilled some holes in the plates of original bumpstops, I believe it was about 4in apart. The Flip Kit came with new bolts to use for it, all you have to do is drill the holes in the factory bumpstops.
     
    Last edited: Jan 7, 2015
  11. Jan 7, 2015 at 6:44 PM
    #11
    TXTaco13

    TXTaco13 Taco/T4R Enthusiast

    Joined:
    Aug 25, 2013
    Member:
    #111175
    Messages:
    6,936
    Gender:
    Male
    Dallas, Texas
    Vehicle:
    4TH GEN V8 4X4 T4R
    '83 CJ7 '19 MT 07
    If you want to reply to several people, hit the "+ button to as many people as you want to, then the quote button to the last person you want to reply to. Took me a little bit to figure out how to do it when I first got on here. Lookin forward to seeing some pics with the new tires!!
     
  12. Jan 9, 2015 at 5:52 PM
    #12
    codyb1

    codyb1 Well-Known Member

    Joined:
    Jan 25, 2012
    Member:
    #71405
    Messages:
    139
    Gender:
    Male
    First Name:
    Cody
    Utah
    Vehicle:
    2015 TRD Sport DCLB
    Toytec Boss Coilovers set at 3" with AAL's,Toytec Boss Rear shocks, LR UCA's, Swaybar Relocate, Diff Drop, 265/70 Nitto Trail Grapplers, 17" KMC wheels, K&N, Limo Tint, 4.7" Shorty Antenna
    Interested on how the ride is with them cranked up to 3"?? I have been looking at icons for awhile know.
     
  13. Jan 9, 2015 at 11:55 PM
    #13
    whiskersfox

    whiskersfox [OP] Active Member

    Joined:
    Oct 14, 2014
    Member:
    #140329
    Messages:
    41
    Gender:
    Male
    First Name:
    Aaron
    La Habra, CA
    Vehicle:
    '07 PreRunner TRD OffRoad 4Door Short Bed
    Icon coilover, total chaos UCA, OME rear spring, Icon shocks, custom rear lights for bed, all pro rear bumper, all pro IFS skid
    Thanks for the help! I am between my phone and computer so it is difficult. And the ride with it at the current setting is great. Softer than the rear. It is a little stiff but that is the nature of the digressive icon suspension. The rear probably would have been just about perfect if the shocks were not high pressurized. But I love the front suspension setup!


    Here is the first pic with new wheels! More to come cause I get my bumper and skid plate in two days. I love the wheels so far. 16x8.5 rims with 4.5 backspacing I believe. Tires are the BFG all terrain KO2s 285/75/16

    IMAG0466.jpg
     
  14. Jan 10, 2015 at 12:11 PM
    #14
    codyb1

    codyb1 Well-Known Member

    Joined:
    Jan 25, 2012
    Member:
    #71405
    Messages:
    139
    Gender:
    Male
    First Name:
    Cody
    Utah
    Vehicle:
    2015 TRD Sport DCLB
    Toytec Boss Coilovers set at 3" with AAL's,Toytec Boss Rear shocks, LR UCA's, Swaybar Relocate, Diff Drop, 265/70 Nitto Trail Grapplers, 17" KMC wheels, K&N, Limo Tint, 4.7" Shorty Antenna
    Really Like your setup and the way it sits. When you say stiff ride, what do you mean? Like sports car ride or feel every bump on the road? Sorry for the 100 questions, just really interested.
     
  15. Jan 10, 2015 at 12:16 PM
    #15
    teneighty

    teneighty I'd rather be skiing...

    Joined:
    Oct 5, 2012
    Member:
    #88357
    Messages:
    5,725
    Gender:
    Male
    Right behind you. NY
    Vehicle:
    18’ F150 SCREW LB 3.5 EcoBoost
    Bilstein 5100’s (x4), 275/65/20 Cooper XLT AT3’s
    What are your measurements before and after? That looks crazy high.
     
  16. Jan 10, 2015 at 2:24 PM
    #16
    whiskersfox

    whiskersfox [OP] Active Member

    Joined:
    Oct 14, 2014
    Member:
    #140329
    Messages:
    41
    Gender:
    Male
    First Name:
    Aaron
    La Habra, CA
    Vehicle:
    '07 PreRunner TRD OffRoad 4Door Short Bed
    Icon coilover, total chaos UCA, OME rear spring, Icon shocks, custom rear lights for bed, all pro rear bumper, all pro IFS skid
    I don't mind the questions, glad to help. They are heavier duty springs meant for a load. There just is not enough weight in the back. Like going over speed bumps, the suspension doesn't really soak it up in the back, it just bounces over it. I am getting my new all pro rear bumper in a few days and that may help with the extra weight in the rear.
     
  17. Jan 10, 2015 at 2:26 PM
    #17
    whiskersfox

    whiskersfox [OP] Active Member

    Joined:
    Oct 14, 2014
    Member:
    #140329
    Messages:
    41
    Gender:
    Male
    First Name:
    Aaron
    La Habra, CA
    Vehicle:
    '07 PreRunner TRD OffRoad 4Door Short Bed
    Icon coilover, total chaos UCA, OME rear spring, Icon shocks, custom rear lights for bed, all pro rear bumper, all pro IFS skid
    I got 2.75 inch in the front and 2.5 inch in the rear. Don't have the before and after on hand but that was the amount of lift acquired.
     
  18. Jan 10, 2015 at 3:46 PM
    #18
    teneighty

    teneighty I'd rather be skiing...

    Joined:
    Oct 5, 2012
    Member:
    #88357
    Messages:
    5,725
    Gender:
    Male
    Right behind you. NY
    Vehicle:
    18’ F150 SCREW LB 3.5 EcoBoost
    Bilstein 5100’s (x4), 275/65/20 Cooper XLT AT3’s
  19. Feb 13, 2015 at 7:48 PM
    #19
    hmcclung

    hmcclung Well-Known Member

    Joined:
    Nov 21, 2013
    Member:
    #117057
    Messages:
    484
    Gender:
    Male
    First Name:
    Heath
    St. Louis
    Vehicle:
    14 Superwhite S/C DCSB TRD OR
    Besides the mud flaps did you have to do any trimming? Or do you have any rubbing?
     
  20. Feb 13, 2015 at 7:57 PM
    #20
    Doomsday

    Doomsday Well-Known Member

    Joined:
    Jan 13, 2010
    Member:
    #29290
    Messages:
    637
    Gender:
    Male
    Cypress, TX
    Vehicle:
    2017 TRD Sport 4x4 DCSB MGM
    Lights, Tires, Wheels,...more to come!
    Looks high as mentioned, I'm sure it will settle a tad though. I got Icons all around with CDC, no complaints here.
     

Products Discussed in

To Top