

-
Welcome to Tacoma World!
You are currently viewing as a guest! To get full-access, you need to register for a FREE account.
As a registered member, you’ll be able to:- Participate in all Tacoma discussion topics
- Communicate privately with other Tacoma owners from around the world
- Post your own photos in our Members Gallery
- Access all special features of the site
 What head unit are you running?
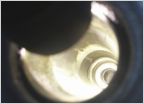 Stripped sparkplug "Help" 3.4l
 1st Gen. LED Lighting
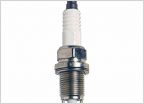 Changing the spark plugs
 Stubborn Oil Leak...Need help identifying source.
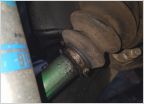 Can you actually protect rubber CV boots?
How To: Stripped V6 Timing Belt Tensioner Bolt
Discussion in '1st Gen. Tacomas (1995-2004)' started by MikeWH, Mar 17, 2023.


