1. Welcome to Tacoma World!

    You are currently viewing as a guest! To get full-access, you need to register for a FREE account.

    As a registered member, you’ll be able to:
    • Participate in all Tacoma discussion topics
    • Communicate privately with other Tacoma owners from around the world
    • Post your own photos in our Members Gallery
    • Access all special features of the site

Help: King coilover adjustment

Discussion in 'Suspension' started by MrZoggs, Nov 30, 2016.

  1. Aug 30, 2017 at 3:49 PM
    #21
    BPaulin_

    BPaulin_ Well-Known Member

    Joined:
    Aug 21, 2017
    Member:
    #227518
    Messages:
    120
    Gender:
    Male
    First Name:
    Bruno
    Orange County, CA
    Vehicle:
    2010 Tacoma TRD Off Road
    Baja Kits +2 LT Kit
    Yup! they work. unthread the spring compressors all that way, slip em onto the coils line them up and hit it with the impact to compress. I am currently working on some King 2.5's for a Colorado and I am using this method. Idk if I'd trust the ratchet strap method.
     
  2. Sep 7, 2017 at 1:51 PM
    #22
    Strictlytoyz

    Strictlytoyz Well-Known Member

    Joined:
    Jul 23, 2015
    Member:
    #160147
    Messages:
    2,774
    Gender:
    Male
    First Name:
    Charles
    HA\/\/AII
    Vehicle:
    07 Shitbox
    I too would like some input on how you ajusted it while on the truck. I have both the punch and t handle tool from king
     
    SR-71A likes this.
  3. Sep 7, 2017 at 3:15 PM
    #23
    MrZoggs

    MrZoggs [OP] Ainokea

    Joined:
    Dec 30, 2009
    Member:
    #28427
    Messages:
    513
    Gender:
    Male
    First Name:
    Zach
    Alaska
    Vehicle:
    13' DCLB Sport
    Some Stuff...
    I've since done it two ways..

    The method i do not prefer: While on the truck, you just keep turning regardless if the sleeve turns. However, do your best to hold the sleeve in place while adjusting. Make sure threads are clean and lubricated. And be aware of coil nut rotation positioning to ensure you don't place it in a position in which you cannot continue to turn. (The adjustment holes are accessible)

    The preferred method: remove coilover and over estimate the preload you'll need, then install. It's easier to lower while mounted than to raise. Lower a full rotation at a time. Test drive measure. Until desired ride height, keep in mind it will settle eventually.

    I found that adjusting while mounted requires man strength, and began to warp the drilled holes the spanner wrench seats into. Likely not the intended way to do things if it's deforming while being adjusted...
     
  4. Sep 7, 2017 at 3:19 PM
    #24
    Strictlytoyz

    Strictlytoyz Well-Known Member

    Joined:
    Jul 23, 2015
    Member:
    #160147
    Messages:
    2,774
    Gender:
    Male
    First Name:
    Charles
    HA\/\/AII
    Vehicle:
    07 Shitbox
    Thanks for the info. One more thing. While doing it off of the truck what did you use to hold the shock and compress the springs?
     
  5. Sep 7, 2017 at 3:22 PM
    #25
    MrZoggs

    MrZoggs [OP] Ainokea

    Joined:
    Dec 30, 2009
    Member:
    #28427
    Messages:
    513
    Gender:
    Male
    First Name:
    Zach
    Alaska
    Vehicle:
    13' DCLB Sport
    Some Stuff...
    Wall mounted spring compressor at a local autocraft... good luck finding a vice to fit between the coils..

    And I would stay away from the ratchet strap method.
     
    lordetaco, bski22 and Leonel like this.
  6. Sep 7, 2017 at 3:26 PM
    #26
    mlevinson

    mlevinson Well-Known Member

    Joined:
    Jun 10, 2009
    Member:
    #18258
    Messages:
    339
    Gender:
    Male
    Raleigh, NC
    Vehicle:
    2017 TRD Off-Road
  7. Sep 7, 2017 at 3:28 PM
    #27
    Strictlytoyz

    Strictlytoyz Well-Known Member

    Joined:
    Jul 23, 2015
    Member:
    #160147
    Messages:
    2,774
    Gender:
    Male
    First Name:
    Charles
    HA\/\/AII
    Vehicle:
    07 Shitbox
  8. Sep 8, 2017 at 7:58 AM
    #28
    Strictlytoyz

    Strictlytoyz Well-Known Member

    Joined:
    Jul 23, 2015
    Member:
    #160147
    Messages:
    2,774
    Gender:
    Male
    First Name:
    Charles
    HA\/\/AII
    Vehicle:
    07 Shitbox
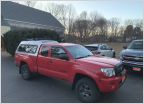
    Went ahead and tried to adjust them while they were on the truck. Actually a lot easier than anticipated. Did 10 full turns on both sides. Will let it settle and then lower them down a little if need be. Thanks guys.

    1504882603877510669062.jpg
     
  9. Sep 8, 2017 at 11:29 AM
    #29
    Coot83

    Coot83 DORKEL NATION

    Joined:
    Aug 9, 2016
    Member:
    #194134
    Messages:
    13,250
    Gender:
    Male
    First Name:
    Chris
    Scottsdale, Az
    Vehicle:
    2012 Baja TX
    TC 3.5 LT, RCV axles, Demello sliders, BD light bar/fogs, LP6, DMZ rear, SOS skids, custom bumper, King 16" triples, Locked-on hydro rear bumps...
    My normal process is hitting the threads with some pb blast or equivalent. After that get the allen wrench and loosen it up and then pull out my provided handle and the T-handle. Assuming it has been about 5 min since you sprayed the pb, then I use both at the same time with the T-handle being the stronger of the two. I have adjusted my truck about 4 times so far and it has worked out. I will say this though, cranking on the T handle will take its toll if you do it too much as the tip of mine eventually failed when my buddy needed it for his OEM kings. That being said though, he has ALOT of threads he cranked up to.
     
    SR-71A and Strictlytoyz like this.
  10. Oct 15, 2017 at 4:54 PM
    #30
    FRSpilot

    FRSpilot Well-Known Member

    Joined:
    Sep 20, 2015
    Member:
    #164752
    Messages:
    103
    Gender:
    Male
    First Name:
    Dave
    Wyoming mostly
    Vehicle:
    2007 Speedway Blue Double Cab TRD Off-Road
    Time to make my build page!
    The driver side is now where I want it -- 10 threads showing. The passenger side was coming along and then the shock body started to spin. Do I have to take it off to fix this? Have I done something I can't fix?
     
  11. Oct 24, 2017 at 2:38 PM
    #31
    bradgarcia805

    bradgarcia805 Active Member

    Joined:
    Sep 16, 2013
    Member:
    #112601
    Messages:
    25
    Gender:
    Male
    First Name:
    Brad
    Southern California
    Vehicle:
    2014 Toyota Tacoma SR5 4x4 Access cab
    I'm experiencing the same thing. Finished up my drivers side but passengers side I got one full turn and then the body started to spin. I called King and stated you have to take it off... I talked to Ryan from Kibbetech and he said he's never had to take a coil off to make simple adjustments like this. I might take the wheel off to hold the lower portion of the shock. Also I didn't use any lubrication on either side but i will to ease up force between the body and the collar so I'll forsure do that next try. If this still doesn't help i'll get a cheapo coil compressor from harbor freight and hope that works to ease pressure against the collar. I'll keep you updated if it works or not. Sure hope it does I really don't want to take my coil off if I don't have to.
     
  12. Oct 25, 2017 at 12:10 PM
    #32
    bradgarcia805

    bradgarcia805 Active Member

    Joined:
    Sep 16, 2013
    Member:
    #112601
    Messages:
    25
    Gender:
    Male
    First Name:
    Brad
    Southern California
    Vehicle:
    2014 Toyota Tacoma SR5 4x4 Access cab
    Were you able to adjust on the truck still? You said the ratchet straps were a waste of time, what did you find to work to alleviate pressure and get the collar to spin without the threaded body to spin while trying to lift? My drivers side was fine adjusting but the passenger side wants to spin the threaded body and the collar together.
     
    Byb127 likes this.
  13. Oct 25, 2017 at 6:53 PM
    #33
    FRSpilot

    FRSpilot Well-Known Member

    Joined:
    Sep 20, 2015
    Member:
    #164752
    Messages:
    103
    Gender:
    Male
    First Name:
    Dave
    Wyoming mostly
    Vehicle:
    2007 Speedway Blue Double Cab TRD Off-Road
    Time to make my build page!
    While it was still on the truck I turned it the opposite direction until the top cap and shock cylinder were flush and the shock cylinder would no longer rotate with the coil adjustment nut. There was a 3mm gap recessed area between the cylinder and the top cap before I did this. If I understand King correctly not fixing this gap can cause a failure. Once I had the cylinder back in place I took the coil-over off and put my el-cheapo coil compressors on. I put two long bolts into the front holes on the top plate and clamped my vise down on these bolts. With a little Motorex (it's a KTM thing) spray lube on the cylinder I was able to turn the nut easily. It was much easier than doing it on the truck. I'll try the strap method on the driver side and see if it helps move the nut.

    As a bonus I was able to lube my upper control arms, which I hadn't done yet, while I had the coil-over off. Total Chaos tells you to loosen the through bolt when you grease the UCAs, and this was a good time.

    Good luck. Don't be too worried about taking off the coil-over. I think I saved time doing it this way. I still don't want to take the other one off if I don't have to, but it's nice to have 360 degree access to the adjustment nut.
     
    bradgarcia805[QUOTED] likes this.
  14. Oct 25, 2017 at 9:41 PM
    #34
    bradgarcia805

    bradgarcia805 Active Member

    Joined:
    Sep 16, 2013
    Member:
    #112601
    Messages:
    25
    Gender:
    Male
    First Name:
    Brad
    Southern California
    Vehicle:
    2014 Toyota Tacoma SR5 4x4 Access cab
    thanks for the responses! I actually was able to finish up and got the collar to turn without the threaded body to spin! jacked the truck up, took my tire off to have better access and threw some silicone spray on the threads and let it sit. I didn't have to use any straps luckily it turned after using silicone spray. thanks again for the responses. I ended up doing adjusting to show 10 threads above collar. Currently sits just under an inch lower than my rear (all pro standard leaf and extended king shocks). Some say their truck rides rougher after lifting but I can't feel any difference at all from king factory setting to the lift i've done. Hope it doesn't settle too much..
     
    Byb127 and FRSpilot like this.
  15. Oct 26, 2017 at 1:55 PM
    #35
    bradgarcia805

    bradgarcia805 Active Member

    Joined:
    Sep 16, 2013
    Member:
    #112601
    Messages:
    25
    Gender:
    Male
    First Name:
    Brad
    Southern California
    Vehicle:
    2014 Toyota Tacoma SR5 4x4 Access cab
    Thanks again for the help! I thought about lifting more but I'm waiting for my leafs to settle a bit more. Are you going to do a cab mount chop? I'm doing some more trimming this weekend and maybe heat up my fender pinch weld and lightly hammer it flatter for clearance. love having 33's but definitely have to massage and chop a few things first haha
     
    FRSpilot and Byb127 like this.
  16. Oct 26, 2017 at 4:53 PM
    #36
    FRSpilot

    FRSpilot Well-Known Member

    Joined:
    Sep 20, 2015
    Member:
    #164752
    Messages:
    103
    Gender:
    Male
    First Name:
    Dave
    Wyoming mostly
    Vehicle:
    2007 Speedway Blue Double Cab TRD Off-Road
    Time to make my build page!
    The BAMF DIY kit looks to be the same as the kit Total Chaos used to offer. I can't the TC kit now. The BAMF also looks to be less involved than the InSain Fabrication one that ToyTech sells. Currently I have 15 threads showing but I haven't driven it yet. According to what I am told 5 threads is 1". I'm also thinking about 650# springs.
     
    Byb127 likes this.
  17. Oct 27, 2017 at 1:22 PM
    #37
    FRSpilot

    FRSpilot Well-Known Member

    Joined:
    Sep 20, 2015
    Member:
    #164752
    Messages:
    103
    Gender:
    Male
    First Name:
    Dave
    Wyoming mostly
    Vehicle:
    2007 Speedway Blue Double Cab TRD Off-Road
    Time to make my build page!
    This is very helpful, thank you. Would a 650# spring accomplish the same thing without a spacer?

    I was all excited to put my parts on and go try it out. Now I am stuck in "while I have it taken apart" and tweak mode. I had new calipers for a 231mm brake upgrade so I ordered rotors and pads to finish that. I have new Crown brake lines partly in. I need to put my Energy Suspension steering bushings in too. And that's just the front. I want to be at a final height so I can get 33s on and running well, but now I keep looking at those ugly stock LCAs and worn out bushings. Im thinking about selling off some stuff to help cut the cost of Total Chaos lowers. They sure are pretty, but that price tag stings a little. Yet, it would make the front suspension pretty much brand new and completely awesome!
     
    Byb127 likes this.
  18. Oct 27, 2017 at 2:06 PM
    #38
    anthony250f

    anthony250f Well-Known Member

    Joined:
    Feb 18, 2012
    Member:
    #73066
    Messages:
    16,663
    Gender:
    Male
    First Name:
    Anthony
    San Diego, CA
    Vehicle:
    2008 dcsb trd offroad 4wd
    All you have to do is slightly loosen hose and rotate house up.....very easy
     
  19. Oct 27, 2017 at 4:09 PM
    #39
    eon_blue

    eon_blue Okayest Member

    Joined:
    Mar 4, 2016
    Member:
    #180213
    Messages:
    69,209
    Gender:
    Male
    First Name:
    Ryan
    Azusa, CA
    Vehicle:
    '04 TRD 3.4l 4x4 5sp manual Xtraca & '96 4runner 4x4 5spd manual
    I kept the top hat of the shock mounted to the truck, removed the lower bolt so I could disconnect the bottom of the shock from the LCA. This allows you to place a jack under the LCA and jack it up, which moves the UCA up and out of the way so it clears the adjustment holes on the shock.

    With the top hat still bolted in, the shock stays in place and now you can turn the collar. Worked like a charm for me.

    When done, lower the LCA back down and bolt the bottom of the shock back in.
     
  20. Oct 27, 2017 at 4:11 PM
    #40
    Strictlytoyz

    Strictlytoyz Well-Known Member

    Joined:
    Jul 23, 2015
    Member:
    #160147
    Messages:
    2,774
    Gender:
    Male
    First Name:
    Charles
    HA\/\/AII
    Vehicle:
    07 Shitbox
    I was actually able to do it. I posted a pic a few posts later. Like how it turned out. Sitting at about 24" on both driver and passenger. Just went on a wheeling trip last weekend. The kings handled great
     
    eon_blue[QUOTED] likes this.

Products Discussed in

To Top