1. Welcome to Tacoma World!

    You are currently viewing as a guest! To get full-access, you need to register for a FREE account.

    As a registered member, you’ll be able to:
    • Participate in all Tacoma discussion topics
    • Communicate privately with other Tacoma owners from around the world
    • Post your own photos in our Members Gallery
    • Access all special features of the site

Fiberglass subwoofer box molding idea

Discussion in 'Audio & Video' started by 5nahalf, Mar 7, 2019.

  1. Mar 7, 2019 at 11:12 AM
    #1
    5nahalf

    5nahalf [OP] I build dumb things

    Joined:
    Sep 22, 2018
    Member:
    #267058
    Messages:
    10,910
    Gender:
    Male
    First Name:
    Erik
    Minnesota
    Vehicle:
    2018 Inferno Longbed
    I have been building a fiberglass subwoofer box, but I am not happy with how it is coming out. It just feels way too rough, there are too many steps involved with the fiberglass, too many joints. I know sanding will make it better, but I think the process and prep can be made better.

    So in a search for making this better, I have come to the conclusion that I can mold the entire box in a single shot with mdf speaker baffle and both front and back of the box all molded at the same time.


    Here is my idea.

    In the rear cubby, there is a plastic panel at the bottom, its removable.
    So I removed this panel and it gives me a very large access to the inside of the cubby.
    My thoughts are that I can cut some wood, cover it with aluminum tape, screw the baffle to the front of it. Then I just clamp that to the front of the cubby (would need to be 2 parts to follow the curve on the front)
    After that part is secure, I can then fiberglass from the inside of the box using that access hole in the back of the cubby.
    Once its all cured, I can remove the screws holding the baffle to the front panel, remove the front panel and I have a perfect flat, and formed front baffle. Cut the speaker hole out, then I just have a big square hole in the back of the box that I can just put a wood plug into and fiberglass it down.

    Im going to try this out next weekend to see how it goes.
     
    boostedka likes this.
  2. Mar 7, 2019 at 9:52 PM
    #2
    5nahalf

    5nahalf [OP] I build dumb things

    Joined:
    Sep 22, 2018
    Member:
    #267058
    Messages:
    10,910
    Gender:
    Male
    First Name:
    Erik
    Minnesota
    Vehicle:
    2018 Inferno Longbed
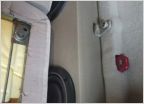
    Back side of the panel with the access door removed
    [​IMG]
    bottom view looking part way in
    [​IMG]
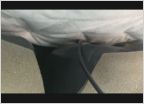
    camera inside panel all ready for fiberglass
    [​IMG]
     
    boostedka and pinktaco808 like this.
  3. Mar 17, 2019 at 5:47 PM
    #3
    5nahalf

    5nahalf [OP] I build dumb things

    Joined:
    Sep 22, 2018
    Member:
    #267058
    Messages:
    10,910
    Gender:
    Male
    First Name:
    Erik
    Minnesota
    Vehicle:
    2018 Inferno Longbed
    [​IMG]
    [​IMG]

    First layers of glass down, need to add a few more
     
    boostedka and xxTacocaTxx like this.
  4. Mar 27, 2019 at 5:38 PM
    #4
    5nahalf

    5nahalf [OP] I build dumb things

    Joined:
    Sep 22, 2018
    Member:
    #267058
    Messages:
    10,910
    Gender:
    Male
    First Name:
    Erik
    Minnesota
    Vehicle:
    2018 Inferno Longbed
    [​IMG]

    Box is coming along, time is short, so I can only do little at a time. But the one price build seems to be pretty good. Getting into the top part with the fiberglass was a pain. If I had to do it again, I would all the seems and corners first, then lay the big open parts last.
     
    boostedka and 20tacoma17 like this.
  5. Mar 27, 2019 at 5:51 PM
    #5
    20tacoma17

    20tacoma17 Well-Known Member

    Joined:
    Nov 8, 2016
    Member:
    #201910
    Messages:
    7,079
    Gender:
    Male
    Vehicle:
    2017 DCLB Sport AT
    Kings, 275/70/17, a few custom items, lots of Meso mods.
    You can use thin layers of body filler to help shape and smooth it out.
     
  6. Mar 27, 2019 at 5:56 PM
    #6
    boostedka

    boostedka Well-Known Member

    Joined:
    Sep 29, 2011
    Member:
    #64367
    Messages:
    5,981
    Gender:
    Male
    First Name:
    James
    NM
    Vehicle:
    2013 DCSB 6MT, 2004 4runner
    Awesome box build! I’m looking forward to seeing more progress
     
  7. Mar 27, 2019 at 6:05 PM
    #7
    JdevTac

    JdevTac Well-Known Member

    Joined:
    Jan 8, 2012
    Member:
    #70234
    Messages:
    6,259
    Gender:
    Male
    First Name:
    Josh
    GA/WA
    Vehicle:
    2nd gen
    Wait so the whole rear of the cubby comes off? And this is the stock cubby without the OEM subwoofer right?

    I may need to do this down the road. I have 3rd gen cubbies in my 2nd gen and have always wanted a form fit enclosure.
     
  8. Mar 27, 2019 at 6:05 PM
    #8
    5nahalf

    5nahalf [OP] I build dumb things

    Joined:
    Sep 22, 2018
    Member:
    #267058
    Messages:
    10,910
    Gender:
    Male
    First Name:
    Erik
    Minnesota
    Vehicle:
    2018 Inferno Longbed
    Yes, im going to sand the whole thing, then using bondo hair and foil tape I will be forming the corners better. I figure I can put some bondo hair in the corners, then press the box in nice and hard, clamp it, then let it harden. This should give me a pretty good shape of the corners. Going to do the same thing around the actual subwoofer... put the sub in, wrap a layer of foil tape around the subwoofers rim and then put in filler so the sub is part recessed.


    Thanks!
     
  9. Mar 27, 2019 at 6:06 PM
    #9
    5nahalf

    5nahalf [OP] I build dumb things

    Joined:
    Sep 22, 2018
    Member:
    #267058
    Messages:
    10,910
    Gender:
    Male
    First Name:
    Erik
    Minnesota
    Vehicle:
    2018 Inferno Longbed

    Yes, this is the drivers side one. If you remove it and look at the back, there is a removable panel. When its removed, it gives the enclosure space to tilt and slide out nice and easy.
     

Products Discussed in

To Top