

-
Welcome to Tacoma World!
You are currently viewing as a guest! To get full-access, you need to register for a FREE account.
As a registered member, you’ll be able to:- Participate in all Tacoma discussion topics
- Communicate privately with other Tacoma owners from around the world
- Post your own photos in our Members Gallery
- Access all special features of the site
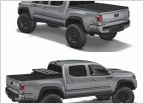 Diamondback Switchback - "Rugged Tri-Fold Tonneau"
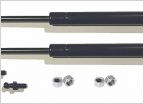 Longer leer struts?
 Shell gaskets
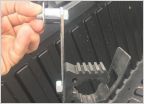 Shovel Mount for Under Tonneau Cover
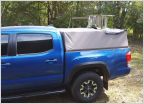 Custom soft topper out of canvas, pic and velcro
 Do i lose my tie downs with a tonneau roll up?
DIY 270 Awning for Wedge Camper
Discussion in 'Tonneau Covers, Caps and Shells' started by davzx, Nov 22, 2021.
Page 1 of 6
Page 1 of 6


