

-
Welcome to Tacoma World!
You are currently viewing as a guest! To get full-access, you need to register for a FREE account.
As a registered member, you’ll be able to:- Participate in all Tacoma discussion topics
- Communicate privately with other Tacoma owners from around the world
- Post your own photos in our Members Gallery
- Access all special features of the site
 Leaf Springs
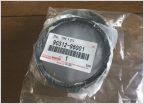 Front Wheel Bearing Seal Part Number Needed
 2020 TRD Off RD Grille to TRD Pro Grille swap w/ front camera
 How To: Retractable iPhone 5 Constant Hot Charger
 Poor man's OBA
DCLB Auto to Manual RC62F, VF2B transfer case and 3rd Gen E-Brake Swap
Discussion in 'Technical Chat' started by DesertRatliff, May 7, 2023.
Page 1 of 6
Page 1 of 6


