

-
Welcome to Tacoma World!
You are currently viewing as a guest! To get full-access, you need to register for a FREE account.
As a registered member, you’ll be able to:- Participate in all Tacoma discussion topics
- Communicate privately with other Tacoma owners from around the world
- Post your own photos in our Members Gallery
- Access all special features of the site
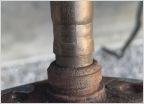 Oxygen sensor confusion
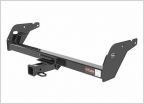 Hitch question
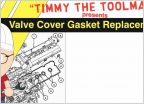 Valve cover gasket "While I'm at it", What else?
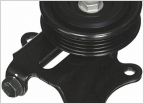 Power steering belt tensioner assembly bolt p/n 44350-34010
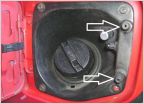 Someone took the rubber feet from my gas door :(
Correctly Determining Rear Shock Mount Placement for Maximizing Shock Utilization
Discussion in '1st Gen. Tacomas (1995-2004)' started by turbodb, Dec 19, 2018.
Page 1 of 3
Page 1 of 3


