1. Welcome to Tacoma World!

    You are currently viewing as a guest! To get full-access, you need to register for a FREE account.

    As a registered member, you’ll be able to:
    • Participate in all Tacoma discussion topics
    • Communicate privately with other Tacoma owners from around the world
    • Post your own photos in our Members Gallery
    • Access all special features of the site

Castle Nut Won't Go On Lower Control Arm LCA - Solved

Discussion in '2nd Gen. Tacomas (2005-2015)' started by Dalandser, Jun 23, 2017.

  1. Jun 23, 2017 at 1:56 PM
    #1
    Dalandser

    Dalandser [OP] ¡Me Gustan Las Tacos-mas!

    Joined:
    Feb 19, 2015
    Member:
    #149090
    Messages:
    17,569
    First Name:
    Anthony
    Downey
    Vehicle:
    08 PreRunner Regular Cab / 98 4x4 Extra Cab
    Empty Wallet Mod
    For anyone who can't get their castle nuts back on their lower control arm ball joints, here's a quick how-to glimmer of hope. My lower ball joint threads were mushroomed out / mashed down from someone banging on them to get them out when they were removed for my long travel front kit. This was as far as they would thread on.

    [​IMG]


    I had just bought new castle nuts so this thread was originally to make sure they would work even if I fixed the threads - the write up will continue in post #6. I'll leave the original first post.

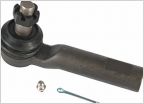
    (Original first post) Bought the truck used, put on aftermarket suspension kit, lost original LBJ castle nuts, bought new oem castle nuts w/ confirmed part number and have to chase some threads because the first few got boogered on my lbj's. Just want to confirm that these are oem and not copies that might have different nut / threads. Don't want to waste my time with this. The LCA's appear stock and the only markings I could find are LD and RK. What do you know about this please - much appreciated. Thank you. FYI I did not booger the threads myself. I would have been more careful.

    [​IMG]
    [​IMG]
     
    Last edited: Jun 23, 2017
  2. Jun 23, 2017 at 1:59 PM
    #2
    PapaBear

    PapaBear Never test how deep the water is with both feet.

    Joined:
    Feb 10, 2014
    Member:
    #122782
    Messages:
    3,563
    Gender:
    Male
    First Name:
    Austin
    SIN CITY
    Vehicle:
    07 DCSB PR 4.0... Aaaand she’s GONE
    Soft Suspension Hard Rubber ®
    [​IMG]
    They look to be stock IMO
     
    Dalandser[OP] likes this.
  3. Jun 23, 2017 at 2:01 PM
    #3
    koditten

    koditten Well-Known Member

    Joined:
    Sep 8, 2013
    Member:
    #112077
    Messages:
    19,615
    Gender:
    Male
    First Name:
    Kirk
    Central Michigan
    Vehicle:
    04 trd x-cab 4 x 4 3.4l
    Reserected from the dead.
    Stock.
     
    Dalandser[OP] likes this.
  4. Jun 23, 2017 at 2:05 PM
    #4
    Dalandser

    Dalandser [OP] ¡Me Gustan Las Tacos-mas!

    Joined:
    Feb 19, 2015
    Member:
    #149090
    Messages:
    17,569
    First Name:
    Anthony
    Downey
    Vehicle:
    08 PreRunner Regular Cab / 98 4x4 Extra Cab
    Empty Wallet Mod
    Muchas gracias compadres! Que tenga un buen dia!
     
    TegoTaco and PapaBear like this.
  5. Jun 23, 2017 at 3:54 PM
    #5
    TacoGold

    TacoGold Well-Known Member

    Joined:
    Jun 1, 2017
    Member:
    #220478
    Messages:
    65
    Gender:
    Male
    First Name:
    Peter
    Austin, Texas
    Vehicle:
    2010 DCSB TRD OR
    Working towards an overland build
    def stock
     
    Dalandser[OP] likes this.
  6. Jun 23, 2017 at 5:19 PM
    #6
    Dalandser

    Dalandser [OP] ¡Me Gustan Las Tacos-mas!

    Joined:
    Feb 19, 2015
    Member:
    #149090
    Messages:
    17,569
    First Name:
    Anthony
    Downey
    Vehicle:
    08 PreRunner Regular Cab / 98 4x4 Extra Cab
    Empty Wallet Mod
    I didn't take any pics of the messed up threads, but I'll explain my approach - the two main tools I used were:

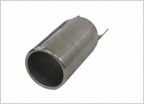
    Dremel for erasing the severely boogered threads at the top. I found a used cutting wheel was easier to control with a smaller diameter so I ground down a couple to about this size:

    [​IMG]

    And a cheap set of files (Harbor Freight I believe). The one that seemed to work the most was the one with the triangle profile.

    [​IMG]

    Like I said I used the dremel to get rid of the really bad threads at the top. I found the first good thread area and erased everything above it. It is important to get that first thread nice and flat on top and uniform with the rest. Here's a pic of the finished product:

    [​IMG]

    The hardest part is getting the beginning of the thread. If you use patience and look carefully at what you're doing, it is possible.

    Using the file is important to smooth out any messed up threads. I would work for awhile and then thread the nut on as far as it would go finger tight. I'd run it back and forth for awhile. Once I couldn't go any further I'd go back to filing and touching up the top thread if it seemed like it was holding up the show. Other than that, don't rush. I spent almost three hours on this - an oldies mix on youtube helped me remain calm :cool:

    You can tell by the second one my work improved:

    [​IMG]

    All in all - it's worth it. This could have been an expensive repair otherwise.
     
    SR-71A and b_r_o like this.
  7. Jun 23, 2017 at 5:26 PM
    #7
    Radarninja

    Radarninja Safety 3rd

    Joined:
    Jun 10, 2017
    Member:
    #221167
    Messages:
    1,229
    Gender:
    Male
    First Name:
    Ryan
    Northern California
    Vehicle:
    06 taco
    Chromed out radiator cap
    Couldn't find a die for that size?
     
    Knute and Dalandser[OP] like this.
  8. Jun 23, 2017 at 5:27 PM
    #8
    Dalandser

    Dalandser [OP] ¡Me Gustan Las Tacos-mas!

    Joined:
    Feb 19, 2015
    Member:
    #149090
    Messages:
    17,569
    First Name:
    Anthony
    Downey
    Vehicle:
    08 PreRunner Regular Cab / 98 4x4 Extra Cab
    Empty Wallet Mod
    No way to get to a store with my dd out of commission. Even with one it's a little tricky with a ball joint that will spin on you with enough torque. You could stick a metal rod through the cotter pin hole to keep it from spinning, but I found out that this isn't always a good way to go:

    [​IMG]
    [​IMG]

    A well prepared person could do it more easily. It came out of nowhere ;)
     
    SR-71A likes this.
  9. Jun 23, 2017 at 5:30 PM
    #9
    Radarninja

    Radarninja Safety 3rd

    Joined:
    Jun 10, 2017
    Member:
    #221167
    Messages:
    1,229
    Gender:
    Male
    First Name:
    Ryan
    Northern California
    Vehicle:
    06 taco
    Chromed out radiator cap
    I see.
    good job on the
    "get shit done with what you have"
    I like it!
     
    Dalandser[OP] likes this.
  10. Jun 23, 2017 at 5:32 PM
    #10
    Dalandser

    Dalandser [OP] ¡Me Gustan Las Tacos-mas!

    Joined:
    Feb 19, 2015
    Member:
    #149090
    Messages:
    17,569
    First Name:
    Anthony
    Downey
    Vehicle:
    08 PreRunner Regular Cab / 98 4x4 Extra Cab
    Empty Wallet Mod
    Thanks. I was pretty happy when both threaded with only my fingers. Onto the "main project" of putting my front end back to stock :)
     
  11. Jun 23, 2017 at 6:49 PM
    #11
    Justinlhc

    Justinlhc Not looking for a relationship

    Joined:
    Jul 7, 2015
    Member:
    #158945
    Messages:
    3,513
    Uhhhh that's not how this forum operates o_O
     
  12. Jun 23, 2017 at 8:55 PM
    #12
    bullaculla

    bullaculla IKA fabrications

    Joined:
    Oct 14, 2012
    Member:
    #89002
    Messages:
    8,155
    Gender:
    Male
    Da big big island!
    Vehicle:
    2013 MGM DCSB Tacoma 4X4 TRD Off Road
    All pro 3 link SAS kit, Diamond axle, kings on 37" MTR/K
    Jimmyh, Dalandser[OP] and D-Rose like this.
  13. Jun 23, 2017 at 11:55 PM
    #13
    Chuy

    Chuy Well-Known Member

    Joined:
    Aug 4, 2008
    Member:
    #8328
    Messages:
    4,003
    Gender:
    Male
    Lakeside, CA
    Vehicle:
    07 V6 DCLB 4X4 Sport
    Silver Taco
    08 Prerunner? I would have replaced the ball joints. Or, were these not the OEM BJs? I think I would have replaced anyways. With the LCA's off the car, they are easy to press out and back in.
     
  14. Jun 24, 2017 at 12:43 AM
    #14
    Dalandser

    Dalandser [OP] ¡Me Gustan Las Tacos-mas!

    Joined:
    Feb 19, 2015
    Member:
    #149090
    Messages:
    17,569
    First Name:
    Anthony
    Downey
    Vehicle:
    08 PreRunner Regular Cab / 98 4x4 Extra Cab
    Empty Wallet Mod
    Lol - let me finish that statement then - putting my truck back to stock to fund my first gen engine build ;)
    Thanks man I appreciate it. After this project and the engine I'm building a lot more respect for machinists - tolerances out to ten thousands of an inch and stuff take a lot of patience, skill, and experience. My dremel has seen a lot of use working on guitars so luckily I'm pretty handy with it. It's amazing how the smallest details can make or break a big project. Thanks for the thread file link - I just ordered them.
    I hear you man, but they're in good shape. No play and nice and firm with boots completely intact. I'm selling this thing after my first gen is reliable enough to become my daily driver so I'm not trying to put any unnecessary funds into this one.
     
    Spintly likes this.
  15. Jun 24, 2017 at 1:37 AM
    #15
    bullaculla

    bullaculla IKA fabrications

    Joined:
    Oct 14, 2012
    Member:
    #89002
    Messages:
    8,155
    Gender:
    Male
    Da big big island!
    Vehicle:
    2013 MGM DCSB Tacoma 4X4 TRD Off Road
    All pro 3 link SAS kit, Diamond axle, kings on 37" MTR/K
    Yeah, the BJs look brand new.
     
  16. Jun 24, 2017 at 12:38 PM
    #16
    Taco1999

    Taco1999 Well-Known Member

    Joined:
    Sep 4, 2014
    Member:
    #137579
    Messages:
    288
    Gender:
    Male
    First Name:
    Jeremy
    Slidell, Louisiana
    Vehicle:
    2014 Tacoma Double cab 4x4 trd
    Tap and die set would have been handy
     
  17. Jun 24, 2017 at 1:00 PM
    #17
    Dalandser

    Dalandser [OP] ¡Me Gustan Las Tacos-mas!

    Joined:
    Feb 19, 2015
    Member:
    #149090
    Messages:
    17,569
    First Name:
    Anthony
    Downey
    Vehicle:
    08 PreRunner Regular Cab / 98 4x4 Extra Cab
    Empty Wallet Mod
    So my question is how would you have used it - like I did with a metal rod (aka drill bit) through the hole to keep it from spinning?
     
  18. Jun 24, 2017 at 1:02 PM
    #18
    Taco1999

    Taco1999 Well-Known Member

    Joined:
    Sep 4, 2014
    Member:
    #137579
    Messages:
    288
    Gender:
    Male
    First Name:
    Jeremy
    Slidell, Louisiana
    Vehicle:
    2014 Tacoma Double cab 4x4 trd
    Maybe a punch in the hole to keep it from turning.
     
    Dalandser[OP] likes this.
  19. Jun 24, 2017 at 1:03 PM
    #19
    Dalandser

    Dalandser [OP] ¡Me Gustan Las Tacos-mas!

    Joined:
    Feb 19, 2015
    Member:
    #149090
    Messages:
    17,569
    First Name:
    Anthony
    Downey
    Vehicle:
    08 PreRunner Regular Cab / 98 4x4 Extra Cab
    Empty Wallet Mod
    lol alright so I'm on the right track with that. Next question - how does it locate the first thread - do you need to dress the bolt somewhat first? These threads were wavy, mushroomed, and pinched together - I'm just wondering since I've never used a die.
     
  20. Jun 24, 2017 at 1:42 PM
    #20
    Taco1999

    Taco1999 Well-Known Member

    Joined:
    Sep 4, 2014
    Member:
    #137579
    Messages:
    288
    Gender:
    Male
    First Name:
    Jeremy
    Slidell, Louisiana
    Vehicle:
    2014 Tacoma Double cab 4x4 trd
    Good question...I use them at work but it's been a while since i have had to use one. let me look into that and i will get back to you.
     
    Dalandser[OP] likes this.

Products Discussed in

To Top