1. Welcome to Tacoma World!

    You are currently viewing as a guest! To get full-access, you need to register for a FREE account.

    As a registered member, you’ll be able to:
    • Participate in all Tacoma discussion topics
    • Communicate privately with other Tacoma owners from around the world
    • Post your own photos in our Members Gallery
    • Access all special features of the site

Atoto A6PF install W/JBL and Nav Guide

Discussion in '2nd Gen. Tacomas (2005-2015)' started by mchabot1987, Jun 15, 2023.

  1. Jun 15, 2023 at 11:54 AM
    #1
    mchabot1987

    mchabot1987 [OP] Well-Known Member

    Joined:
    Apr 2, 2021
    Member:
    #361424
    Messages:
    301
    Gender:
    Male
    Elizabeth City, NC
    Vehicle:
    2017 Super White TRD Sport DCLB
    Yes
    What's up Tacoma world peeps,

    After hours of random YouTube videos, diagram’s and scratching my head I was able to successfully install an Atoto A6PF Head unit with the factory JBL and Nav system while retaining the OE steering wheel controls and OE Backup Camera.

    I couldn't find an exact write up for this Install so I decided to make one in hopes this will save people a little time in the future.

    I wanted to keep the OE steering wheel controls and originally bought the Axxess ASWC-1 wiring harness, but then I found a video of a guy using one wire to retain his steering wheel controls in his F150, So that had me thinking do I really need this $60 harness......turns out no I didn’t (So save your self $60 or so). I'll explain how to do this without this Harness.

    All this cost about $350 (Got the radio on an instant $30 off coupon which came to $169)

    Below are the tools and parts needed for the install.

    NOTE 1: BEFORE YOU CONTINUE. I AM NOT RESPSONSIBLE FOR ANY MODIFICATIONS YOU DO TO YOUR VEHICLE THIS IS MERELY A GUIDE.

    NOTE 2: MAKE ALL YOUR WIRE CONNECTIONS BEFORE SOLDERING TO ENSURE YOU HAVE CORRECTLY WIRED EVERYTHING (FOR EXAMPLE THERE SHOULD BE 4 GROUNDS, CONNECT ALL THEM TOGETHER TO A SINGLE WIRE THEN GROUND TO THE VEHICLE)

    Parts needed:

    [ ] Axxess AXTO-TY1 (JBL wiring harness). Link: https://www.amazon.com/dp/B085VGM7B4

    [ ] Axxess TOYCAM1-6V (Retain Backup camera). Link: https://www.amazon.com/dp/B01MRIP0ES

    [ ] Anina Radio Antenna Adapter (Male). Link: https://www.amazon.com/dp/B08DHDX6G1

    [ ] And of course the Atoto A6 Head unit. Link: https://www.amazon.com/dp/B07B3T59TX

    [ ] Metra Dash kit (others prefer Scosche). Link: https://www.amazon.com/dp/B00A81NGK2 or https://www.amazon.com/dp/B00FK1UZSQ

    [ ] USB for cigarette lighter socket. Link: https://www.amazon.com/dp/B01MY1WDIU

    [ ] Bluetooth OBD2 reader (optional, but awesome) Link: https://www.amazon.com/dp/B074DWH8JR

    Optional front facing camera which I initially was going to install but didn't. May do it in the future. Don't have a link for this as I didn't purchase one.

    Tools needed:

    [ ] 10mm socket (Radio brackets)
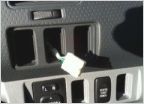
    [ ] Plastic pry tool to take out AC Controls.
    [ ] Phillips #2 screw driver (HU mounting brackets)
    [ ] Small Phillips screw driver (to attach mounting plates onto the HU)
    [ ] Wire strippers.
    [ ] Wire crimpers.
    [ ] Soldering iron. (And solder duh)
    [ ] Electrical pliers.
    [ ] Electrical tape (I used for tidying up wires)
    [ ] 4 T-Taps.
    [ ] 1 loop terminal (for the ground wires)
    [ ] Heat shrink.
    [ ] Lighter or heat gun (for heat shrink)
    [ ] Zip ties, zip ties and zip ties. (cleans up wiring and keeps it organized.

    1. Follow instructions for the AXTO-TY1 (pretty straight forward) connecting most of the wires to the wiring harness from the Atoto A6. The amp turn on from the AXTO-TY1 will connect to the smaller harness on the Atoto HU (Should be the only wire connected to this harness). Tape off unused wires.

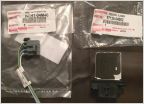
    2. To retain factory back up camera (Did not get any pictures) I used the Axxess TOYCAM1-6V (this contains a 12volt to 6volt step down converter) follow instructions to connect this harness correctly. You should only be using 3 wires on the harness, The ground (black), Signal Input (Yellow) and the male RCA connector that will go into the Atoto harness labeled "reverse camera" you can get the camera signal from behind the glove box (red wire top right of the connector see attached picture) by using a T-tap, this signal will be connected to the Pink wire of the Atoto and the Blue/White wire of the step down converter.

    3. Now to retain steering wheel controls (SWC) there will be a 28 pin connector (See picture) Pins 21 (Purple/White), 22 (Yellow/Black), and 23 (Red/White) are the only 3 wires needed to retain SWC.

    Pin 21 (Purple/White) will be connected (T-Tap) to the brown wire on the Atoto harness (Will be labeled)

    Pin 22 (Yellow/Black) will be connected (T-Tap) to the Orange wire on the Atoto harness ( will be labeled)

    Pin 23 (Red/White) Will be connected (T-Tap) to the other grounds from the other harnessess (I merged all these grounds into one wire)

    Note: when you get the head unit up and running it will automatically recognize that there are SWC. Then go into the SWC menu on the Atoto and map the buttons you want. (you can have the SWC do other things on the Atoto, for example volume up button can activate the front camera etc.).

    4. For the antenna (AM/FM radio) this is self explanatory, just connect the cable to the vehicles wiring harness and then into the back of the Atoto.

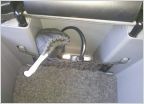
    5. I did not get a picture of the grounding location, But there is a good location to the right of the head unit that you can access from the glove box, this is where I grounded my system.


    Note: There will be a lot and I mean a lot of wires to stash behind the dash, But luckily the Atoto is slim and will provide plenty of space to store these wires. Pleas feel free to message me if there are any questions. This is a pretty detailed guide and hoping I covered everything that I did to make this install smooth.

    20230609_155154.jpg
    upload_2021-3-31_12-38-26.jpg
    20230609_144807.jpg
    20230609_144640.jpg
    20230609_144632.jpg
    20230613_135623.jpg
    20230613_143154.jpg
     

    Attached Files:

    Last edited: Jun 15, 2023
  2. Jul 25, 2023 at 10:39 AM
    #2
    aledor09

    aledor09 New Member

    Joined:
    Jul 24, 2023
    Member:
    #429716
    Messages:
    4
    Gender:
    Male
    First Name:
    jR
    TX
    Vehicle:
    2012 TRD SPORT MGM DCSB
    Thanks for sharing. I just ordered an Atoto S8 Premium I'll be installing in my 2012 W/ JBL so your especially helpful. You retained the factory AMP & Speakers?
     
  3. Jul 25, 2023 at 11:56 AM
    #3
    mchabot1987

    mchabot1987 [OP] Well-Known Member

    Joined:
    Apr 2, 2021
    Member:
    #361424
    Messages:
    301
    Gender:
    Male
    Elizabeth City, NC
    Vehicle:
    2017 Super White TRD Sport DCLB
    Yes
    Yes. All I wanted was a new head unit so this is how I retained the JBL system, steering wheel controls and the factory backup camera. Had zero issues since installing.

    Good luck and let me know if I can help.
     
    NmapFE and aledor09[QUOTED] like this.
  4. Jul 25, 2023 at 12:21 PM
    #4
    reallifedog

    reallifedog wat.

    Joined:
    Dec 11, 2014
    Member:
    #144054
    Messages:
    531
    Gender:
    Male
    First Name:
    Jordan
    Denver
    Vehicle:
    08 Tacoma TRD OR
    I have the S8 Premium and really like it.
     
    aledor09[QUOTED] likes this.
  5. Jul 25, 2023 at 12:38 PM
    #5
    aledor09

    aledor09 New Member

    Joined:
    Jul 24, 2023
    Member:
    #429716
    Messages:
    4
    Gender:
    Male
    First Name:
    jR
    TX
    Vehicle:
    2012 TRD SPORT MGM DCSB
    @mchabot1987 Glad to hear that, only looking to the upgrade head unit as well. It looks like it's going to be very straight forward install. Will probably upgrade the rest next year. Thanks.
     
    Last edited: Jul 25, 2023
    NmapFE likes this.
  6. Jul 25, 2023 at 12:46 PM
    #6
    aledor09

    aledor09 New Member

    Joined:
    Jul 24, 2023
    Member:
    #429716
    Messages:
    4
    Gender:
    Male
    First Name:
    jR
    TX
    Vehicle:
    2012 TRD SPORT MGM DCSB
    @reallifedog How long have you had your S8? I had been looking and researching the S8 Premium and finally pulled the trigger on it on Prime Day. It will definitely be an upgrade from my JBL that is on its way out.
     
  7. Jul 25, 2023 at 12:48 PM
    #7
    reallifedog

    reallifedog wat.

    Joined:
    Dec 11, 2014
    Member:
    #144054
    Messages:
    531
    Gender:
    Male
    First Name:
    Jordan
    Denver
    Vehicle:
    08 Tacoma TRD OR
    Probably two years now. I've since updated the firmware a couple of times and this thing really performs well.
     
    NmapFE likes this.
  8. Sep 2, 2023 at 8:51 AM
    #8
    aledor09

    aledor09 New Member

    Joined:
    Jul 24, 2023
    Member:
    #429716
    Messages:
    4
    Gender:
    Male
    First Name:
    jR
    TX
    Vehicle:
    2012 TRD SPORT MGM DCSB
    I finally got it installed, install went well just have one problem I’m trying to figure out. If I turn the ignition to the start position and play music, everything works as expected. If I then turn the ignition to Start, to start the truck, the HU keeps on playing the same source but there is no sound coming from the speakers/amp. If I restart the HU, either by the restart option or by turning the truck ok and off, sound will start to work again. Did you run into any issues like this?
    I contacted Axxess support and they immediately blamed it on the factory amp, stating that it’s failing. I’ve never had a single ‘no sound’ issue with the stock HU.
     
  9. Sep 3, 2023 at 6:08 PM
    #9
    mchabot1987

    mchabot1987 [OP] Well-Known Member

    Joined:
    Apr 2, 2021
    Member:
    #361424
    Messages:
    301
    Gender:
    Male
    Elizabeth City, NC
    Vehicle:
    2017 Super White TRD Sport DCLB
    Yes

    That's very strange. I'm not entirely sure what would cause that. Double check your wiring possibly. Hopefully other members can chime in with a little more guidance.
     
  10. Mar 19, 2024 at 4:24 AM
    #10
    NmapFE

    NmapFE Well-Known Member

    Joined:
    Apr 1, 2022
    Member:
    #393981
    Messages:
    524
    Gender:
    Male
    Vehicle:
    2014 DCLB 4x4 Limited. 6112’s/5125, KYB Top Hats, SPC UCA’s, Icon RXT leaf pack,
    2014 DCLB 4x4 Limited. 6112’s/5125, KYB Top Hats, SPC UCA’s, Icon RXT leaf pack
    respect at a whole new level!!! Nicely done!!
     
  11. Mar 19, 2024 at 6:58 AM
    #11
    1schoir

    1schoir Well-Known Member

    Joined:
    Jun 7, 2021
    Member:
    #367923
    Messages:
    168
    Gender:
    Male
    Freeport, NY
    Vehicle:
    1995 Blue Tacoma Extra Cab 4 cyl 5 speed...2006 Red Tacoma SR5 Access Cab 5 speed
    Considering the long hours it must have taken to figure this out and then document it so thoroughly so that anyone can follow it with confidence and benefit from it, KUDOS to you! :cheers:
     
    mchabot1987[OP] likes this.
  12. Mar 19, 2024 at 7:40 AM
    #12
    mchabot1987

    mchabot1987 [OP] Well-Known Member

    Joined:
    Apr 2, 2021
    Member:
    #361424
    Messages:
    301
    Gender:
    Male
    Elizabeth City, NC
    Vehicle:
    2017 Super White TRD Sport DCLB
    Yes
    Thank you good sir. Really hope it helps people in the future. Even with different head units the wiring should be about the same.
     
  13. Sep 6, 2024 at 2:51 PM
    #13
    DaleRS

    DaleRS Well-Known Member

    Joined:
    Mar 27, 2021
    Member:
    #360769
    Messages:
    234
    Gender:
    Male
    First Name:
    Dale
    Cleveland, Ohio
    Vehicle:
    2015 Black DCSB SR5 w/ Snugtop
    Would you happen to know which harness I would need to purchase for a non-JBL truck? Or point me in the right direction? I'm looking to install an Atoto into my truck but I'm getting hung up on the wiring part. Thanks!
     
  14. Sep 6, 2024 at 2:54 PM
    #14
    mchabot1987

    mchabot1987 [OP] Well-Known Member

    Joined:
    Apr 2, 2021
    Member:
    #361424
    Messages:
    301
    Gender:
    Male
    Elizabeth City, NC
    Vehicle:
    2017 Super White TRD Sport DCLB
    Yes
    I'm not 100% sure but if you put in your truck details on Crutchfield should give you a list of options for wiring harnesses. Hope that helps. Wiring should be about the same minus the JBL.
     
    DaleRS[QUOTED] likes this.
  15. Sep 6, 2024 at 2:55 PM
    #15
    DaleRS

    DaleRS Well-Known Member

    Joined:
    Mar 27, 2021
    Member:
    #360769
    Messages:
    234
    Gender:
    Male
    First Name:
    Dale
    Cleveland, Ohio
    Vehicle:
    2015 Black DCSB SR5 w/ Snugtop
    I honestly don’t know why I didn’t think to just do that. Thanks for the fast reply!
     
  16. Sep 6, 2024 at 2:56 PM
    #16
    mchabot1987

    mchabot1987 [OP] Well-Known Member

    Joined:
    Apr 2, 2021
    Member:
    #361424
    Messages:
    301
    Gender:
    Male
    Elizabeth City, NC
    Vehicle:
    2017 Super White TRD Sport DCLB
    Yes

    No problem. :)
     
To Top