1. Welcome to Tacoma World!

    You are currently viewing as a guest! To get full-access, you need to register for a FREE account.

    As a registered member, you’ll be able to:
    • Participate in all Tacoma discussion topics
    • Communicate privately with other Tacoma owners from around the world
    • Post your own photos in our Members Gallery
    • Access all special features of the site
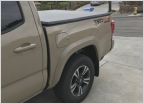
ARE Topper Repair

Discussion in 'Tonneau Covers, Caps and Shells' started by NickofTime, Dec 23, 2017.

  1. Dec 23, 2017 at 4:42 PM
    #1
    NickofTime

    NickofTime [OP] Well-Known Member

    Joined:
    Jun 17, 2015
    Member:
    #157617
    Messages:
    186
    Gender:
    Male
    First Name:
    Nick
    Anchorage, Ak
    Vehicle:
    2006 White Tacoma DCSB TRD
    I just throw money at my truck
    I bought this topper used this summer because it was $450 and I thought I wanted one. 5D7D5CA2-48B4-491D-9D48-150FE23A45D0.jpg
    I’m more of a fast off-roading kind of guy and ended up kind of destroying it on our last run. Outside is still in good shape, but the inside is not.
    F46D3CCD-7745-4F4C-AF7E-B8268979A607.jpg
    So I’m deciding to sell the topper, but first I need to do some serious repairs.

    7A649CE5-04B0-42C1-BCFB-B13D4437B5D1.jpg
    E247C3BE-C20D-4B35-8765-EC6C70DC2344.jpg
    The glue is coming off, it’s cracked in a few areas(not to the outside) and the weather shtripping is old.

    I’ll use this stuff for repairs
    78FC4F0C-7334-455A-9039-F154C600766A.jpg

    And this stuff for the stripping:bananadance:

    57F069AB-BC44-4E63-AB25-E3267D29E855.jpg

    FYI:

    1. I’ve never done any kind of body work. Ever.
    2. This is not an instructional guide, just a cool project.
    3. I don’t really know what I’m doing.
    4. Constructive criticism is welcome.
     
  2. Dec 23, 2017 at 4:42 PM
    #2
    NickofTime

    NickofTime [OP] Well-Known Member

    Joined:
    Jun 17, 2015
    Member:
    #157617
    Messages:
    186
    Gender:
    Male
    First Name:
    Nick
    Anchorage, Ak
    Vehicle:
    2006 White Tacoma DCSB TRD
    I just throw money at my truck
    First day

    Used the Gator 4” paint and rust remover wheel to remove the old adhesive holding the bed support on
    3286D0EB-8825-4C01-B472-B3A39779B72C.jpg 0CA23306-0AF2-4F75-B360-A7F58B114E0F.jpg 95E04C97-AD91-4EEF-996F-DE15D4AAE204.jpg

    Also removed old adhesive from trim piece and from the metal support under the window. Two part epoxy will reattach those pieces.
    26300F1F-82B7-43B0-8CE6-5937E280AACD.jpg

    The passenger side bed support hasn’t separated completely from the topper so I’ll have to find a way to separate those.30EB8E92-EA8C-4921-8E57-4206AD6E25A8.jpg

    That’s all for today. My drill batteries are dead and I’m itchy.
     
    Last edited: Dec 23, 2017
  3. Dec 23, 2017 at 4:42 PM
    #3
    NickofTime

    NickofTime [OP] Well-Known Member

    Joined:
    Jun 17, 2015
    Member:
    #157617
    Messages:
    186
    Gender:
    Male
    First Name:
    Nick
    Anchorage, Ak
    Vehicle:
    2006 White Tacoma DCSB TRD
    I just throw money at my truck
    Second day

    Started off the day with more prepping. Decided to switch to a 60 grit flap disc which made quick work of taking off the old adhesive.F0F28E17-03AB-427D-95FB-CC7D7F8F2FF8.jpg 0F8AD46B-FA3E-4783-871C-7D744DE60391.jpg

    The bed support on the passenger side wouldn’t full separate from the topper so I prepped as much as I could and will just apply new adhesive to the parts that arent still attached.
    80C8C1DD-516E-41D1-8543-D1528C4B46BF.jpg
    DCC86E91-0776-40E4-AB27-1299B782C732.jpg

    Moved on to a flap disc sander attachment for my drill and hit everything with 60 grit, 100 grit and 150 grit. Vacuumed as much as I could
    72852E98-E729-402D-8C51-4FC551221A5D.jpg
    627C7133-F76E-4318-9731-4B2388986BD1.jpg
    Attached the front trim piece below the front window with two part epoxy. Also attached the metal clamp support with Two part epoxy.
    73517395-7B77-4210-A305-7FE7F3764458.jpg DB992A04-0A5A-4752-B37D-C1EF478BD019.jpg

    That’s all for today. Tomorrow (maybe) will be washing all the prepped areas down with soapy water to make for a good adhesion. I don’t have any acetone, but I was told I don’t need any. I will also start mixing and applying the fiberglass resin repair kit I think.
     
    Last edited: Dec 24, 2017
    lucky13don likes this.
  4. Dec 23, 2017 at 4:42 PM
    #4
    NickofTime

    NickofTime [OP] Well-Known Member

    Joined:
    Jun 17, 2015
    Member:
    #157617
    Messages:
    186
    Gender:
    Male
    First Name:
    Nick
    Anchorage, Ak
    Vehicle:
    2006 White Tacoma DCSB TRD
    I just throw money at my truck
    Third day

    WARNING!!! Make sure you’re in a well ventilated room that does not connect to your house. Also make sure when attempting this repair that you don’t have roommates, dogs or a pregnant sleeping wife... all of which I had.

    Alright now that that’s out of the way..
    I completed this task with gloves, a dust mask, goggles and coveralls.. all of which I recommend.

    Sponge bathed all areas needing to be repaired.885912A5-AA0E-4F27-A89A-1FCF24A983C5.jpgThen I went over everything with paper towels and acetone.D16629A6-4620-408E-8C98-35E67F219947.jpg

    The fiberglass/resin kit consists of a big mat of fiberglass, the resin and a hardener. I cut the fiberglass into strips, and mixed up the resin according to the package.
    4CAEF06F-37A3-43F5-BEAE-89DA976CF04D.jpg
    2D19A928-021F-48E1-8A7D-FB0FA68F3BFC.jpg
    The resin stuff is like molasses. Once mixed, you have about 10 minutes to work with it. I dunked the fiberglass strips in the resin mix to make sure it soaked the whole strip. I applied two layers to the topper and one layer to the bed support.

    Let me warn you.. this is a nasty process. The resin is heavy and sticky so the fiberglass strips starting ripping and tearing apart. Fiberglass and resin will get everywhere. Everything you touch will be covered in fiberglass and resin so keep the bottle of acetone close by to clean up the sticky fiberglassy mess. This did not turn out as clean as I expected
    1E7CE659-0D13-4F54-83EE-00219370EA83.jpg EFB47491-2397-489A-AA79-88F0A342DCD7.jpg FCC9A96F-C373-49BE-B4B1-4B73A299B5F1.jpg

    For right now it’s drying and curing. Might take awhile since I had to open the garage to vent nasty fumes.
    I plan on cutting the extra fiberglass that didnt adhere and adding an adhesive. For the passenger side that didn’t come apart all the way I plan on using just a fiberglass adhesive since I probably shouldn’t use the resin stuff again..
     
    Last edited: Dec 28, 2017
  5. Dec 23, 2017 at 4:43 PM
    #5
    NickofTime

    NickofTime [OP] Well-Known Member

    Joined:
    Jun 17, 2015
    Member:
    #157617
    Messages:
    186
    Gender:
    Male
    First Name:
    Nick
    Anchorage, Ak
    Vehicle:
    2006 White Tacoma DCSB TRD
    I just throw money at my truck
    Fourth day?
     
  6. Dec 28, 2017 at 10:35 AM
    #6
    lucky13don

    lucky13don Well-Known Member

    Joined:
    Mar 29, 2017
    Member:
    #214798
    Messages:
    5,410
    Gender:
    Male
    First Name:
    Don
    Milton, fl
    Vehicle:
    R.I.P.04 tacoma prerunner, 04 sequoia 4x4
    Too many to list
    Looking forward to next step.
     
  7. Dec 28, 2017 at 4:34 PM
    #7
    NickofTime

    NickofTime [OP] Well-Known Member

    Joined:
    Jun 17, 2015
    Member:
    #157617
    Messages:
    186
    Gender:
    Male
    First Name:
    Nick
    Anchorage, Ak
    Vehicle:
    2006 White Tacoma DCSB TRD
    I just throw money at my truck
    Third day done.
     
  8. Dec 28, 2017 at 4:48 PM
    #8
    bijick

    bijick such mods much want

    Joined:
    Jan 9, 2016
    Member:
    #174469
    Messages:
    1,721
    Gender:
    Male
    First Name:
    E
    Stl
    Vehicle:
    2013 MGM Singular Cabular Selectable
    OME 884’s ,Dakar hd’s, Jba uca, lce header, 4.88’s, Arb locker , j shift tcase-T4R, arb bumper, leer topper, 3500w inverter, mad wife, scratched paint, skid plates, snorkelerer, led flush mount reverse lights, etc..
    Cool so far, I got an access cab topper for dirty dirt cheap for my regular cab so when it warms up I’ll be grinding the curved lip down to fit better. Seeing some non pro experience with fiberglass is nice for me
     
  9. Dec 28, 2017 at 5:18 PM
    #9
    NickofTime

    NickofTime [OP] Well-Known Member

    Joined:
    Jun 17, 2015
    Member:
    #157617
    Messages:
    186
    Gender:
    Male
    First Name:
    Nick
    Anchorage, Ak
    Vehicle:
    2006 White Tacoma DCSB TRD
    I just throw money at my truck
    Very true:rofl:
     
  10. Dec 28, 2017 at 5:27 PM
    #10
    bijick

    bijick such mods much want

    Joined:
    Jan 9, 2016
    Member:
    #174469
    Messages:
    1,721
    Gender:
    Male
    First Name:
    E
    Stl
    Vehicle:
    2013 MGM Singular Cabular Selectable
    OME 884’s ,Dakar hd’s, Jba uca, lce header, 4.88’s, Arb locker , j shift tcase-T4R, arb bumper, leer topper, 3500w inverter, mad wife, scratched paint, skid plates, snorkelerer, led flush mount reverse lights, etc..
    Lol I hope that didn’t come across as mean, all the online tutorials all make it seem so easy and I don’t think it’s going to go down like that for me.
     
  11. Dec 28, 2017 at 5:36 PM
    #11
    NickofTime

    NickofTime [OP] Well-Known Member

    Joined:
    Jun 17, 2015
    Member:
    #157617
    Messages:
    186
    Gender:
    Male
    First Name:
    Nick
    Anchorage, Ak
    Vehicle:
    2006 White Tacoma DCSB TRD
    I just throw money at my truck
    Not at all. I know I’m no pro when it comes to fiberglass repair. Just figured I’d share my lack of experience. I’m Glad it’s giving you an accurate representation
     

Products Discussed in

To Top