1. Welcome to Tacoma World!

    You are currently viewing as a guest! To get full-access, you need to register for a FREE account.

    As a registered member, you’ll be able to:
    • Participate in all Tacoma discussion topics
    • Communicate privately with other Tacoma owners from around the world
    • Post your own photos in our Members Gallery
    • Access all special features of the site

Any videos or guides on installing a DMX957XR in a '14 2nd Gen?

Discussion in 'Audio & Video' started by Taco D'Voe, Jul 21, 2020.

  1. Jul 21, 2020 at 8:42 PM
    #1
    Taco D'Voe

    Taco D'Voe [OP] Active Member

    Joined:
    Jan 27, 2010
    Member:
    #30125
    Messages:
    37
    Gender:
    Male
    none so far!
    I ended up ordering one of these after months of issues with my factory stereo having problems with the camera, low volume, dead cd player & bluetooth (I posted in another thread here as someone else had the exact same description).

    So instead of wasting more time on this, I looked into some options and ended up with 957XR and ordered all the accessories that were recommended through Crutchfield.

    I figured this would be a good amount of work for me as I haven't installed a car stereo in years, when ordering I spoke to someone was under the impression that there would be some instructions but its basically just how to get the unit in and out of the dash, nothing involving the actual setup! I would normally take this into a shop but my wife is immune compromised and we're taking every precaution we can to stay away from people and not get sick with covid, so I'm trying to figure this install out on my own.

    If anyone can suggest a link or a guide for this equipment or similar units, I would appreciate it.

    Here are the parts I've got to work with:

    Kenwood Excelon DMX957XR

    iDatalink Maestro RR Interface Module
    iDatalink HRN-RR-TO1 Factory Integration Adapter
    Metra 40-LX11 Antenna Adapter
    Metra 95-8235 Dash Kit
    Metra AX-TOYUSB USB Port Cable

    thanks in advance!
     
    Last edited: Jul 21, 2020
  2. Jul 22, 2020 at 11:40 AM
    #2
    Purpleman

    Purpleman Well-Known Member

    Joined:
    Aug 13, 2014
    Member:
    #136093
    Messages:
    600
    Gender:
    Male
    Anaheim
    Vehicle:
    15 PreRunner
    First thing is going to idatalink's website and creating an account. Then you flash your Maestro (you need the radios serial #). They give you a wiring diagram, make sure to print it out and follow it. If anything comes up, idatalink has some of the best tech support.
     
    phocas likes this.
  3. Jul 22, 2020 at 2:13 PM
    #3
    phocas

    phocas Well-Known Member

    Joined:
    Jun 6, 2019
    Member:
    #295561
    Messages:
    365
    Gender:
    Male
    I installed this in a 17' Tacoma before switching to the Pioneer, i did it myself not that difficult. Make sure you have all the tools (wire cutters, tessa tape, etc) and you will be good. Following youtube vidoes for other double din exelons work too, thats how I did mine.
     
  4. Jul 22, 2020 at 3:53 PM
    #4
    Taco D'Voe

    Taco D'Voe [OP] Active Member

    Joined:
    Jan 27, 2010
    Member:
    #30125
    Messages:
    37
    Gender:
    Male
    none so far!
    Thanks for the advice! I started today with the firmware flash and just going through everything in the wiring guide that was idatalink generated for my truck. It's looking less daunting now however I'm still not sure what all the connectors and wires are for. I'm assuming several of these will not be needed.

    The one thing that's making me nervous is fitting all the cables in the back. Are there tricks to where I should mount the maestro and how to organize the cable bundles behind the stereo?
     
  5. Jul 22, 2020 at 3:56 PM
    #5
    phocas

    phocas Well-Known Member

    Joined:
    Jun 6, 2019
    Member:
    #295561
    Messages:
    365
    Gender:
    Male
    I wouldn't worry too much about placement back there, do the best you can and common sense. Biggest thing is when you are connecting the wires to the headunit, make sure they are connected properly and can't come undone. Tessa tape is great for keeping things organized and certain bundles together. It also helps prevent rattling.
     
  6. Jul 22, 2020 at 5:05 PM
    #6
    Taco D'Voe

    Taco D'Voe [OP] Active Member

    Joined:
    Jan 27, 2010
    Member:
    #30125
    Messages:
    37
    Gender:
    Male
    none so far!
    Thanks I'll order some of that Tesa tape.

    Quick question regarding a couple wires here. I'm just tying these together and noticed the Kenwood manual says to ground the kenwood's extra long black wire to the chassis while the maestro diagram shows a straight connection to the black wire on their harness. Should they both be grounded to the chassis together or just a straight connection like I have the other wires?

    With the blue/white 'amp turn-on' cable or 'P.Cont' on the Kenwood adapter end, should I connect these even though I don't have an external amp? Unless the '14 TRD has an external amp that I'm not aware of, I believe it was powered by the stock non-JBL deck...

    the 3rd question is regarding that 'AUX IN' cable on the maestro diagram. It shows a red and black stereo connector on the diagram but my harness only has the 3.5mm connector. Is this the same thing?
    [​IMG]
    [​IMG]

    [​IMG]
     
  7. Jul 22, 2020 at 9:08 PM
    #7
    Taco D'Voe

    Taco D'Voe [OP] Active Member

    Joined:
    Jan 27, 2010
    Member:
    #30125
    Messages:
    37
    Gender:
    Male
    none so far!
    ok people great success!!

    I managed to plug in the head unit without any sparks or smoke so I think I got the wiring down. I tested carplay, engine info and backup cam and they're all working! The backup camera only works though when I hit the 'cam' button and not switching on when I change gears into reverse. I searched and sure enough it sounds like there's some extra work to do here. I did see something on crutchfield mentioning that I have to do something with a wire but of course there's no instruction on this step from what I can find here.

    Can someone let me know what wire needs to get spliced where?

    Tomorrow I'll try installing this and running the mic and gps somewhere..


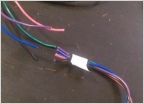
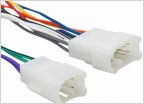
    Also I have a few extra connectors. Does anyone know what these are for?

    [​IMG]

    [​IMG]
     
  8. Feb 2, 2021 at 4:07 PM
    #8
    wi_taco

    wi_taco My skid plates give rocks taco flavored kisses

    Joined:
    Jul 20, 2020
    Member:
    #335129
    Messages:
    4,108
    First Name:
    Adam
    SE Wisconsin
    Vehicle:
    2015 Toyota Sienna with rear locker
    I'm also considering this head unit. Did you ever get it installed and everything working? And would you happen to have any photos of the final product? Debating if I like how the mounting kits look and would be nice to see one installed. Thanks!
     
  9. Sep 5, 2021 at 6:31 AM
    #9
    Taco D'Voe

    Taco D'Voe [OP] Active Member

    Joined:
    Jan 27, 2010
    Member:
    #30125
    Messages:
    37
    Gender:
    Male
    none so far!
    Sorry I missed this but yeah, I got everything working. Bored half to death over covid I ended up ripping the seats out and added a couple amps, 2 10's and a DSP. Other than a couple small issues it's been running smooth and I'm happy with the improvements. I can post some pics if you're still interested.
     
  10. Nov 27, 2021 at 8:26 PM
    #10
    cactusred

    cactusred Active Member

    Joined:
    May 9, 2013
    Member:
    #103859
    Messages:
    26
    Gender:
    Male
    North Texas
    Vehicle:
    2013 Magnetic Grey Tacoma
    If you still have those pics to post, be happy to see you post them, I'm installing this same deck in a 13 Tacoma, though mine was a JBL model. Appreciate it if you are able. Did you have extra wiring or connectors left over as well? Thanks.
     

Products Discussed in

To Top