1. Welcome to Tacoma World!

    You are currently viewing as a guest! To get full-access, you need to register for a FREE account.

    As a registered member, you’ll be able to:
    • Participate in all Tacoma discussion topics
    • Communicate privately with other Tacoma owners from around the world
    • Post your own photos in our Members Gallery
    • Access all special features of the site

'95 Front Suspension Rebuild Experience/Takeaways

Discussion in '1st Gen. Tacomas (1995-2004)' started by Lycus, Apr 12, 2025.

  1. Apr 12, 2025 at 7:52 PM
    #1
    Lycus

    Lycus [OP] Member

    Joined:
    Jan 15, 2023
    Member:
    #415501
    Messages:
    5
    Gender:
    Male
    First Name:
    Scott
    Vehicle:
    1995 Emerald Green Tacoma 4WD
    IMG_7168.jpg

    I wanted to make a post to highlight my experience re-doing the front suspension on my '95. 233,000 miles on it, 150k of which were from 1995 to 2007. The truck only saw 60k miles from 2007 to 2023, when I inherited it. I definitely think doing all of this at once was a good decision, since it seems like the sawzall has to come out every time I look at this thing...

    I also got new hardware for pretty much everything ahead of time, didn't want to get myself into a situation where I had to cut a bolt out and didn't have one to replace it.

    This is by no means a guide but I hope it can serve as a reference for someone looking to do this job and I can at least attest that these parts are what got my truck back together and driving nicely. It'll hopefully help you not make some of the same mistakes I did. Timmy and AdventureTaco both have ample information on doing this job, which is primarily what I looked at.

    EVERYTHING I REPLACED
    - Lower ball joints with OEM, PN 43340-39585 & 43330-39815
    - Upper ball joints with OEM, PN 43310-39016
    - LCA bushings with Whiteline, PN W53377A
    - UCA bushings with OEM, PN 48632-35080
    - These are "not compatible" according to the online vendors. They work fine and are what others have used.
    - Outer tie rods with OEM, PN 45046-39295 & 45047-39175
    - Sway bar bushings with Energy Suspension, PN 8.5118G 27mm
    - Sway bar endlinks with whatever autozone had that fit
    - Steering rack bushings with Whiteline, PN W12978
    - Coilovers with preassembled kit from Suspension Lifts, PN 4600BIL95T
    - UCA bolts/nuts with OEM, PN 90105-14105 & 90080-17208
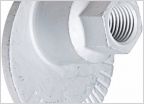
    - LCA Cams with OEM, PN 48409-35040 MORE ON THIS BELOW

    EVERYTHING THAT NEEDED TO BE FORCIBLY REMOVED
    -
    Sway bar endlinks. Nuts holding the sway bar to the endlink were seized and I yielded both endlinks before the nuts loosened.
    - Coilovers. The nuts holding several of the upper studs to the shock tower were seized and spun the studs in the top hat, requiring creative angle grinding to cut the studs and remove the coilover.
    - All 4 LCA cams. Not a surprise to anyone who's done this I'm sure. Sawzall with Diablo blades took care of this.

    SPECIAL TOOLS/EQUIPMENT I USED
    - Autozone ball joint kit,SKU 557231
    - Autozone master ball joint set, SKU 787835
    - OMT front end service kit, PN BS06. Bought on Amazon.
    - Harbor Freight bearing separator, 1/2 in. to 4-3/8 in. Jaw Capacity
    - Hydraulic press
    - Sawzall
    - MAPP Gas Torch
    - Angle grinder w/cutoff wheel

    BLUNDERS
    1) I spent a long time absolutely REEFING on the captive nut holding the vertical steering rack bolt in. It is captive. It's welded to the frame. Don't try to remove it. Just put your wrench on the top of the bolt. This is covered in Timmy's videos and I just missed it.

    2) I went into this job planning to leave the axles attached to the knuckles. Mine have been replaced at some point and are in good shape. I was able to get the upper ball joints out of the knuckles without issue using the Autozone kit.

    HOWEVER. The new upper ball joints measured 15 THOU larger in diameter than the hole in the knuckle they were supposed to be pressed into. I did some sanding to clean up the knuckle and drop the interference down to about 10, but this was still far too much for the Autozone press to handle.

    I ended up removing the axles and pulling the knuckles anyways, just to use the shop press to get the new UBJ's in. My advice would be to just suck it up and remove the knuckle on disassembly. Way easier to work with.

    3) I pressed one of the outer tie rods out by pressing on the threads instead of the castle nut. I severely damaged the threads. Thankfully I was already replacing mine, but make sure to rethread the castle nuts and press on those when removing the tie rods/LBJ's.

    4) I initially ordered these 3 parts to replace my LCA hardware consisting of the cam, the eccentric cap, and the bolt.
    90080-11283
    48452-35020
    48409-35050

    They are described as fitting 1996-2004 Tacomas. I've gotten used to some sites not even having 1995 as an option, so I assumed these were the correct parts. When I removed my old hardware, I noticed the new hardware had longer sleeves/bolts and the eccentrics with the alignment ticks were noticeably bigger.

    The correct LCA cams are for trucks made from 01/1995 to 09/1995. PN at the the top of this post. The corresponding eccentric is discontinued. I had to reuse my bolts and the eccentric that caps on to the end of the cam. Thankfully I could still get the sleeves, because my old ones were cut out and destroyed.

    SHOP PRESS ACTIVITIES

    The bearing splitter was the MVP of this job. Since the flanges on the control arm bushings are on the outside of the arm, you have to squeeze the splitter between the bushing and the arm. Pressing on the splitter will then move the arm relative to the bushing, allowing the bushing to come out.

    Don't be afraid to use a chisel to deform the lip on the bushing in order to fit the splitter. If the splitter slips it could damage your control arm or break the splitter. I chipped my splitter when it wasn't aligned perfectly.

    ** If you do not have a large amount of sockets at your disposal to use as press tools, you should get a press tool set like what Timmy goes over in his videos**

    After seeing how much pressure it took to move the old bushings, I would be very wary of the bottle jack method unless the underside of your truck is pristine.

    TL;DR

    I was able to get this job done in 2 weekends as someone with an intermediate mechanical background and a decent set of tools at home. I used a friend's shop who had access to a press. I probably could have gotten it done in 1 weekend if I didn't need to order new LCA cams.

    I set a target weekend about 3 months in advance which gave me plenty of time to stock up on parts, beer, friends, etc. I did my research and had torque specs and references on hand. If your 1st gen isn't currently on the side of the road with LBJ failure you probably have time to take a deep breath and plan.

    I was pretty scared of tackling this job since my truck is my only reliable vehicle. With adequate preparation and taking advantage of all of the great resources that are already out there, this job is 100% possible (but stressful) to do in a weekend :thumbsup:
     
To Top