

-
Welcome to Tacoma World!
You are currently viewing as a guest! To get full-access, you need to register for a FREE account.
As a registered member, you’ll be able to:- Participate in all Tacoma discussion topics
- Communicate privately with other Tacoma owners from around the world
- Post your own photos in our Members Gallery
- Access all special features of the site
 Moog Ball Joint ( Why the hate?)
 The ultimate headlight upgrade H4 (not LED or HID)
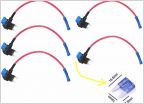 Add-A-Fuse question
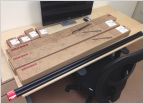 Yakima Roof Rack on 2014 Tacoma Extended Cab
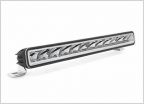 Looking for ideas... want to replace the TOYOTA in my pro grill
 Jump starter/pack worth having?
2007 2.7L Coolant Bypass Pipe Replacement Info & Photos
Discussion in '2nd Gen. Tacomas (2005-2015)' started by shmn, Jun 23, 2023.


