1. Welcome to Tacoma World!

    You are currently viewing as a guest! To get full-access, you need to register for a FREE account.

    As a registered member, you’ll be able to:
    • Participate in all Tacoma discussion topics
    • Communicate privately with other Tacoma owners from around the world
    • Post your own photos in our Members Gallery
    • Access all special features of the site

2001 Tacoma ARB Bumper Installation, Help!

Discussion in '1st Gen. Tacomas (1995-2004)' started by whitundra, Feb 21, 2020.

  1. Feb 21, 2020 at 5:53 PM
    #1
    whitundra

    whitundra [OP] Well-Known Member

    Joined:
    Apr 24, 2017
    Member:
    #217232
    Messages:
    268
    Gender:
    Male
    First Name:
    Cooper
    Bend, OR
    Vehicle:
    Flippac'd First Gen Taco
    I need some help installing an ARB on my 2001 Tacoma. I’ve read that frame is different on almost each year of Tacoma, so I was gonna see if anyone has installed one on an 01’.

    I have some questions about where to cut the frame.

    I unbolted the factory crash bar then cut 1 inch off of the frame rail. I can slide the bracket over the frame rails and the 2 holes where the tow hook's were line up, is this it?

    Am I good to drill the hole that goes through the frame where the long bolt and sleeve go?

    I see that the kit came with a steel block that goes in the frame rail, but I'm not sure if this is needed on the 01'.

    Thanks

    IMG_7986.jpg
     
  2. Feb 21, 2020 at 6:06 PM
    #2
    Kwikvette

    Kwikvette Well-Known Member Vendor

    Joined:
    Feb 27, 2019
    Member:
    #284735
    Messages:
    79,700
    Gender:
    Male
    Fresno County
    4 run, 2 don't
    You don't need to cut anything.

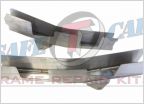
    ARB provides these 2 "blocks" that act as spacers as well as a steel plate that takes place of the factory crash bar.

    That's where you bolt your crush cans onto.
     
  3. Feb 21, 2020 at 6:10 PM
    #3
    Kwikvette

    Kwikvette Well-Known Member Vendor

    Joined:
    Feb 27, 2019
    Member:
    #284735
    Messages:
    79,700
    Gender:
    Male
    Fresno County
    4 run, 2 don't
    @whitundra

    This gets removed -


    Then these get installed over the frame end -


    They get sandwiched in this manner. This is just for demonstration as I clearly don't have the steel plate that goes across between the frame ends up front -


    Here's how it looks with the plate in place -

    20200129_114023.jpg

    Then the capture nuts go here in order to attach your bumper -


    Keep in mind, there are 2 different sized capture nuts so make sure you use the right size otherwise you'll find out too late and you'll have to undo what you've done just to replace them.
     
  4. Feb 21, 2020 at 6:17 PM
    #4
    F250orelse

    F250orelse Well-Known Member

    Joined:
    Apr 10, 2016
    Member:
    #183920
    Messages:
    125
    Gender:
    Male
    First Name:
    Michael
    Arkansas
    Vehicle:
    2022 Tacoma double cab trd 4x4
    ome 886 springs-shocks suspension, bfg’s 285’s. Camburg uca
    Also be sure to put the skid plate bracket on the right way, another thing don’t tighten anything down until you get the bumper on.
     
  5. Feb 21, 2020 at 6:34 PM
    #5
    4xdog

    4xdog Well-Known Member

    Joined:
    May 10, 2018
    Member:
    #253074
    Messages:
    1,160
    Gender:
    Male
    Santa Fe, NM
    Vehicle:
    03 DC TRD OR, 15 DC TRD OR, 08 RX350, 62 TR3B
    @Kwikvette's photos and description of the mounting process are perfect. That's exactly how the ARB went on my 2001 and then onto my 2003 when I moved to that truck.
     
  6. Feb 21, 2020 at 6:38 PM
    #6
    whitundra

    whitundra [OP] Well-Known Member

    Joined:
    Apr 24, 2017
    Member:
    #217232
    Messages:
    268
    Gender:
    Male
    First Name:
    Cooper
    Bend, OR
    Vehicle:
    Flippac'd First Gen Taco
    Holy shit, this is EXACTLY what I needed to see, thanks so much!! ARB's directions suck and this answers all of the questions that I had.

    So the piece that you removed in picture 1, do you have to cut any spot welds to get it off or can I tap it out with a hammer?

    EDIT** I just went out to my truck and see the bolt holding that piece onto the truck.

    Thanks for the help everyone!!
     
    Last edited: Feb 21, 2020
  7. Feb 21, 2020 at 6:45 PM
    #7
    Kwikvette

    Kwikvette Well-Known Member Vendor

    Joined:
    Feb 27, 2019
    Member:
    #284735
    Messages:
    79,700
    Gender:
    Male
    Fresno County
    4 run, 2 don't
    It's just a real shame that the instructions provided are stupidly vague.

    It also doesn't help that any instructions found are the old, outdated style that required cutting of the frame whereas the new revision dosen't.
     
  8. Feb 21, 2020 at 6:46 PM
    #8
    whitundra

    whitundra [OP] Well-Known Member

    Joined:
    Apr 24, 2017
    Member:
    #217232
    Messages:
    268
    Gender:
    Male
    First Name:
    Cooper
    Bend, OR
    Vehicle:
    Flippac'd First Gen Taco
    I agree, I've installed bumpers on 2 other toyota's but this is not nearly as simple haha. Well thanks again for the help man, I'll let you know if I get stuck anywhere else.
     
  9. Feb 21, 2020 at 6:50 PM
    #9
    Kwikvette

    Kwikvette Well-Known Member Vendor

    Joined:
    Feb 27, 2019
    Member:
    #284735
    Messages:
    79,700
    Gender:
    Male
    Fresno County
    4 run, 2 don't
    It doesn't help that nothings labeled either -

    20200129_122157.jpg
     
    tacotoe and cruiserguy like this.
  10. Feb 21, 2020 at 6:53 PM
    #10
    4xdog

    4xdog Well-Known Member

    Joined:
    May 10, 2018
    Member:
    #253074
    Messages:
    1,160
    Gender:
    Male
    Santa Fe, NM
    Vehicle:
    03 DC TRD OR, 15 DC TRD OR, 08 RX350, 62 TR3B
    This is what's behind the bumper. Those holes in the front allow access to a socket. These are pix of my 2003, but my 2001 was the same.
    [​IMG]

    It bolts together like this. I *highly* recommend antisieze on the fasteners to both prevent corrosion and make any subsequent removal super easy (to change headlights or grille, for example).

    A few other tips: (1) consider using waterproof connectors for the indicator light wiring. Corrosion can be brutal in this location. I've used Weatherpack, 'cause I have the crimping tool, but Deutch or any other system would work equally well, (2) consider stainless fasteners for the indicator lens. After a few years that plated Phillips screw is gonna be a bear to get out. Mine now have hex head stainless cap screws and nyloc nuts, (3) treat the backside of the bullbar with Fluid Film -- ARB's protection is pretty good, but Fluid Film will provide another layer of corrosion prevention, (4) consider a mod to the winch fairlead mounting area to put your license plate there if you're not running a winch -- I've done this three times on different vehicles and I've been delighted with how it protects the plate and fills that spot on the bar.

    [​IMG]

    [​IMG]

    [​IMG]

    [​IMG]

    [​IMG]

    [​IMG]
     
    Last edited: Feb 22, 2020
  11. Feb 21, 2020 at 6:58 PM
    #11
    4xdog

    4xdog Well-Known Member

    Joined:
    May 10, 2018
    Member:
    #253074
    Messages:
    1,160
    Gender:
    Male
    Santa Fe, NM
    Vehicle:
    03 DC TRD OR, 15 DC TRD OR, 08 RX350, 62 TR3B
    ISTR that the mounting instructions I had were decently complete. Well illustrated and only confusing in the area where they want one to mount a big vertical bolt through holes drilled in the frame. Perhaps there are different versions? Mine date from the late 2000s, and I thought they were downloadable from ARB.

    There's some online stuff -- like Scott Brady's original Expeditions West Tacoma -- that get into all kinds of things like cutting and rewelding the frame. That's all overkill for how my bar gets used, and can be a scary distraction to what's really needed.
     
    Last edited: Feb 22, 2020
  12. Feb 21, 2020 at 6:59 PM
    #12
    Kwikvette

    Kwikvette Well-Known Member Vendor

    Joined:
    Feb 27, 2019
    Member:
    #284735
    Messages:
    79,700
    Gender:
    Male
    Fresno County
    4 run, 2 don't
    Obligatory front pic -

    20200218_151139.jpg
     
  13. Feb 21, 2020 at 7:00 PM
    #13
    Kwikvette

    Kwikvette Well-Known Member Vendor

    Joined:
    Feb 27, 2019
    Member:
    #284735
    Messages:
    79,700
    Gender:
    Male
    Fresno County
    4 run, 2 don't
    The hole through the frame is actually a hole through the 2 small blocks. You'll notice in the revision, they recommend 2 different drill bit sizes vs the 1 in the old instructions.

    This provides support/rigidity in the whole setup in case you're using a winch or something.

    I didn't drill out the holes due to a lack of a powerful drill, but it wasn't a concern for me seeing as how I haven't installed my winch yet.
     
  14. Feb 21, 2020 at 7:09 PM
    #14
    4xdog

    4xdog Well-Known Member

    Joined:
    May 10, 2018
    Member:
    #253074
    Messages:
    1,160
    Gender:
    Male
    Santa Fe, NM
    Vehicle:
    03 DC TRD OR, 15 DC TRD OR, 08 RX350, 62 TR3B
    Same here. No big bolts put on either of my Gen 1 Tacomas. I think the guys at Sierra Expeditions might have put the big bolts in my Gen 2 when I had them do the install on that one. I've not mounted a winch on any of my ARB bullbars, and I've had one since the mid 1990s on my 4WDs...
     
  15. Feb 21, 2020 at 7:12 PM
    #15
    Kwikvette

    Kwikvette Well-Known Member Vendor

    Joined:
    Feb 27, 2019
    Member:
    #284735
    Messages:
    79,700
    Gender:
    Male
    Fresno County
    4 run, 2 don't
    I'll be drilling mine out for sure though once I upgrade my trucks wiring as well as the alternator. Until then, the winch remains new in box, in storage...
     
  16. Feb 21, 2020 at 7:27 PM
    #16
    2BeersPlease

    2BeersPlease Well-Known Member

    Joined:
    Jan 22, 2017
    Member:
    #208304
    Messages:
    5,237
    Gender:
    Male
    That "or something" could be you getting yanked out of a situation. Winch or not, you'll want all the hardware attached.
     
    cruiserguy and Kwikvette[QUOTED] like this.
  17. Feb 21, 2020 at 7:29 PM
    #17
    Kwikvette

    Kwikvette Well-Known Member Vendor

    Joined:
    Feb 27, 2019
    Member:
    #284735
    Messages:
    79,700
    Gender:
    Male
    Fresno County
    4 run, 2 don't
    And that is absolutely true.

    Wanna help drill them in for me? :rofl:
     
    2BeersPlease[QUOTED] likes this.
  18. Feb 21, 2020 at 7:33 PM
    #18
    4xdog

    4xdog Well-Known Member

    Joined:
    May 10, 2018
    Member:
    #253074
    Messages:
    1,160
    Gender:
    Male
    Santa Fe, NM
    Vehicle:
    03 DC TRD OR, 15 DC TRD OR, 08 RX350, 62 TR3B
    Largely true, but if I needed to be pulled I'd use the recovery hook mounted to the frame before anything shackled to the bullbar.
     
    2BeersPlease[QUOTED] likes this.
  19. Feb 21, 2020 at 7:34 PM
    #19
    2BeersPlease

    2BeersPlease Well-Known Member

    Joined:
    Jan 22, 2017
    Member:
    #208304
    Messages:
    5,237
    Gender:
    Male
    It was a chore. One came out not so straight, but I still got the bolt in with a little persuasion.
     
    cruiserguy and Kwikvette[QUOTED] like this.
  20. Feb 21, 2020 at 7:41 PM
    #20
    Kwikvette

    Kwikvette Well-Known Member Vendor

    Joined:
    Feb 27, 2019
    Member:
    #284735
    Messages:
    79,700
    Gender:
    Male
    Fresno County
    4 run, 2 don't
    Where've you been
     
    Taco critter likes this.

Products Discussed in

To Top