1. Welcome to Tacoma World!

    You are currently viewing as a guest! To get full-access, you need to register for a FREE account.

    As a registered member, you’ll be able to:
    • Participate in all Tacoma discussion topics
    • Communicate privately with other Tacoma owners from around the world
    • Post your own photos in our Members Gallery
    • Access all special features of the site

04 Extra Cab SAS

Discussion in '1st Gen. Builds (1995-2004)' started by 8sixFabrication, Aug 24, 2021.

  1. Aug 24, 2021 at 8:35 PM
    #1
    8sixFabrication

    8sixFabrication [OP] Well-Known Member

    Joined:
    Feb 22, 2021
    Member:
    #357016
    Messages:
    113
    Gender:
    Male
    First Name:
    Chris
    Clackamas Oregon
    Hey all. I'm new to this forum and wanted to do an old fashioned build thread like I used to on other forums. So here is my long winded intro.

    My names Chris. I'm from the Portland OR area and work as a fabricator/machinist. I've been an avid Toyota 4x4 enthusiast since about 2004.

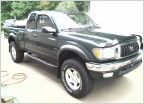
    This is the donor which was previously my DD/adventure rig. It's a 2004 Toyota Tacoma, 3.4 V6, 5 speed, TRD Offroad. My wife and I have had a lot of great memories in it and it was the first newer truck I've bought myself. We have a small fleet of 4x4 Toyotas, but this one has been a bit sentimental.

    [​IMG]

    Additionally, I will be documenting this on Instagram as well for those interested. Although, this thread will obviously be far more detailed. @ pnw_trd_tacoma

    [​IMG]

    Unfortunately in October of last year, I was hit head on by a driver traveling in the wrong direction on a 1 way road. Insurance totaled it, and I opted to keep it. I was fortunate enough to make it unscathed, except a little bit of driving anxiety for a few months. I had been entertaining a solid axle swap for a little bit, or long travel and 35s. Since I have a mildly built 85 pickup, sometimes I wanted to do harder stuff in the Tacoma, with the comforts such as AC and horsepower haha. Well, the accident made the decision for me and here we are.

    [​IMG]
    [​IMG]
    [​IMG]

    Due to time and budget constraints, I feel like this project will come in phases, and unfortunately not get done super fast. Checkpoint 1 is to get it sitting on a new axle and movable before rain hits here on the PNW. Which I believe is a reasonable goal. I've slowly been gathering parts such as the donor axle, springs, frame plates, coil buckets, steering box, wheels, and roller tires for mock up(reject tires that don't balance) and more.


    The goal is to fit 37s, as low as possible, and have good street manners for long road trips. Im sort of going for a Tacoma, if Toyota offered a factory solid axle. So that definitely guided my choice for suspension and axle. At some point in the process, I will have the core support and anything damaged body wise repaired. Probably when I can drive it back on a trailer again.


    Here are the hypothetical specs as of now:

    -80 series land cruiser front axle(elocker swap eventually) with full rebuild and manual hubs
    -All stock landcruiser radius arms and suspension
    -5.29 or 4.88 F/R with factory Elockers on both ends
    -RCVs in front
    -NW Fabworks Eco box dual case adapter with 23 spline gear driven case(stock ratio) on the back and triple sticks
    -Mini truck steering box
    -37" MTRs
    -17x9 Method 701s


    First order of business a couple months back, was to have the frame straightened. It was about 10mm out of square, due to the drivers frame rail being pushed back. Luckily, my cousin and uncle are body men so I am fortunate enough to have that resource.

    [​IMG]


    After it sat for a bit out back, getting covered in pine needles and sap, it was time to drag it out and throw the 37s on to get an idea of ride height and let the creative juices get going. I am really happy with the look of the Bronze. This is the ride height I am shooting for, give or take an inch or 2.

    [​IMG]
    [​IMG]
    [​IMG]
     
  2. Aug 24, 2021 at 8:38 PM
    #2
    8sixFabrication

    8sixFabrication [OP] Well-Known Member

    Joined:
    Feb 22, 2021
    Member:
    #357016
    Messages:
    113
    Gender:
    Male
    First Name:
    Chris
    Clackamas Oregon
    With the juices flowing, this past weekend I set out to repair the chunk of frame that was bent. Also, to make a cross member to both serve as a new bumper mount and support the frame when the IFS goodies are cut out.


    [​IMG]


    The frame rails measure about 3.125”x2.125”, .120” wall. Since that isn’t a common size, I decided to form a little replacement so I wouldn’t fight things fitting properly. I had to cut the body mount off the piece I removed and repaired it before welding it onto the new piece. After I have the IFS crap cut out and the frame plates on, I will add some more fish plating to strengthen that part where I made the splice.


    [​IMG]
    [​IMG]
    [​IMG]
    [​IMG]
    [​IMG]


    The next day I started the cross member. Its .187” wall, 2x2” square tube with ¾”, .120” wall HREW sleeves machined down, and TIG welded in. I did this for the future bumper mounts to work in double shear. I decided to keep some “legs” to wrap under the bottom of the frame for a little more strength. There is also some ⅛” plate welded between the frame and cross member to help spread the load some. I can't get anything else in there like a gusset for strength, because of clearance for the radiator.


    [​IMG]
    [​IMG]
    [​IMG]
    [​IMG]


    With any luck, I should hopefully have the IFS cut out by the end of this coming weekend and the axle roller under it to start designing the radius arm mounts


    .
     
  3. Aug 24, 2021 at 9:33 PM
    #3
    plurpimpin

    plurpimpin Well-Known Member

    Joined:
    Jul 31, 2011
    Member:
    #60895
    Messages:
    2,971
    Gender:
    Male
    PDX
    Vehicle:
    2010 TRD Off Road 4x4
    seriously dude? The OP is doing some dope stuff and legit fab work and you’re gonna crap in his thread with this foolishness?

    Nice work OP, I’m eager to watch the progress on this one.
     
    This site contains affiliate links for which the site may be compensated.
    #3
  4. Aug 24, 2021 at 10:12 PM
    #4
    8sixFabrication

    8sixFabrication [OP] Well-Known Member

    Joined:
    Feb 22, 2021
    Member:
    #357016
    Messages:
    113
    Gender:
    Male
    First Name:
    Chris
    Clackamas Oregon
    Thanks man.


    It appears he is just being sarcastic, so no skin off my back lol
     
    ***SPHYNXTER*** and yotadude520 like this.
  5. Aug 27, 2021 at 8:58 AM
    #5
    8sixFabrication

    8sixFabrication [OP] Well-Known Member

    Joined:
    Feb 22, 2021
    Member:
    #357016
    Messages:
    113
    Gender:
    Male
    First Name:
    Chris
    Clackamas Oregon
    The last 2 evenings after work have been reasonably productive. Got everything taken apart and out of the way such as brake lines, power steering, wiring. I removed the power steering pump so I didn't make mess. Took off the alternator to keep it out of harms way from the plasma cutter. Removed the struts, front driveshaft and really anything that would prevent the front end from just dropping to the ground

    [​IMG]
    [​IMG]

    Before I cut anything, I took a set of trammel points and made some marks on the frame. The idea here is due to all the stress introduced to the frame from the accident, then having it pulled straight, I want to see if it moves after the IFS cross members are removed.

    [​IMG]
    [​IMG]

    Of course it wouldn't be the PNW without some rain in the middle of a project

    [​IMG]

    And after a little plasma work, here we are! Im hoping by the end of the weekend to have the frame cleaned up, frame plates tacked on and steering box clamped to frame, coil buckets tacked in, and the axle rolled under the truck to start eye balling everything

    [​IMG]
     
    jubei, slander, Ritchie and 4 others like this.
  6. Aug 29, 2021 at 2:10 AM
    #6
    Kkrause09

    Kkrause09 Well-Known Member

    Joined:
    Jan 20, 2020
    Member:
    #316705
    Messages:
    171
    Gender:
    Male
    First Name:
    Kyle
    Vehicle:
    Tacoma sas
    Excited to see a Fresh build thread, looks great So far!!

    I went with the low ride height also on 37s, you won’t be disappointed

    E8DF2F40-C5BC-41BC-9050-7FED7D13D479.jpg
     
    15psd, BassAckwards and Ritchie like this.
  7. Aug 29, 2021 at 6:00 AM
    #7
    slander

    slander Honorary Crawl Boi

    Joined:
    May 10, 2013
    Member:
    #103909
    Messages:
    8,964
    Gender:
    Male
    Hickory, NC
    Vehicle:
    02 Tacoma, fixed with curse words.
    My recommendation is to go with 5.29s. I love them and being able to accelerate in 5th gear up a hill is pretty sweet!! I built a low slung truck on 37s as well, it has its pros and cons! Following!
     
  8. Aug 29, 2021 at 9:59 AM
    #8
    8sixFabrication

    8sixFabrication [OP] Well-Known Member

    Joined:
    Feb 22, 2021
    Member:
    #357016
    Messages:
    113
    Gender:
    Male
    First Name:
    Chris
    Clackamas Oregon

    Got a couple more pictures and details of your ride?
     
  9. Aug 29, 2021 at 1:55 PM
    #9
    Kkrause09

    Kkrause09 Well-Known Member

    Joined:
    Jan 20, 2020
    Member:
    #316705
    Messages:
    171
    Gender:
    Male
    First Name:
    Kyle
    Vehicle:
    Tacoma sas
  10. Aug 29, 2021 at 5:22 PM
    #10
    8sixFabrication

    8sixFabrication [OP] Well-Known Member

    Joined:
    Feb 22, 2021
    Member:
    #357016
    Messages:
    113
    Gender:
    Male
    First Name:
    Chris
    Clackamas Oregon
  11. Aug 29, 2021 at 7:01 PM
    #11
    Kkrause09

    Kkrause09 Well-Known Member

    Joined:
    Jan 20, 2020
    Member:
    #316705
    Messages:
    171
    Gender:
    Male
    First Name:
    Kyle
    Vehicle:
    Tacoma sas
    Washougal Wa just across the River from u
     
  12. Aug 29, 2021 at 7:07 PM
    #12
    8sixFabrication

    8sixFabrication [OP] Well-Known Member

    Joined:
    Feb 22, 2021
    Member:
    #357016
    Messages:
    113
    Gender:
    Male
    First Name:
    Chris
    Clackamas Oregon

    Oh rad. I know a couple of the Washougal guys. Maybe we'll run across each other one of these days. Im just down in the Clackamas area.
     
    Last edited: Aug 23, 2022
    Kkrause09[QUOTED] likes this.
  13. Aug 29, 2021 at 8:55 PM
    #13
    8sixFabrication

    8sixFabrication [OP] Well-Known Member

    Joined:
    Feb 22, 2021
    Member:
    #357016
    Messages:
    113
    Gender:
    Male
    First Name:
    Chris
    Clackamas Oregon
    Well, while the last couple days have been fairly productive, I still wish I was a little further along. But, I'm definitely making progress.

    With the suspension cut out, I wanted to check to see if the frame moved as mentioned in a previous post. When I re-scribed my lined over the pink paint stick, they both were exactly the same, and in the same scribe mark. So that was a relief.

    [​IMG]

    With that out of the way, it was time to tackle cleaning the frame up....which was annoying. However, here we are.

    [​IMG]

    With that done, it was time to drag the axle out, and put it under the truck to start getting an idea of where everything will land. First issue I noticed is the lip on the wheels isn't allowing them to fully seat onto the rotor. So I took the nuts and washers off the drive flange to at least get it to sit further on and throw 2 lug nuts on for mock up purposes. I will have to bust out an aluminum carbide burr to remove that lip unfortunately.

    [​IMG]

    With the wheels on, I was able to shift the axle into place, and start figuring things out. Unfortunately, I am seeing there is some stuff that is delaying things. First off, I need to get a rear sump oil pan installed before I can get things fine tuned into place and start working on other aspects of the suspension. I knew I would need a rear sump pan, but wasn't sure if not having one right now would have prevented me from getting it sitting on the suspension... clearly it is. I am also hoping I wont have to modify it.

    [​IMG]

    I really only got to clamp some stuff in to start eye-balling where things will land. I am going to need to modify the frame plate I got from WFO to get the steering box where I need it I believe. But with it clamped in, I can now order a pitman arm.

    I measured the compressed spring length on out stock FJ80 to see about what I needed to set the coil buckets to. They both weigh about the same so I figured this was a pretty good baseline. I have plenty of room for adjustment so thats good.

    [​IMG]

    I ran a string line to see about what my steering link angle would be and it is fairly reasonable at this height. I think setting up the steering link and panhard bar wont be overly complicated.

    [​IMG]

    This currently is the only place I am concerned when it comes to up travel. The picture makes it look like there is more room then there actually is. But the pinion flange isnt too far away from the bell housing. I can raise the truck an inch or 2, but am hoping to avoid that if possible.

    [​IMG]

    This is currently the biggest hurdle for my first checkpoint. I was hoping that I could avoid messing with the trans cross member until after the truck was sitting on its own suspension. However, that's not my reality. Ideally, I would like to tuck the radius arm up a little more. In this photo, its set at the proper caster for a stock fj80. I am fairly confident I can tuck it up more with a little work such as offset bushings in the front, maybe a little modification to the mount.

    [​IMG]

    Lastly, here are some photos of how far forward the axle is pushed. I am an idiot and forgot to measure it before cutting crap out. But its a couple inches. I can probably go back about an inch, which I may do. I am hoping to not have to butcher the front sheet metal for full stuff and turn in front.

    [​IMG]
    [​IMG]


    Thats all for this weekend. Pretty close to my goal. Now I need to order a pitman arm, and oil pan kit before I can make any big dents in the project
     
  14. Aug 29, 2021 at 9:35 PM
    #14
    lm546

    lm546 Well-Known Member

    Joined:
    Jan 24, 2019
    Member:
    #280436
    Messages:
    243
    Gender:
    Male
    First Name:
    Craig
    Tucson, AZ
    Vehicle:
    2015 dcsb OR, 2002 double cab, 1985 Toyota pickup
    Looking good!
     
    8sixFabrication[OP] likes this.
  15. Aug 30, 2021 at 8:07 AM
    #15
    POSTacoMike

    POSTacoMike On the rocks, please

    Joined:
    Nov 4, 2019
    Member:
    #309824
    Messages:
    1,114
    Gender:
    Male
    First Name:
    Mike
    Red Deer AB
    Vehicle:
    2001 Tacoma DC XPreRunner
    OME Suspension, ARB Bumper, frame swap, Rebco logger box.
    Awesome!! I'm on 37", still on the ifs tho. I like that you're using an 80 series front axle. much better choice than the mini truck axle!!
     
    8sixFabrication[OP] likes this.
  16. Aug 30, 2021 at 8:28 AM
    #16
    8sixFabrication

    8sixFabrication [OP] Well-Known Member

    Joined:
    Feb 22, 2021
    Member:
    #357016
    Messages:
    113
    Gender:
    Male
    First Name:
    Chris
    Clackamas Oregon

    That's awesome! Are you long travel or just a lot of work making it fit with stock IFS?
     
    POSTacoMike[QUOTED] likes this.
  17. Aug 30, 2021 at 8:43 AM
    #17
    POSTacoMike

    POSTacoMike On the rocks, please

    Joined:
    Nov 4, 2019
    Member:
    #309824
    Messages:
    1,114
    Gender:
    Male
    First Name:
    Mike
    Red Deer AB
    Vehicle:
    2001 Tacoma DC XPreRunner
    OME Suspension, ARB Bumper, frame swap, Rebco logger box.

    A ton of tubbing!! Cut my firewall back as much as i could. No long travel for it either, yet. lol
     
  18. Aug 30, 2021 at 8:44 AM
    #18
    POSTacoMike

    POSTacoMike On the rocks, please

    Joined:
    Nov 4, 2019
    Member:
    #309824
    Messages:
    1,114
    Gender:
    Male
    First Name:
    Mike
    Red Deer AB
    Vehicle:
    2001 Tacoma DC XPreRunner
    OME Suspension, ARB Bumper, frame swap, Rebco logger box.
    And fibreglass fenders and boxsides.

    225C8625-99D2-4699-88CE-23A9DEAB5687.jpg
     
    8sixFabrication[OP] likes this.
  19. Aug 30, 2021 at 8:45 AM
    #19
    8sixFabrication

    8sixFabrication [OP] Well-Known Member

    Joined:
    Feb 22, 2021
    Member:
    #357016
    Messages:
    113
    Gender:
    Male
    First Name:
    Chris
    Clackamas Oregon

    Awesome! Nice work dude
     
    POSTacoMike[QUOTED] likes this.
  20. Sep 6, 2021 at 9:27 PM
    #20
    8sixFabrication

    8sixFabrication [OP] Well-Known Member

    Joined:
    Feb 22, 2021
    Member:
    #357016
    Messages:
    113
    Gender:
    Male
    First Name:
    Chris
    Clackamas Oregon
    Well, as per standard operating procedure, I am not as far along as I would like to be at this point in time. This weekend ended up not being as productive as I wish it were, but still making progress.


    This week I was able to collect some parts. I ordered and received a nice steering arm from Sky

    Went to my local Toyota dealership for all the parts to convert to a rear sump oil pan

    [​IMG]
    [​IMG]


    This is the part I am most excited about scoring. I have been looking for a high pinion elocker for quite some time, and after enough pestering of a buddy at a local shop, I finally got my hands on one for a really nice price. If I can't get my hands onto an empty 80 series front elocker housing, I will do the retro-fit on it. I've done a few but am hoping for factory goodness.

    [​IMG]


    Next was to tackle something I hadn't been looking forward to. The radius arms landed right where the factory cross member mounts were. Ideally, I didn't want to touch the trans, so I could build my new cross member around everything sitting in the factory location. However, something had to move. So I scabbed together some spare steel, and welded in(don't mind the shit welds) some temporary supports. Nothing seemed to move more than 1/16" so I will take it as a win.

    [​IMG]
    [​IMG]

    Once that was welded in, I cut out the stuff in the way and ground the chassis clean. It was actually rather time consuming, and a part of the project I wasn't fond of. However, we got it.

    [​IMG]
    [​IMG]


    With all that clear, and the radius arms bolted to the axle and tight, it was time to stare at the truck for a while and take a bunch of measurements. I decided the center of the mounting hole being 3" below the bottom of the frame was about all the more I could tuck it up. With the way the radius arms cross over the frame, I didn't think they would clear on full articulation. Much higher, and they appear to crash into the frame the best I could measure.

    Since radius arm mounts are the next thing I need to have made and fit up, I wasn't able to spare the time to have my old shop laser cut the parts for me. It was a minimum of a week out, so I had to tackle the time consuming task of making stuff myself.

    First thing was to get a precision template utilizing my expert CADboard skills. A combo of porta-band and plasma action and I had the pieces roughed out. Since some of these parts are critical in dimension, used my mill to make everything that was important, perfect. This allows me to set the side to side spacing perfect so there is only about .020" extra width for the radius arm sleeves. I also made slotted holes for fine tuning of the front axle. The idea here is to measure a bazillion times and tighten it up with some large washers on the outside edges. Once I am ready to drive it, I will take it to a friends shop for an alignment then when its perfect, I will stitch weld the washers on to keep it set for good. The slotted holes turned out a bit crude for my taste, but they should be covered by the large washers once its permanently set.

    [​IMG]


    After I TIG tacked everything together, I did a quick test fit. The frame has a taper in the location I am mounting these, so I wanted to make sure I got everything dead on before welding anything together. I did't want anything having to be forced into position to mount.

    [​IMG]
    [​IMG]


    Once it was in there, I decided the little gussets on top need to go away, and larger ones on need to be made and put on the outside edges. There will be a large cap plate as well that will add strength, and keep crap from building up on top of the mounts. For now, these little gussets served well as proof of concept and helped me verify my measurements were correct for the angle of the frame. Hopefully tomorrow evening I will be able to get in 1 last test fit with the new gussets/cap, and the mounts heavy tacked into place.

    [​IMG]
     

Products Discussed in

To Top